Inventory, Sales (POS), Settlements, Disbursements
Buy Outright (Resale, 'BOR')
'Buy Outright' is purchasing merchandise from individuals.
'Retail' is purchasing merchandise from businesses (suppliers, wholesalers, etc) and is included in the Diamond and Virtual editions of BCSS.
Shop Accounts for Buy Outright
- Press F2 in the program to open a new-client record.
- Enter a short client ID like 'shop' or a number like '1'. (The first item purchased will have an Item ID of shop-1 or 1-1.) If numbers are used, each time the new-client screen is opened, the program will auto fill the next available number in sequence. The suggested number can be changed to another number, letters or a combination of both. If letters are included in any client ID, the program can no longer suggest the next client ID.
- Complete information about the seller.
- Ignore 'Requested Space'. (It is used in conjunction with the rental of floor space in malls.)
- Set a User Date as a reminder to contact this person. (not commonly used)
- 'User Text' can be any letters and numbers to tag or flag the buyer. (not commonly used)
- The Client % will be ignored but it can be set to zero to avoid confusion.
- Check 'This Client Is Active'.
- DO NOT check 'This Is a House Account'.
- All other settings can be ignored.
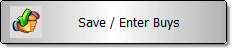
- Press 'Save / Enter Buys' to save the record and open the buy-outright batch-enter screen.
- Refer to Batch Add Inventory for detailed instructions.
Don't use House Accounts for buy outright.
Do NOT check this box:
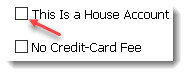
If that box IS checked, attempting to use Batch Buy Outright will display a message: "House Accounts cannot be used for buy outright".
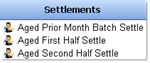
Settlement
See Client Settlement.
Enter a New Seller and Purchase Merchandise
To keep accurate records, account and till balances, an account must be created for each individual seller:
- Press F2. The New-Client Screen will open.
- Complete as much information as you wish. The program only requires an ID and name. IDs can be letters, numbers or a combination. For organization and sorting of lists, the format should be consistent. Stores often use part of the last name and first initial, like KennA and enter the name in last-first format like Kennedy Ann (space, no comma).
- Press 'Save / Enter Buys':
Buy Outright General Reports
The most important reports can be called by pressing Function Keys on the top of the keyboard:
- F8: Items Entered Today
- F9: Today's Sales Recap
- F10: Today's Sales
- F11: Today's Settlements
The buttons across the middle of the screen are handy for viewing data for the time periods shown on the buttons:

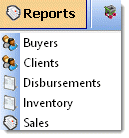
The 'Quick Links' (on the right) have useful one-click reports related to buy outright in the Clients, Disbursements, Inventory, Sales and Settlements work areas. For example these are the Quick Links for the Clients Work Area:
Some of the functions shown do pertain to consignment and not buy outright.
Buy Outright Inventory Reports
Specific inventory reports based upon Clients, Dates In, Last Sale, Price Range, Quantity and Categories can be defined and generated under Reports > Inventory:
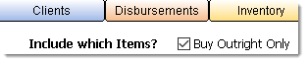
Select Inventory. To generate a report including buy-outright items only, check the box:
Settings tell BCSS which inventory items to include.
For example, to include only items 22 through 40 for Meryl Streep:
- Check 'Buy Outright Only'. (not shown above)
- Check 'Quantity greater than 0'. (Only items in inventory will be included in the report. Sold items will not be included.)
- Select 'Meryl Streep' from the Client drop-down menu.
- Check 'Items # Range' and enter 22 in the From Field and 44 in the To Field. (These settings will not apply if the box is not checked.)
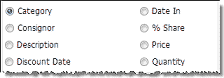
Sort Output
The content may be sorted by any of these:
Preview and Print the Report
Selecting Print Detailed List...
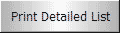
...will display a print preview of items matching the search criteria with ID, Category, Original Price, Quantity, Discount Date, Date In, Description, Client, Current Price, Discount, Last-Sale Date and Barcode.
Selecting Print Brief List...

...will present ID, Description, Category, Client, Price, Quantity and Date In.
Selecting Bar Code Report...

...will present a list with scanable barcodes.
Print the report with the printer icon:

View the Report
Selecting View the Report

displays items matching the search criteria.
Buy Outright Sales Reports
Specific sales reports (based upon layaways, sales on hold, bad checks, voids, credit memos, client, buyer, salesperson, payment method, category, location, invoice date, invoice total and inventory number) can be defined and generated under Reports > Sales:
Select Sales.
Settings on this screen determine the information in the Report:
Shop Sold List

Pressing Shop Sold List (at the bottom of the Sales Report Screen) will present a report showing Item ID, Description, Category, Price, Quantity, Date Sold, Invoice # (and 'Sold By' in BCSS Diamond and Virtual) for each item sold for the current day (if no date filter is set). Click the printer icon at the top of the report window to print the report.
Consignments-Sold List

This report includes Item ID, Description, Category, Price, Quantity, Date Sold, Invoice # and Payment Method for consignments sold.
Buy-Sold List

This report includes Item ID, Description, Category, Original Price, Quantity, Sale Price, Buy Price and Profit for shop-owned items.
Sales Recap

Pressing the Sales Recap Button will present a list of sections (not shown) for Invoice List, Salesperson Recap (in BCSS Diamond and Virtual), Payment Recap and Shop Totals. Uncheck sections to be excluded from the Sales Recap Report. Press the Preview/Print Button to preview the report. Click the printer icon at the top of the report window to print the report.
This is the information displayed in each Recap. (Buyer and employee information appear in Diamond and Virtual only.)
- Invoice List: Date, Invoice #, Buyer, Sale Amount, Tax, Sale Total, Pay Method
- Salesperson Recap: Salesperson, # of Sales, Amount
- Payment Recap: Type of Payment, # of Payments, Total
- Shop Totals:
Sales (before tax): Gross sales receipts including consignor/vendor and shop-owned inventory plus finalized layaway sales.
Clients' %: Clients' share of sales proceeds
Buy-Outright Cost: Total paid for inventory purchased by the shop
Employee's %: Commissions payable to employees
Other Payments: Any payments entered as disbursements in the program
Promo Discounts: The total of discounts absorbed by the shop
Profit/Loss: Sales minus above costs
Buyer Fees: Total reductions before settlement
Tax(es) (split if 2): State and local sales tax amounts. If sales tax changed during the report period, all taxes charged are listed.
Non-Taxable Sales: Total of sales not subject to sales tax
Sales Recap 'Errors'
Account History is an explanation of a client's account balance. The person in charge of 'the books' at the store must have a thorough understanding of the concepts of accounting as they apply to the consignment/resale business.
Payment Recap is a total of recorded amounts received. The other sections of the Sales Recap are based on prices of items sold. Go through invoices for the period in question and look for differences between payments and prices.
Common Mistakes
- Changing an employee ID
- Assigning buy outrights to the House Account
Troubleshooting
Incorrect Starting Number
- Find the last item number for the client.
- Select the client.
- Click on Items at the bottom of the screen.
- Sort the ID column and locate the last item number.
- Open the New-Item Screen (F3).
- Enter an item, changing the Item Number to the next-available number for the client.
- Complete information about the item.
- Click Save and Exit, or click 'Save, Print a Thermal Label'.
Either way, the item will be saved.
- Reopen the Batch-Enter screen for the client and confirm that first item # is correct.
Credit-Card Processing
BCSS and Credit-Card Processing
Use any merchant account and credit-card processor you wish. BCSS does not limit your choices. If you need to change processors or banks later, we won't be standing in your way.
Just swipe the card and select the card type from a drop-down menu on the sales invoice. The amount of the sale is auto-entered.
![]() The cash drawer will not pop open when credit card is selected as the payment method.
The cash drawer will not pop open when credit card is selected as the payment method.
Share Credit-Card Costs with Clients
It's becoming a common practice to pass some or all of the cost of providing credit-card processing on to those who benefit from it - your patrons.
A percentage can be deducted from every settlement of credit-card purchases:
- Any client can be permanently excluded.
- The percentage only applies to credit-card sales.
Where allowed, a percentage can also be added to credit-card purchases.
Use these options to take in more than actual credit-card costs.
There is a 3rd option of a % to be deducted from every sale (credit card or not) before applying the consignor split. For example, if the % is 2% and the sale is $100, the store would take $2 then split the remaining $98.
These 3 options are available in a separate module for $19.95/mo and that too can be passed on to clients.
Call 888-427-5779 for more information, or send an email.
Disbursements
Things to Know about Checks
- BCSS auto-prepares Check Disbursements if the Payment Method for Settlement is 'Check'.
- Attempting to print a check for a cash disbursement or for a disbursement marked as Not Approved will generate an error message.
- If a check is created but won't be printed, change the check's status to Not Approved so it cannot be printed and will not affect reports. (Select the check in the Disbursements Work Area and click 'Approved/Canceled'.)
- For some printers, it may be a bit difficult to determine the correct row spacing settings to print 3 checks per page. A work-around is to turn off '3 Checks Per Page' in Program Setup and print 1 check (the first print position) at a time, printing one check, tearing it off and refeeding the remainder of the sheet of checks.
Cancel a Check
- Select the check from the List in the Disbursements Work Area.
- Select Edit Disbursement and select Not Approved, then OK.
- Canceled checks do consume a check number but do not affect store income.
Checks and Accounting
A cash disbursement is processed the same as a check but no check number is used and no check is printed.
Cash and check both decrease store income.
Buying Checks
Three checks per page is the most common choice because there's less paper waste. Have them prepared by your bank to include special security measures against fraud.
If not already done, go to File, Program Setup, General and select either one check per page or three.
Settlement Checks
Adjust Print Position on Checks before attempting to print checks.
Pay One Client by Check
Manage Bad Checks
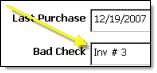
- Editing an Invoice Record to note a bad check flags the Inventory Record and the Buyer's Record.
- Reports can include bad checks only.
Record a Bad Check
Select Sales in the Work-Areas Menu.
Select a Sale in the List of Sales then select View Sale from the Sales Menu (lower left).
The View-Sale Screen has a button labeled 'Bad Check'.

If payment was made by check, pressing this button will draw a line through all amounts paid by check on the invoice.
If payment was not made by check, this button has no effect.
Bad-check sales are not included in sales reports unless the 'Report should only include bad checks' filter is checked. They do appear if 'View All' or one of the time periods (Today, Week, Month, etc.) in the Time Bar is selected.

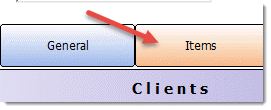
If a Buyer's check is bad, the invoice number will appear on the General Tab in the Consignor's Details Area. Select the Consignor from the list and look to the lower right -
In the Disbursement Work Area
Click on a Disbursement to select it.
Click Approved/Canceled...
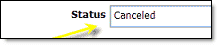
...to toggle the status of a check between Approved and Canceled.
The status of the check is shown in the Details Area next to Status:
Canceled checks do consume a check number but do not affect store income.
Check Setup
Go to File, Program Setup, General Tab and select either one check per page or three.
Print a check on a blank sheet of paper and hold it up to the light with a check behind to make sure the print lines up with the check's fields.
The Top and Left Margins and Row Space may need to be changed (on the New-Disbursement Screen) to print correctly. The default settings of (Left) 350, (Top) 850, and (Row) 13 are correct for most ink printers.
Prepare a New Check for Printing
- Select New Disbursement from the Disbursements Work-Area Menu.
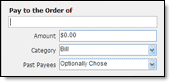
- Complete the fields on the New-Disbursement Window:
The next available check number and current date are auto-entered and may be changed. The starting check # is 1000.
- Enter the payee's name and the amount of the payment. Other information is optional.
- Select Bill, Cash Disbursement or 'Other' for the type of payment. ('Other' includes settlements and commission payments.)
- When entries are complete, press OK.
The new check will now be listed in the Disbursements Work Area.
- Select the check.
- Select the print position for the check (Top, Middle or Bottom).
- Click OK to print.
When printing a check for the first time (or when printing for the first time after the program has been uninstalled and reinstalled), print on a plain piece of paper to see where the print would have been placed on the actual check, then adjust the margin settings to place the print in the correct position on the check.
Print the Check
- Select a check from the List in the Disbursements Work Area.
- Select Print Checks in the Disbursements Work Area Menu (lower left).
- A Check Layout window will appear. Select which check position to print, Top, Middle or Bottom.
- View the check on the Print-Preview Screen. If it appears to be correct, click the print button.
Adjust Print Position on Checks
It may be necessary to adjust top and left margins and row spacing to place print on checks in the proper positions. Align print for the first check. Alignment for checks 2 and 3 (on 3-check-per-page) should be ok.
The settings for margins and row spacing are located on the Edit-Disbursement and New-Disbursement screens.
Follow these procedures for determining correct Print-Position Settings:
- If there are no checks to print, use New Disbursement in the Disbursements Menu to create 3 fictitious checks. (They can be marked as 'Not Approved' later or BCSS may be reinstalled later to erase test data.)
- Choose the checks in the Disbursements Work Area. (Check the status of the check at the bottom of the screen. Status must be 'Approved'. If the check is shown as 'Canceled', it will not print. Either choose an Approved Check or click the Approved/Canceled option in the Disbursements Menu to change the status to Approved.)
- Select 'Print Check' from the Disbursements Menu.
- On the Check Position Screen, 'Top' should be selected by default. Select 'Top' if it is not selected.
- Click on the 'Close-Window X' in the upper right corner of the Check Position Screen.
- View the check on the Print-Preview Screen. If it appears to be correct, place one blank sheet of paper in the printer. (Feed one sheet at a time to avoid misfeeds.)
- Click the print button.
- Place the printed sheet over a check and square the 2 sheets.
- Hold them up to the light and observe where print would have been placed on the sheet of checks.
- To adjust print position, double click on the check record to open its Edit Screen. Settings for Margin and Row Space appear on the right:
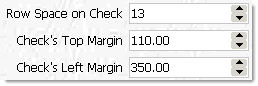
Large changes in the values for top and left margin are necessary to see significant changes in print position.
It may be necessary to use negative values to achieve correct position. Top or Left Values could be from -500 to 2500. Row space could be from 5 to 20.
- If the print position is too high, increase the Top-Margin Setting, or vice versa.
- If the print position is too far to the right, increase the Left-Margin Setting, or vice versa.
- Use the Row-Space Setting to increase or decrease the distance between lines.
When the correct settings have been determined, record the settings (off of the computer) for future reference.
Disbursement Reports
Can't Print a Disbursement Report- error: bcoptions.dbf is not a table
- Close the program.
- Go to C:\BCSS\blank db.
- Copy these files to the clipboard: bcoptions.cdx and bcoptions.dbf.
- Paste those files in C:\BCSS, replacing the existing files.
- Reopen the program and try again.
There are 3 ways to generate Disbursement Reports:
- Quick Links
- Details Area - Select a Disbursement in the Disbursement Work Area
- Filtered (Defined) Reports
Quick Links Reports
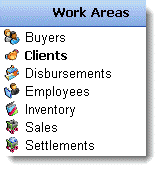
BCSS is divided into Work Areas. They are:
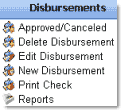
Each Work Area has its own set of Quick Links. These are the Quick Links for Disbursements:
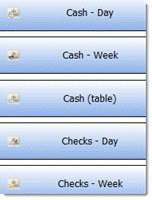
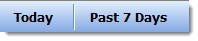
Cash Day/Week - View cash disbursements for today or the past 7 days
Cash (table) - View cash disbursements.
Checks Day/Week - View checks for today or the past 7 days.
Checks - View checks.
Disbursements Day/Week - View disbursements for today or the past 7 days.
Time Filters
Click on these buttons:
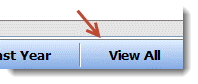
to view records that have been added or edited today, last 7 days, last 30 days, etc. Click View All to see all records again.
One Disbursement Information
Select a disbursement from the Main Table and view information about the disbursement in the Details Area at the bottom of the screen:
Filtered Reports
A report 'filter' filters out unwanted information in the report.
For example, by setting the filter 'date range' to a specific time period, all data not falling within the specified range will be omitted from the report.
Disbursement Reports Using Filters
- Go to Reports then click on Disbursements.
- Reports can include all disbursements or only those Approved or Not Approved.
- Select options and make settings on screen to define which disbursements are to appear in the report. (Note that the boxes for Payment Date and Payment must be checked.)
- The report can be for all consignors or a selected consignor.
- The report can be sorted by Payee or Date.
- Select Print the Report to view a print preview with the option to print.
- Select View the Report to view results in the Table.
Pay by Check
When a settlement is finalized with 'Check' as the payment method, BCSS saves the settlement, prepares a check for printing and lists it in the Disbursement Work Area.
To pay a consignor by check, after the settlement has been processed -
- Go to the Disbursement Work Area.
- Select the check to be printed from the table by clicking on it.
- Select Print Check from the Disbursements Work Area Menu (lower left).
- On the next screen (not shown), select a print position for the check (top, middle or bottom).
- Click the X in the upper-right corner of Check-Position Window to close the window.
- The print that will appear on the check is presented in a Print-Preview Window.
- If the information is correct, click the Printer Icon on the top menu:
- The next screen to appear is the Windows Print Setup screen.
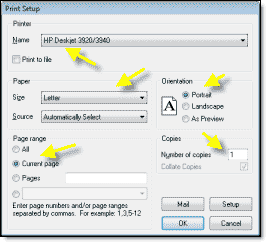
The settings should be:
- Name: The correct printer name should appear here.
- Size: Letter
- Page range: Current page
- Orientation: Portrait (Never 'As Preview')
- Number of copies: 1
- When settings are correct, load a blank sheet of paper in the printer and press OK to start printing.
- Place the printed page over a check page, square them and hold them up to the light to verify that the print will appear in the correct positions on the check.
- If the print position is incorrect, follow the procedures for Adjusting Print Position on Checks.
- If the print positions are correct repeat the printing of the check but load the sheet of checks into the printer.
To pay a consignor by check for a settlement not yet finalized -
- In the Settlements Work Area, select Batch or Aged-Batch Settlements.
- Click on 'Check None' to uncheck all accounts.
- Check the account to be settled.
- Make any other necessary adjustments (total amount, date, deductions, check #).
- Verify that Payment Method is 'Check'.
- Click Print Settlements - Settlements are created and will automatically be sent to the printer. DO NOT CLOSE THE WINDOW.
- Verify correctness. If any changes need to be made, delete the settlement, void the disbursement and manually re-create the settlement using 'Settle New' (F7).
- Click 'Print Checks'.
All checks will be sent to the printer. It might be advisable to only feed one sheet of checks at a time to assure proper printing and avoid issues with paper jams, out-of-ink runs, etc.
Here's another way to finalize the settlement and print the check:
- In the Clients Work Area, select the consignor to be settled.
- Press F7 or click 'Settle New F7' (top right).
- Make any other necessary adjustments (total amount, date, additions, deductions, check #) and/or notes.
- Verify that Payment Method is 'Check'.
- Change the check # if necessary.
- Click 'Save, Print, Exit' to save the settlement, or
- Click 'Save and Exit' to just save the settlement.
- Go to the Disbursements Work Area.
- Click on 'Today':
- Select the check.
- At the lower left, click on Print Check.
- Press View All to display all records again.
Pay Multiple Clients by Check
- Select Aged-Batch Settle or Batch Settle from the Settlements Work-Area Menu:
Sales eligible for settlement will be listed. Uncheck those that are not to be processed and make sure 'Check' is the Payment Method selected.
(Settlements for less than the amount stipulated in Program Setup will not appear in the list.)
- Place enough checks in the printer tray.
- Click on Print Checks:

Checks should start to print. (It might be advisable to load one sheet at a time to control printing and monitor for print errors.)
Item and Space Rental
Item Rental
Any item added to or in inventory can be designated as a 'rental':
- When entering an item check 'Rental'.
- When using consignment batch enter, check 'Rental'.
- To change an item to a rental, delete the record and reenter the item as a rental.
Client items could be 'rented out' (with permission) but mostly rentals will be shop-owned items with 100% of the proceeds credited to the shop account.
Process a Rental-Item Purchase
Press F5 to start the procedure for renting an item.
Select a Buyer from the List or press 'Close Without Choosing' to enter a Rental Sale without selecting a Buyer.
Click on Select from Item List
Rentals will have a pink background.
Select the Rental Item and press OK.
On the Invoice, if another item is added, the background color of Rental Item's line will be pink - a reminder to enter the Out/Return Dates. The Out Date is usually the current date and is auto-filled. The Return Date is the date the Item is to be returned. Both dates may be changed by typing new values or by using the drop-down calendars.
Complete the Invoice as for a New Sale.
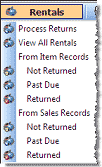
Process Rental Returns
Select Rentals (at the top).

Select Process Returns to view a list of Rentals that are currently out.
Check the items being returned and click OK to clear the Rental Record.
Inventory quantities will increase for the items returned.
Other selections in the Rental Menu allow reports that show Inventory or Sales Records for Rental items returned, not returned or past due.
Space Rental in Malls and Markets
![]() Under Reports select Clients and other parameters then use the 'Rent Collected' button for a report of rents collected.
Under Reports select Clients and other parameters then use the 'Rent Collected' button for a report of rents collected.
In the software vendors are the same as 'clients' (or consignors), each with a record and a Client % (the amount of each sale to be paid to the vendor). If a vendor is to receive 100% of sales proceeds, enter 1 for Client %. Enter .8 for 80%, etc. Enter 0 for sales proceeds that are to be credited to the shop account.
With the Diamond and Virtual editions:
- Track spaces for rent, renters, rent amounts, due dates and reservations.
- Print price labels for vendors and mall-owned merchandise.
- Process vendor sales.
- Deduct rent from sales proceeds or collect rent in advance.
- Share in vendor sales at variable percentages.
- Add customized fees.
- Pass credit-card charges on to vendors and purchasers. (paid option)
- Produce several reports including rent shortages.
With the Virtual edition, vendors can view their account information online and add inventory online (to be downloaded to the shop computer). Mall operators routinely charge a small monthly fee for the feature, generating additional income beyond the $25/month server rental.
Vendor records are created the same way client or consignor records are created. (video)
Setup
Create a record for every rental unit.
- In BCSS click on File (upper left) then Program Setup then click on the Mall tab.
- Check the options at the top of the page that apply.
- Deduct rent from settlements: Rent due will be auto-deducted when a settlement is processed. The amount set will be retained and can be edited.
- Deduct other charges from settlements: Edit a vendor record and click on the Current-Charges tab to record other charges. Some types of charges are suggested on that screen. They can be changed and other types of charges can be entered. These are one-time fees and must be reset every month. For recurring charges, increase the rent.
- Deduct Rent from batch settlements: Same as above but in 'batch'.
- Rent is due monthly or weekly: Enter the appropriate amount in the table under 'Rent'. The program will add the amounts due to the Current-Charges Screen on the Edit-Client-Record Screen.
- Collect weekly rent 4 weeks in advance: Rent accumulates weekly and is collected 4 weeks in advance.
- On the first row under Name, enter a name for a space (like Booth 11).
- The Description is optional and can be any combination of letters and numbers.
- Under Occupant use the drop-down menu to select a client. (If no names appear, create a Client Record for every floor-space rentor and return here.)
- Enter the rental amount (under Rent) and due date (under Last Rent Paid - the date when rent was paid last, or the date to start paying from if the client has not paid previously).
- For 'Waiting' don't make an entry here, but edit the client's record and select the space the client wants (using the drop-down menu for 'Requested Space'). The client's name will appear in the Waiting column. If more than one client is waiting for the same space, the oldest request will be displayed first.
- Click Save/Exit to save entries and exit Program Setup.
- Edit a Client Record and click on the Current-Charges tab.
- If rent is due, the amount will appear here. If no rent is due, 'No Rent Due' will appear.
- Check the 'Pay This' box and press Pay Selected. (Close the Buyer List if it appears.)
- A Client-Credit-Sale Invoice will be presented.
- Collect payment from the client and select the pay method on the right.
- If a credit card is being used, the amount due will be auto-entered as the amount paid.
- For other forms of payment, the amount tendered will not be auto-entered.
- Click Save to record the sale, or click 'Save, Preview, Print' to view/print a receipt and save the sale.
Customized Charges
When adding or editing a client record, click on 'Current Charges' to view 7 predefined types of charges (Advertising, Consultation, Credit-Card Fees, Delivery/Pickup, Preparation, Rent and Taxes).
These will always appear, plus a set of blank lines below. Rents are added to this list automatically, including past due if appropriate.
To add different charge, click in the Name field on the next-available line and type the name of the charge. A description is not needed but one may be entered.
To add charges, edit one of the predefined lines, or use one of the blank lines below the predefined lines to add a fee type. Either way, enter an amount. Click OK. When this window is next opened, entries appear at the top, plus the 7 predefined types and blank lines below ready to be used again.
To collect payment, check appropriate boxes. Click on 'Pay Selected'.
A fixed percentage can be set in Program Setup > Sales to be deducted from credit-card sales. Vendors would pay the (small) percentage on purchases made using credit cards but not on other payment methods (like cash, check, PayPal...). A separate percentage can be set to be added to credit-card sales so the person using the credit card pays the added fee. A third option allows for a set percentage or dollar amount to be deducted from every sale before applying the sales-split %. All 3 options are bundled in an optional module that requires activation ($19.95/mo). If your monthly sales are $10,000 and the percentage is 3%, that's an additional $300 - $19.95 in revenue.
Vendor online access to account information requires a username and password assigned by the mall manager. The information can be viewed on any device including cell phones. Malls are charging $2-$5 per month. Online access is also an optional module ($25/mo). One mall has 500 vendors with most of them paying $5 per month so this too can be a great source of additional income. No additional software functionality is needed. Just add the monthly fee to the rent total.
Pay Rent from Sales
Note: Rents can be collected in advance or deducted from sales.
If rent is to be collected in advance, in Program Setup > Mall, check 'Collect weekly rent 4 weeks in advance'.
Collect Rent When There Are No Sales
- Open the New-Sale Screen.
- Click on Unlisted Item.
- Enter a Description of 'rent collection'.
- Leave price set at zero.
- Select the Vendor under Client ID.
- Select Cash as the Payment Method.
- Click Save.
- Close the New-Sale Screen.
- Go to the Client Work Area.
- Select the client's record.
- Click on New Settlement in the lower-left menu.
- Enter the amount of the rent as a positive number in the Deduction field.
- Select Store Credit as the Payment Method. (Otherwise the rent due is cleared with no outstanding record of the amount due.)
The Settlement will process as entered, recording a negative settlement and a negative payment against the zero-price item.
Waiting List
On the General tab of the Consignor Edit window, specify which floor space a Consignor would like to have.
In Program Setup on the Mall tab, the name of the person waiting for the space will be displayed in the Waiting column. If more than one consignor is waiting for the same space, the oldest request will be displayed first.
Quickbooks
(This feature is available in BCSS Deluxe, Diamond and Virtual.)
![]() QuickBooks Integration with BCSS (Virtual edition) allows for the direct transfer of data from BCSS to QuickBooks.
QuickBooks Integration with BCSS (Virtual edition) allows for the direct transfer of data from BCSS to QuickBooks.
Important: QuickBooks doesn't know about consignment settlements for credit or cash. If you use QuickBooks with BCSS, always issue settlement checks, not cash or credit, so QuickBooks and BCSS will always agree. This is a limitation of QuickBooks that we can't remedy. A work around would be to generate a check then pay cash using the check as tender.
- BCSS exports vendor names from check records.
- BCSS will only export records for checks, employees and sales once. If one of these records has been deleted from QuickBooks, it cannot be exported again from BCSS. Save all exported files.
- First and last name must be used in the name fields for Sales and Checks, otherwise QuickBooks will only give an unhelpful error message and not import the record. 'Cash Sale' (or any entry like 'Co.' or 'Inc.') may be used.
- If apostrophes (') and quotes (") and tabs are used in BCSS (in inventory descriptions, for example), they will not be displayed in BCSS or QuickBooks.
Exporting Data in QuickBooks Format (.iif)
BCSS records are exported to a data file then imported into QuickBooks. The columns of records in BCSS for Clients, Vendors, Employees, Sales, Inventory and Checks are separated in the output data file by commas, so this type of file is commonly called a 'comma-separated' or 'comma-delimited' file with file names ending in .csv. QuickBooks data-file names end in .iif (Intuit Interface Format).
First, set up a 'company file' in QuickBooks before importing data. This creates a 'Chart of Accounts' and only needs to be done once. (See QuickBooks Help for details and for setting preferences.)
When BCSS output is imported into QuickBooks, no changes are made to existing accounts, and new accounts, if any, are added.
Use the 'Make QuickBooks Accounts' function (BCSS Main Menu, Utilities) to make the accounts in QuickBooks that BCSS will add data to. This function creates a file to be used to import data into QuickBooks as described below.
- Accounts Receivable
- Bills
- Checking
- Commissions
- Consignor Payable
- Inventory Asset
- Sales: Consignment Sales
- Sales: Discounts Given
- Sales: Retail Sales
- Sales: Tax Payable
- Supplies
- Undeposited Funds
- Other Expenses
Exporting All Data to QuickBooks
To transfer all records for Clients, Vendors, Employees, Sales, Inventory and Checks to QuickBooks (for the first time, or to replace a corrupted QuickBooks file) -
- In BCSS, on the General tab of Program Setup, check 'All Data' to export all records to QuickBooks once, then uncheck this option to avoid duplicate records.
- Choose 'Export All' under the Main Menu/Utilities/QuickBooks.
- Give the file a descriptive useful name like 'BCSS-data-12-31-16.iif' and note the location of the file on your PC.
Open QuickBooks and import the file (File/Import/iif file).
Exporting Select Data for QuickBooks
The program exports records since the last export each time.
If records that have been exported need to be exported again:
- In Program Setup > General, check All Data.
- Save/Exit
- Perform the export (under Utilities).
- If only some of the records are to be imported into QuickBooks, open the .iif file in a word processor (Notepad, Wordpad), remove the unwanted data, save the file and import.
- In Program Setup > General, remove the check in 'All Data'.
- Save/Exit
The next data exported from BCSS will be from the last record exported.
Updating All QuickBooks Records
Make sure the option mentioned above is NOT checked (to avoid duplicate records in QuickBooks).
Be sure to export vendors first if there are new ones.
- Choose Export All under the Main Menu/Utilities/QuickBooks.
- Give the file a descriptive useful name like 'BCSS-data-12-31-16.iif' and note the location of the file on your PC.
Open QuickBooks and import the file (File/Import/iif file).
BCSS will export all vendor and inventory records. QuickBooks will update changed records and add new ones.
The simple way to avoid having to remember exporting vendors first is to export all data daily (or however often needed).
Updating Select QuickBooks Records
Records for vendors, Employees, sales, inventory or checks may be updated separately.
- Choose the information to be exported (Main Menu/Utilities/QuickBooks).
- Give the file a descriptive useful name like 'BCSS-data-7-31-16.iif' and note the location of the file on your PC.
- Open QuickBooks and import the file (File/Import/iif file).
Be sure to export the vendor list first if there are new entries.
General Considerations
QuickBooks will not accept a check unless the vendor payee is already on file, so to write a check for a new vendor, export the vendor list first. Otherwise, QuickBooks will give an error message and not import the record. This is most important because checks and sales can only be exported once from BCSS.
Be sure to record both names before exporting. It is possible to edit the iif file and insert a last name if it has been left out. This requires just a little in the way of computer skill. QuickBooks will accept 'Cash Sale' as first and last name. For vendor company names, add Co. or Inc. if necessary.
When exporting to QuickBooks, to assure there will never be a sale of non-existent inventory, a check for a payee not in the QuickBooks vendor list, or a transaction for which QuickBooks does not have an account, export files in this order: Accounts - Inventory - Sales - Vendors - Disbursements - Employees
QuickBooks does not recognize cash withdrawals from store funds. QuickBooks requires that checks be written for all disbursements so BCSS only exports check disbursements to QuickBooks. This will cause a discrepancy between what BCSS says about current funds and what QuickBooks says. We strongly recommend following the QuickBooks discipline of using checks for everything. This means no Settlements for credit.
The one exception to the checks-only rule is that QuickBooks will accept a credit memo where the Buyer is given cash refund. BCSS does report these to QuickBooks, however, BCSS recognizes the difference between a partial refund where the Buyer keeps the item and a full refund where the Buyer returns the item. As far as QuickBooks is concerned, all credit memos are for returned items.
BCSS allows a number of disbursement methods but QuickBooks does not know about Settlements for credit or cash.
Sales documents must have a buyer. The buyer can be 'Cash Sale', but it cannot be Sale or Cash. In QuickBooks, log in as administrator. Open the Customers area, click on Transactions and choose various ways to look at sales.
BCSS will not export voided invoices.
QuickBooks will accept inventory items from BCSS but it will not accept a quantity on hand. That must be input manually. BCSS does pass the quantity for each item as a custom field. To view custom fields for a QuickBooks item, first right-select the item and choose edit from the list. Then select custom fields. On the pop-up screen, select define fields. This generates another popup with a column of five fields. Put a check in the top check box. In the top label window, enter quantity and click OK. The quantity for this item is viewable but the same number for quantity needs to be put in the place where QuickBooks actually expects to find quantities in the item record.
QuickBooks does not know about Consignor or Buyer ID's so BCSS provides a custom field option for that as well.
Right click on the Consignor or Buyer Record. Choose edit. The rest is much the same.
Accounts Payable, Accounts Receivable, Cost of Goods Sold
BCSS does export Cost of Goods and Accounts Receivable information. It exports Undeposited Funds and Bank information (which would be Revenue accounts). It does not export Accounts Payable. There is a point where BCSS doesn't translate well to QuickBooks because QuickBooks doesn't understand consignment. It is a retail tool. Clients, for instance are exported as Vendors.
But BCSS does export a balanced set of accounts. It probably takes some data massage in QB to get the data to look right in a balance sheet.
The items.iif file has a column for cost. QuickBooks uses that for Cost of Goods Sold.
QuickBooks Integration with Consignment Software
BCSS Virtual is integrated with QuickBooks. (The program accesses QuickBooks DLL's (Dynamic Link Libraries) and submits data to the QuickBooks database via the links.)
According to Intuit upgrading to the newest version isn't necessary and because new versions are 'backwards compatible', all versions are compatible with this integration.
Windows may keep QuickBooks running in the background even though QuickBooks may have been closed.
- After a BCSS export without QuickBooks open, it will be necessary to terminate QuickbooksW32.exe in Task Manager > Processes. Otherwise QuickBooks will warn that external software is interacting with the company file when that is clearly not so. Here's how:
- Right click on the taskbar.
- Select Start Task Manager.
- Click on the Processes tab.
- Sort the list if necessary (by clicking on 'Image Name').
- Right click on Quickbooks@32.exe.
- Click on End Process.
- Close the Task-Manager window.
Exporting from Consignment Software to QuickBooks for the First Time
Before starting an export session for the first time:
- With QuickBooks closed, download and install the QuickBooks Runtime Module.
- Read Only: Change the company file from 'read only' to 'read write' (to allow changes to be made by the consignment software).
- Find the Company Files Folder (Windows 10/8/7/Vista: C:\Users\Public\Public Documents\Intuit\QuickBooks\Company Files or XP: C:\Documents and Settings\All Users\(Shared) Documents\Intuit\QuickBooks\Company Files)
- Right click on the folder.
- Select Properties.
- Go to the General tab if not already on it.
- Click on the Read-Only box until it is empty.
- Click OK.
- Create a New User in QuickBooks:
- In QuickBooks go to Company > Setup Users and Passwords > Setup User.
- The username is bcss (lower case).
- Answer 'No' to create a password. (There is no password.)
- Click next to access User Access Control.
- BCSS doesn't require access to all areas of QuickBooks, but if the BCSS login is to be used for QuickBooks access, select 'All Areas of QuickBooks'. Otherwise choose Selected Areas of QuickBooks.
- Click next.
- The consignment software should have Full access to all areas except Time Tracking (no access), Payroll and Employees (create transactions only), Sensitive Accounting Activities (no access), Sensitive Financial Reporting (no access).
- Click Finish.
- Leave QuickBooks open.
BCSS Setup
- In BCSS > Program Setup > General tab enter the company filename.
- Save and Exit.
- In BCSS under Utilities (upper right in the program) click on Connect to QuickBooks.
- BCSS is signed, but QuickBooks doesn't find a certificate. Allow access even if QuickBooks is closed.
- Click Continue.
Connecting BCSS to QuickBooks
In BCSS under Utilities (upper right in the program) click on 'Connect to QuickBooks'.
Four progress prompts will appear:
- QuickbooksFC Object Created
- Connection Open
- Open Company File Attempt 1 (BCSS will try 3 times if necessary.)
- All Processes Successful
In BCSS under Utilities click on 'Export All'.
The last step (opening the company file) can take 2 or 3 minutes as QuickBooks and BCSS 'handshake'. (Tech support has no control over the time it takes Windows to complete this step.)
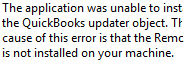
If this message appears, go back over the instructions above to make sure QuickBooks is installed and correctly configured:
If the handshake is successful, a message will appear confirming 'All Processes Successful'.
It will also be necessary to close BCSS and reopen it.
Troubleshooting
Read-Only File: By default Quickbooks creates the company file as 'read only'. Follow these instructions.
Incorrect Data: The 'quick fix' for incorrect data is to create a new company file in QuickBooks, check 'All Data' in BCSS Program Setup (General tab) and import the data again. (Uncheck 'All Data' in BCSS to transfer only new data in future transfers.)
Retail
Retail Accounts In BCSS
 There must be only one (house) account used for buying and reselling 'retail' items as all sales proceeds will go to that account for which profit/loss will be calculated and displayed on the Sales-Recap report.
'Retail' in BCSS is the buying and reselling of merchandise on hand as well as merchandise acquired from businesses. (Buying and reselling merchandise acquired from individuals is 'resale' or 'buy outright'.)
Another type of 'house account' is the 'Transfer Account' which receives ownership of unsold consignments (if the Transfer Account and automatic transfers are activated and the disposal option in the client record is 'Transfer to House'). The Transfer Account should not be used for retail.
Other types of inventory with no cost basis (like donations to the shop) can be entered in the Transfer Account. All sales proceeds of donated items are generally subject to income tax.
For retail items, BCSS records buy and sell prices, computes the differences for sold items and reports the differences as profit or loss in the Sales-Recap report.
Retail House Account
For our purposes 'retail inventory' is merchandise purchased from businesses (suppliers, wholesalers, vendors, craftsmen, artists, etc.).
To enter retail inventory, a House Account must exist. To create one:
- Press F2 or click on New Client.
- If numbers are used for Client ID, enter the number that appears (on the right) for 'Internal ID'.
- If letters are used for Client ID, keep it short (for report columns and price labels). One letter would suffice (like 'r' for retail).
- Tick 'This Is a House Account' and note that the Client % changed to 0%. All sales proceeds will go the House Account.
- Click on Save/Exit. (Do not attempt to enter 'Buys' or 'Consignments' from this screen.)
Retail Inventory
It wouldn't be necessary to create client records for suppliers. It may be sufficient to place supplier information in the Details field of the item record then find the item record by scanning a barcode in the Inventory Work Area or by using the key-press search function below the list of items in the Inventory Work Area.
To add retail inventory:
- Select the House Account from the Clients Work Area table.
- In the lower-left menu chose Batch Retail. (Resize the screen if needed. Tech support can remove columns from this screen. A service fee would apply.)
- Enter up to 20 characters for a Description and press Enter.
- Press the first letter of the category name and use the mouse or down arrow to select the category then press Enter.
- Enter up to 100 characters for Details and press Enter, or just press Enter to skip the field.
- Enter the Selling Price and Retail Cost (no dollar signs).
- Change the Quantity, if appropriate.
- A 'Path to Picture' and 'Notes' can be typed in (or added later).
- With 'Label Quantity = Item Quantity' checked, multiple labels for any item will be printed.
- If sheet labels are to be printed, select on of these five options:

- If thermal labels are to be printed, select Thermal.
- If no labels are to be printed, click Save to save entries and close the screen. (Labels can be printed later.)
BCSS supports the use of two thermal label printers (or the Dymo Twin Turbo) - to avoid tag having to change labels/tags in the printer for different types of merchandise; however these are cheap non-commercial printers which are not recommended or supported. It appears this type of printer, for example, cannot accurately print small barcodes on small labels.
To view items entered:
- Go to the Inventory Work Area and click on Today:
- ...or click on Today Entered or press F8.
- ...or create an inventory report using today's date for the 'Date-In Range'.
- ...or select the House Account in the Clients Work Area and click on 'Items' at the bottom.
Retail Sales
If a retail item has been assigned to a category, that category can be included in promotional sales. (For some period of time, all items in category xxx will be discounted by xx%.)
Retail sales are generally taxable but local jurisdictions allow some merchandise (like clothing) to be sold tax-free or tax-free below a stipulated amount. Create categories, configure taxes and assign the categories to items.
With Diamond and Virtual editions, employees can be paid commissions and they can be denied or allowed access to any data and program functions (like voiding sales and discounting at POS). Each employee can have a 'till' that can be audited at any time.
To sell a retail item:
- Select the item in the Inventory Work Area and press 'Item to Invoice', or
- Press F6 to open the new-sale screen. (Adjust if necessary.) 'Cash Sale' will be listed as the name purchasers who don't wish to provide their personal information. With Diamond and Virtual, information entered here will be recorded in the Buyers Work Area.
- The cursor will be in the bar-code field ready for a scan. Scan a barcode that was created by the program. (Barcodes not created by the program won't work.)
- ...or enter the Item ID,
- ...or enter an Unlisted Item (and choose the House Account for the Client ID),
- ...or select an item from the dropdown menu.
- If a picture of the item was saved and assigned to the item, click on 'View Item Picture' to view it.
- The cost of the item will appear in 'Last Item Cost'.
- Under 'Enter Payments Below' if the payment is made in cash, leave 'Cash' as the payment method and enter the amount tendered in the field named 'Enter amount 1 here'. Change Due will appear at the bottom of the page.
- For payments other than cash, click the down arrow to the right of 'Cash' and select the method of payment. If a credit-card option is chosen, the amount of the sale will be entered as the amount paid and can be changed if necessary.
- If the sale is a Layaway, check the option at the bottom of the page and complete the payment schedule in the fields below 'Enter Payments Below'.
- For each item, Tax % may be changed and a '% Off' can be entered in decimal format.
- The entire invoice can be made tax free by checking 'Non-Taxable' (and optionally entering the buyer's 'Reseller Tax ID').
- For the entire invoice, discounts can be entered as dollar or percentage amounts.
- If credit-card charges are being passed to purchasers, the amount of the credit-card charge will appear at the bottom of the page.
- After all entries have been made, click Save to save the sale and prepare a new sale screen or choose 'Save, Preview, Print' to save the sale and print a receipt.
A sale can be put on hold indefinitely by clicking on 'Put Sale on Hold' and will appear in the Sales Work Area with a pink background.
A sale can be put on hold temporarily by clicking on Invoice 2 (top of the page) then returning to Invoice 1 when that purchaser returns to checkout.
Because invoices can be placed on hold temporarily, the 'red X' in the upper-right corner has been disabled to avoid losing sales on hold. Use 'Terminate Session' to close the invoice screen.
Retail Reports
Any list of information is a 'report'. There are several ways to create, view and print lists (reports) in the program:
- Select the House Account in the Clients Work Area and click on Items at the bottom. An item record can be selected then edited by clicking on Edit Item in the lower-left menu. The selected item can be deleted. If attempted, a warning message will appear. Click OK to delete or cancel to not delete.
- Click on the blue Reports button at the top then select Inventory. Select House Account for the Client and set any parameters on the page to define which data should appear in the report.
- Reports can be generated for one or more House Accounts by clicking on Clients on the Reports screen and setting parameters there. Check 'House Accounts Only'. Reports will include House Account Names, # of Items, Balance, Dates Entered, Sales and Settlements.
- Sales Reports can be created using the Sales-Report page on the Reports screen.Select the House Account and set search parameters.
Troubleshooting
Barcodes Missing in current versions of the software are generally no longer an issue. The program assigns a barcode as each item is entered into inventory. Duplicate and missing barcodes might only occur now when barcodes are manually entered or edited, which should never be done.
Items Added to Wrong Account can be corrected by:
- For a few items, delete the items from inventory and reenter them under the correct consignor. Reprint price labels if necessary.
- For several items:
- MAKE A BACKUP OF THE CURRENT DATA.
- Click on the correct consignor in the Consignor Work Area.
- Edit the consignor record to view and record the Internal ID (not the Client ID).

- Select 'Batch Consignment' at the lower left. The program will show the next Item ID for the next item to be added. (Remember that for step 9.)
- Export inventory records (under Utilities) to a spreadsheet.
- Open the spreadsheet.
- Find the item records to be corrected. If no other inventory has been entered after the discovery of wrongly-assigned items, the items to be corrected should be at the end of the list.
- Using the ID discovered in step 3, for each item correct the Internal Client ID (column B). (The 'Internal ID' in column R is the program's for identifying the item. Do not change that.)
- Starting with the first item to be corrected, edit the 'ItemNum' (column A) to match the next Item ID discovered in Batch Consignment.
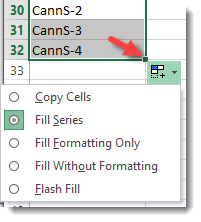
- For additional items, in that same cell, click and hold the black square at the lower-right corner and drag down to the last item to be corrected. Excel might fill the remaining cells with sequential IDs. If not click on the Auto-Fill Options box adjacent to the black box and select Fill Series.
- Save changes.
- It's not necessary to close the spreadsheet. Open BCSS.
- Under Utilities use Import Inventory.
- Navigate to the edited spreadsheet, select it and click Open. A confirmation message will appear showing the # of records imported.
- Before doing anything else, verify that the Item IDs are correct. If they are not, RESTORE THE DATA BACKUP and try again, following each step correctly.
- When done correctly the items will be removed from the incorrect account and added to the correct account.
- Reprint price labels if necessary.
Duplicate ID or Incorrect Starting #
The 'next Client ID #' is stored in the Windows Registry. Windows can sometimes lose track of the number. Also, if letters and numbers are used in Client IDs (not advisable) the program will lose track of the next available number. Sort the ID column in the Clients Work Area and observe the last-used number. Open the new-client screen and enter the next number in sequence for the ID.
Missing Records
The most common reasons for missing client records are:
- The client record has been flagged as 'inactive' and in Program Setup > General, the option to not include inactives in lists is not checked.
- Record is not in sorted list: The record name is not as expected.