Search the BCSS Manual
POS Sales
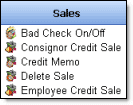
Sales
Types of Sales
Consignment: Sell merchandise belonging to others for a share of sales proceeds.
Credit Sale: Sell merchandise using store credit as payment.
Space Rental: Rent booths or floor space to tenants.
Layaway: Accept installment payments for purchases with delivery upon final payment.
Rental: Grant use of merchandise for a period of time with payment up front and late payments and refunds upon return.
Resale (Buy Outright): Sell merchandise purchased from individuals.
Retail: Sell merchandise on hand or resell purchases from businesses.
![]() Credit-Card Processing
Credit-Card Processing
Any card-processing service can be used with BCSS.
Process a Credit-Card Purchase in BCSS
- While viewing the program press F6 or click on New Sale.
- Enter items to be purchased.
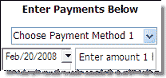
- In BCSS under 'Enter Payments Below' select the card being used.
- Process the credit-card transaction on the credit-card terminal.
- If payment is successful, in BCSS, save the sale or print a receipt and save.
- If payment is not successful, try another form of payment and change the payment choice in BCSS.
- If payment cannot be made either:
- Clear the screen to ready for the next customer, or
- Put the sale on hold for later retrieval, or
- On the invoice, click on Page 2 (at the top) to open and second invoice and return to the first invoice later.
Split Credit-Card Payment
When a buyer wants to use 2 (or more) credit cards to make a purchase:
- Scan the first card at the credit-card terminal.
- In BCSS choose the card type.
- Change the amount.
- The amount remaining to be paid will be displayed in the Due field.
- Scan the second card at the credit-card terminal.
- In BCSS check the box for 'Choose Payment Method 2'.
- Choose the card type.
- Change the amount if necessary.
- Save or Save/Print.
Share the Cost of Credit-Card Processing
A Credit Sale is a consignor purchase using store credit as payment.
A consignor can acquire store credit by:
- Accepting store credit as settlement for sold consignments
- Accepting store credit as a refund for returns
Note that funds from sales of consignments are not available for store-credit purchases until the sales have been settled for 'store credit'.
Regardless it is still possible to process a credit sale where there is no store credit available in the consignor's account. Doing so will create a negative balance for store credit in the consignor's record and will be deducted from future settlements.
To reverse a credit sale (where there is no store credit) simply void the applicable invoice.
Process a Credit Sale
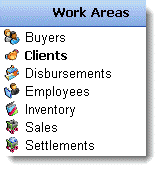
Select the consignor in the Clients Work Area then choose Credit Sale from the lower-left menu.
Note: BCSS Diamond and Virtual have a 'buyers work area' for recording information about clients making purchases. Credit sales cannot be made for buyers because buyers aren't necessarily consignors who have inventory in-store that might be sold to generate offsetting store credit.
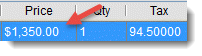
The amount of available store credit is listed under 'Enter Payments Below'. In this example the store credit is $40:
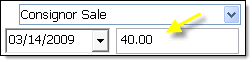
The 'Change-Due' field (not shown) will display the credit as a negative number.
Enter items to sell. The credit will be auto-applied against the total cost of the item. The Change-Due field will adjust accordingly.
If the amount of the purchase does not exceed store credit the Change-Due field will display a negative number representing the amount of store credit remaining available to the Client.
If the purchase amount is greater than store credit the Change-Due field will display a positive number representing the amount to collect from the Client. Follow these steps to collect the overage:
- Place a check in the box preceding 'Choose Payment Method 2' (yellow arrow).

- Click the blue down arrow (blue arrow above) and select a payment method.
- Enter the amount shown ($11.77 in the example above) in the Change-Due field as the amount to collect from the Client.
- Follow the remaining procedures for a new sale to complete the process.
Accounting within BCSS
- Inventory is reduced.
- Income for the day is increased.
- The cost of the purchase is deducted from the Client's Account Balance (Store Credit).
Please refer to Aged-Inventory Discounts for discounting inventory (prior to POS) as it remains unsold.
Price Discount at the Point of Sale
There are 5 types of discounts at the point of sale:
Discounts Absorbed by the Store
- Dollar - Total Invoice is reduced by a dollar amount.
- Promotional - All items offered under a Special Promotion are discounted (except in BCSS Intro).
Discounts NOT Absorbed by the Store
- Percentage (%) - Items are discounted individually by a %.
- Percentage (%) - Total Invoice is reduced by a %.
- Price - The price of an item is reduced.
Explanation
Invoices can include more than one item. Each line item can be discounted by %:

If the invoice total is manually discounted by a %...
...that percentage is applied to each item on the invoice and the discount is shared with consignors.
If the invoice total is discounted by a $ amount...
... or by a sales promotion...
...the discount cannot be applied proportionately to each invoice item and must be absorbed by the store.
If the price was discounted...
...the discount will be shared with the client.
Any of the 5 discounts can apply at the same time or in combination. If one discount is changed, the others are not affected. BCSS tracks the amount of each discount and computes the correct total.
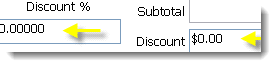
Discounts by price, percent and dollar amount are entered on the New-Sale Screen.
Tip: To keep the consignors' shares the same and reduce the amount credited to the store, enter a dollar amount for a discount.
Note that for dollar and promotional discounts The Sales-Recap Report (store revenue) will present the discounted price while Items-Sold Reports (typically produced for consignors) will show the price before the discount - because the client's share is not discounted by dollar and promotional discounts.
![]() As of July 14, 2014 (v. 6.0.2272) the program computes the difference between Original Price and Sale Price for each item on the invoice and reports the total of those differences as Total Discount.
As of July 14, 2014 (v. 6.0.2272) the program computes the difference between Original Price and Sale Price for each item on the invoice and reports the total of those differences as Total Discount.
Accuracy depends upon having accurate Original Prices. Sometimes zero is enter for new items and a price is entered at checkout. And sometimes the sale price is higher than the original price. The program ignores situations where the sale price is higher than original price.
It is also possible for the user to edit the Original Price. The program can't know whether that is the case.
Discounting the Invoice at POS
Press F6 to open a new sales invoice.
Process a New Sale.
The discount may be entered as a dollar amount and/or as a percentage:
The percentage discount is not absorbed by the store. It applies to the client's share and the store's share.
The dollar discount IS absorbed by the store. It does not apply to the client's share; therefore, the full sales price will appear on the client's settlement.
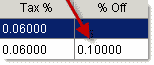
Line-Item Discounts
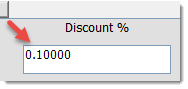
Reduce the cost of a single item by entering the amount of the discount (in decimal form) in the '% Off' field:
This discount is not absorbed by the store. It applies to the client's share and the store's share.
Promotional Discounts
Promotional Discounts are auto-entered by BCSS (during a Special Promotion only).
A Promotional Discount will only appear in the Discount field during a Special Promotion. It may be edited to increase or decrease it.
This discount is absorbed by the store. It is not deducted from the client's share.
Accounting for Discounts in BCSS
Discounts by %, Age or Price are shared by the client and the store. (If a $100 item is discounted by 10%, for example, and the split is 50-50, the client receives $45 and the store receives $45.)
Dollar ($) and Promotional (%) Discounts are charged by the store (not deducted from the client's share). (If a $100 item is discounted by $10, for example, and the split is 50-50, the client receives $50 and the store receives $40.) (On invoices with multiple items from multiple consignors, it is not possible to proportion a dollar or promotional discount to each item.)
A % Discount reduces the settlement amount. Dollar and Promotional Discounts do not reduce the settlement amount.
Promotional discounts can be by invoice or category or both. If both are specified, both apply. If only one is specified, that one applies.
|
Discount Type
|
Absorbed
|
Reduce Settlement
|
Reduce Invoice
|
|
%
Aged
Price
Dollar
Promotional
|
No
No
No
Yes
Yes
|
Yes
Yes
Yes
No
No
|
Yes
Yes
Yes
Yes
Yes
|
Finalizing the Invoice
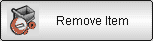
After the last item is entered, remove any items by selecting the item and selecting the Remove-Item button.
If applicable, check Non-Taxable and select COD, Net 30 or Prepaid from the Terms field.
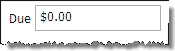
Select Payment Method under Enter Payment Below and enter Amount Paid. Change due to the Buyer, if any, will appear at the bottom if the field named 'Due'.
If applicable, check 'Send Mailings' and/or select an Employee in the 'Sold by' field.
Select 'Preview, Print, Save' to print preview and print a copy of the invoice.
Select 'Save' to save the sale.
Once the Invoice is saved, it may be located in the Sales Work Area List.
Employee Commission Adjustments (BCSS Diamond and Virtual)
A Discount of the Total Sale and a promotional discount do not reduce the commission.
A Dollar-Amount Line Item Discount and a Percentage Discount do reduce the commission.
Invoice Header and Footer Messages
Messages (like "Thank you for shopping with us!" and "All Sale Final" can be printed on full-page and thermal receipts.
Full-Page Receipts
'Header' and 'Footer' are actually misnomers in that both messages appear at the bottom of the full-page sales receipt. The messages may be changed by editing the text in files named header.txt and footer.txt located in the BCSS folder (C:\BCSS).
Procedure for editing:
- Reboot the computer and log in as Administrator.
- Click on Start.
- Click on Computer, My Computer, This PC - depending upon the Windows edition.
- Click on C:.
- Double click on BCSS.
- Double click on header.txt.
- The computer should open header.txt in Notepad or WordPad.
- Leave the BCSS Program Folder open.
- Make the desired changes.
- Hold the Control Key and press S to save the changes.
- Repeat these instructions to change the footer text.
- If Windows says you don't have permission, reboot the computer and log in as Administrator, then return to these instructions.
- Return to BCSS.
- Select a sale in the Sales Work Area.
- In the lower-left menu, select Print Sale.
- Scroll down to see the changes.
Thermal Receipts
Any characters entered in the Email and Web-Address fields in Program Setup will print on thermal receipts. Go to File then Program Setup and make entries on the General tab.
Layaways
A 'layaway' is a purchase made with a series of payments over time with delivery of the purchased goods upon final payment.
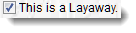
Any sale entered on the new-sale screen can be changed to a layaway by checking 'This Is a Layaway' at the bottom of the invoice screen.
While Layaways and Accounts Receivable share the similarity of installment payments, layaways differ in two respects:
- No interest is charged on the unpaid balance.
- Goods are not delivered until all installment payments have been made.
By default layaways are not included in settlements until the final payment is made. (Buyers might return items or not complete payments and the store would be out money paid to consignors for items purchased on layaway.)
![]() Include Layaways in Settlements by checking 'Include Layaways in Settlements' in Program Setup, Clients Tab. Clients can be paid before all layaway payments have been received.
Include Layaways in Settlements by checking 'Include Layaways in Settlements' in Program Setup, Clients Tab. Clients can be paid before all layaway payments have been received.
- Layaway payments will appear in the shift balance if the cash-drawer feature is being used. If the cash-drawer balance and sales totals are off, look for layaways for the differences.
- The only way to correct a layaway or delete an item from a layaway is to void the sale and reenter it.
- Layaway sales, payments and transaction status are recorded. With the last payment, change the original date of the sale to the date of last payment - to record the sale as finalized as of the date of last payment.
Creating a Layaway
- If the purchaser is in the list of buyers, select the record and press F4 to open the new-layaway screen.
- Otherwise press F4 to start a new layaway, or press F6 to open a new invoice and check this option at the bottom:
Enter the name of the purchaser. Other information may be entered if desired.
After all items have been added to the invoice:
Enter the payment schedule in the fields on the right under Enter Payments Below.
Enter the first payment and payment method:
When entering the remainder of payments, each box to the left of 'Pending' must be checked.

For the second scheduled payment, for example:
- Check the box to the left of 'Pending'.
- Click the down arrow to the right of the date to use a calendar to select the next payment due date (or type the date in).
- Replace 'Enter amount 2 here' with the anticipated amount of the 2nd payment.
Repeat for all scheduled payments. The total of payments must equal the total-sale amount. If so the 'Due field' will show zero.
Click 'Save' to record the sale or 'Save, Preview, Print' to save the sale and preview the sales receipt with an option to print the receipt.
Upon completion of the Sale, Inventory and Employee Commissions are automatically updated along with data-tracking entries.
Managing Layaway Payments
Note: Sales reports are of final transactions. Layaways aren't final until full payment is received or closed, so they aren't in Reports of sales until final.
Layaway payments are included in daily receipts. To balance the cash drawer, do not use sales reports or the Daily Sales Recap. Use shift closeouts instead.
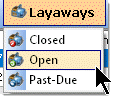
To view only open layaway records, click on Layaways then select Open.
Double click on an entry to open its edit window.
Finalizing Layaways
When all payments have been made, at the bottom of the View-Sale Screen, uncheck the box named 'This Is a Layaway'. At that point the sale is considered finalized for commission purposes and will be included in reports.
Altering the Payment Schedule
The Layaway Payment Schedule may be altered at any time.
Here's a common example:
A down payment of $66 was made on a purchase of $117 with plans to pay $20, $20 and $11 on the future dates entered:
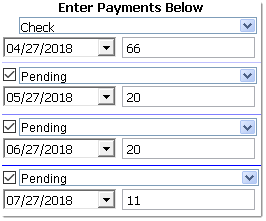
The purchaser decides on May 27th to pay the scheduled payment of $20 plus the last scheduled payment of $11:
- On the blue title bar click on Layaways > Open:
- Locate the record and double click on the listing.
- For the $11 payment, change $11 to $0 and uncheck 'Pending'. (It's not necessary to alter the date or change 'Pending' to something else.)
- For the May 27th payment, change $20 to $31.
- Change Pending to the method of payment used ('Cash' in this example).
- Leave the $20 payment scheduled for June 27th or change the entry if needed:
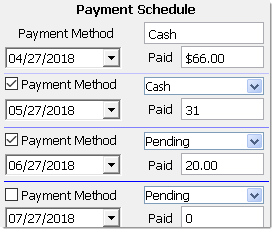
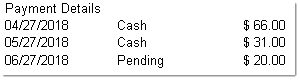
- Click 'Save/Close' to save changes or 'Preview and Print' to save changes and preview the transaction. Payment Details will appear on the preview:
- Close the screen and reopen the layaway record to verify that changes have been saved.
Cancel a Layaway
- Void the sale.
- Create a new disbursement record to account for the money refunded, if any.
Layaways and the Cash-Drawer Balance
Initial layaway payments will be included in the till closeout for the appropriate pay method. Payments that are still pending don't show.
Layaways and Store Credit
The only way to apply store credit to a layaway is to start the layaway as a Client Credit Sale. The first payment can be charged to the Client's balance. Subsequent payments would need to be paid some other way.
Layaway Quick Reports
Go to the Layaways to view Open, Closed, Expiring and Past-Due Layaways. Make selections. Results will appear in the Main Table in BCSS.
Other Layaway Reports
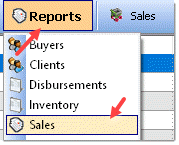
Select Reports then Sales:
Reports here may be printed, or they may be viewed on screen in the Table. (See Reports for how to create Reports.)
![]() There are new options for layaways in reports:
There are new options for layaways in reports:
- Only Layaways in Payment Recap
- No Current Layaways in Payment Recap
- Choosing neither will include layaways in a separate section of the report.
- The first option will show only current layaways.
- The second option will show no current layaways.
New Sales
Opening the New-Sale Screen for the first time each day applies aged-inventory discounts (which is why with large databases it appears that the program is 'thinking'). On networks, on the main PC, run discounts manually each day (under Sales above) and turn Automatic Discounts off on network POS stations.
![]() Use the 'View Item Picture' button on the Sales Invoice Screen to view an image of the item being sold (to verify that price tags have not been switched).
Use the 'View Item Picture' button on the Sales Invoice Screen to view an image of the item being sold (to verify that price tags have not been switched).
![]() 'Last-Item Cost' will be displayed at the top of the new-sale screen when a line item is entered. The amount will be the cost of a buy-outright or retail item, or the amount that will be paid to the client. Selecting items listed on the new-sale screen will display the amount for the item selected.
'Last-Item Cost' will be displayed at the top of the new-sale screen when a line item is entered. The amount will be the cost of a buy-outright or retail item, or the amount that will be paid to the client. Selecting items listed on the new-sale screen will display the amount for the item selected.
The program will offer the next available invoice number automatically. The Invoice Number can be changed but if it is, for the next sale, the program will offer the next greater number. Try to avoid changing the Invoice Number and do not use very large numbers for an invoice number.
Multiple Sales Invoices
There are five tabs at the top of the sales invoice:
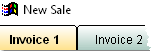
If the customer is being checked out and wants to put the sale on hold, invoice 2 can be opened for the next person in line and when the first customer returns, invoice 1 can be reopened to complete the sale. Up to 5 invoices can be open at a time.
Because this is possible, the 'red X button'...
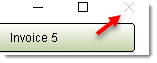
...has been disabled to prevent open invoices from being closed before they are saved.
To close the Sales Invoice window, use 'Terminate Session':
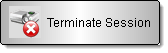
A warning will appear if there are any open unsaved sales.
Start a New Sale - Open the Sales Invoice
There are several ways to open the New-Sale Screen:
- Press F6 from any Work Area then choose a Buyer from the list presented. (The list will only appear in Diamond and Virtual and only if the Buyer's Work Area is activated in Program Setup > Sales.)
- Buyers Work Area > select a Buyer > Press F6
- Buyers Work Area > select a Buyer > New Sale in the Buyers Menu (lower left)
- Buyers Work Area > select a Buyer > New Sale in the Quick Links Menu (on the right)
- Buyers Work Area > select a Buyer > right -click > New Sale
- Clients Work Area > Credit Sale (Use store credit to make a purchase.)
- Employees Work Area > Employee Credit Sale
- Inventory > select an item > click 'Item to Invoice' in the Quick Links Menu
- Inventory > select an item > right-click then 'Add Selected Item to Invoice'
- Sales > New Sale from the Sales Menu
After taking one of the actions above, one of 2 things will happen.
1. A list of Buyers will appear IF this box is checked in Program Setup (Sales Tab):

AND no Buyer was selected prior to opening a New-Sale Screen.
Choose a Buyer. The New Sale Invoice will open with the Buyer's information pre-entered, or
2. A New Sale Invoice opens. 'Cash Sale' appears for the Buyer's name (unless a Buyer was previously selected). Replace 'Cash Sale' with Buyer information if desired.
Note that there are 5 Tabs at the top of the New-Sale Screen, Invoice 1, Invoice 2, etc. Up to 5 invoices may be open at any time.

Today's date and the next available Invoice # will be auto-filled. If a Buyer was selected from the Buyers List, additional information like name and address and Credit Limit will be auto-filled (if previously entered in that Buyer's Record).
Enter Items to Be Sold
An item being purchased can be entered 1 of 4 ways:
1. Enter an Item Listed in Inventory - Click Select from Item List:
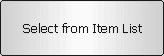
and select the item from the List. BCSS will auto-complete the Item ID, Description, Price, Quantity, Tax and Tax %. '% Off' and 'Buyer Fee' may be entered. 'Client ID' will be blank (because BCSS knows who owns the item). 'Out Date' and 'Return Date' (not shown) are for rental items.

2. Enter a Listed Item by Inventory ID - Enter the Item's ID number in this box:
and press Enter. BCSS will populate the Invoice with the Item's Information as above.
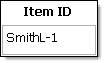
3. Enter an Unlisted Item - Click Enter Unlisted Item:
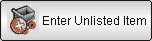
The Item ID will be generated and entered by BCSS when the Client ID is selected.
- Click in the box under 'Description' and enter up to 20 characters to describe the item.
- Enter the Price and Quantity then in the Client ID box use the menu to select a Client.
- Enter a Buyer Fee if applicable.
![]() Default Values can be set for Description, Price and Client. When entering an unlisted item, the program will auto fill those fields with the values saved.
Default Values can be set for Description, Price and Client. When entering an unlisted item, the program will auto fill those fields with the values saved.
- Go to File then User Interface.
- Check Unlisted Item and choose your store's most common price.
- For Account choose the account that sells the most items.
- For Unlisted Description enter the Description (up to 20 characters) that is used most often.
- Save/Exit.
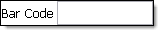
4. Enter a Barcode:
Complete the Invoice
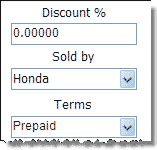
If applicable, values may be entered for Discount, Sold by (Salesperson - Diamond and Virtual editions) and Terms (Prepaid, COD, Net 30). 'Prepaid' is the default and applies to all purchases except COD and Net 30 (which are rarely used by consignment businesses) :
The sale may be marked as Non-Taxable and the Buyer may be added to the store's mailing list by checking 'Send Mailings':

Use the blue down arrow to chose the Method of Payment.
The Invoice Total should be auto entered for the Payment Amount. This will not happen if cash is selected as pay method, or if Rewards Points is activated.
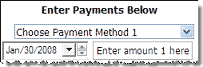
If the Payment Amount was not auto-entered, replace 'Enter amount 1 here' with the amount tendered.
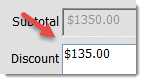
These fields appear at the bottom
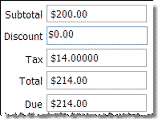
showing Subtotal, Discount (if any), Tax and Change Due (auto-computed and filled), and Total. (Tax is carried out to 5 decimal places for reporting accuracy.)
The Discount may be edited.
Some discounts are absorbed by the store. Others are shared with the client.
Finalizing the Sale
Lastly, Click Save to save the Invoice and not print it:

...or click Save, Preview, Print to preview the Invoice and/or print it.

Note that a Sale may be put on Hold BUT first a Client (or the Transfer Account) must be chosen. The Client cannot be changed when retrieving a Sale put on Hold. (If a mistake is made, void the Sale and start a New Invoice.)
or Items may be removed from the Invoice by selecting the item in the table and clicking on:
or an Invoice may be canceled

View a Completed Sale
There are 2 ways to view a completed sale:
1. Select a Buyer then click on the History tab (at the bottom of the BCSS screen).

2. Select the sale from the Main Table and chose View Sale from the Sales Menu.
Only these changes may be made when viewing an existing Sale.
- Bad-Check Status
- Invoice Date
- New Payments for Layaways
- Remove Layaway Status when payments are complete
To change anything else, the Invoice must be voided and a new one created.
Payment Methods
There are several ways to accept payment using BCSS:
- Credit Cards: Select the type of card that was used (Visa, MC, etc.). The amount of the sale will be entered as the amount remitted and can be changed.
- Cash. The amount of the sale will not be auto entered as the amount tendered which avoids having to remove an entry before typing in the amount tendered.
- Check: The amount of the sale will be auto entered as the amount remitted and can be changed.
- Deferred Payment: Enter the amount tendered in the First Payment-Method field and select the method of payment. In the second Payment-Method field choose Deferred Payment and the amount to be deferred. (If the entire amount is to be deferred, enter the amount of the sale as the first payment and select Deferred Payment as the method. Either way, BCSS will consider the transaction complete and include the amount of the sale in Daily Sales Recap.)
- Layaway is not in the list because it is a type of transaction and the scheduled payments must be entered where 'Enter amount # here' appears. For layaways, check the box at the bottom (This is a Layaway.) and enter the payment schedule on the right.
With Deferred Payment the customer is taking delivery of items purchased with a promise to pay later, so the store is essentially extending credit. For tax purposes adjustments may need to be made if the store is on a cash (not accrual) basis and payments are received in different tax years.
With Layaway the customer will take delivery of items purchased after payment in full. The program records payments as they are received. No adjustment would need to be made for tax purposes if payments span two tax years.
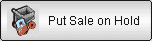
Pending Sale - Put a Sale on Hold
Any Sale (including Credit Memos, Buyer and Employee Credit Purchases, Layaways) can be put on hold any number of times. When completing a New Invoice, select:
When entering an unlisted item, a client (or the House Account) must be chosen before putting the sale on hold. When the invoice is retrieved for further processing the client can't be changed..
When a Sale in put on hold, it is saved and appears in Sales Work Area with a burgundy background.
Pending Sales do not reduce Inventory until finalized.
Locate Sales on Hold
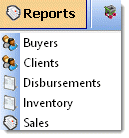
Select Reports from the Main Menu:

Select Sales:
Under 'Report Should Only Include' check Sales on Hold'.
Please refer to Reports for completing the report.
A sale (like invoice 1) can be put on temporary hold by opening invoice 2, 3, 4, or 5:

Multiple Invoices
The program opens a new invoice with an invoice number, but the sale might not be finalized for some time. During that time sales could be processed on other invoice pages. So when invoice 2 is finalized, the invoice number that would have been used for the first invoice is still available and is used for the second invoice. When invoice 1 is finalized, the program checks to see what the next highest available invoice number is and uses it. Going back to check for unused invoice numbers risks invoice ID collision.
"The header/footer doesn't appear on the invoice."
- In BCSS, click on File (upper left) then Program Setup then Sales.
By default the header/footer settings look like this:

- Click on the box (red arrow).
- A Windows Screen named 'Choose a Text File' will open. The folder should be the BCSS Program Folder:

- Click on header.txt.
- The 'path' for the Header File should now read: 'C:\BCSS\header.txt'.

- The 'path' for the Header File should now read: 'C:\BCSS\header.txt'.
- Repeat these steps for the footer.
- Click Save/Exit.
- Select a sale in the Sales Work Area.
- In the lower-left menu, select Print Sale.
- Scroll down to see the header and footer.
Adjust Header/Footer Position on the Sales Invoice
In Program Setup (Sales tab), the Header and Footer heights may be set. Normally .55 inches is correct for most laser printers. Increase the numbers to move the header/footer further down on the page.
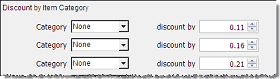
Special-Promotions - Store-Wide Sales, By Category and/or By Invoice Total
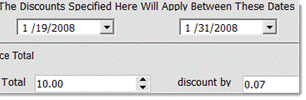
In addition to Discounts, Price may be reduced using the Special-Promotion Feature by designating a time period for the sale and the amounts to discount Invoices and/or Categories.
In the Sales Work Area, select Sales Promotions (not shown) from the lower left menu:
Set the inclusive dates for the promotion. (Use the down arrows to see calendars.) The discounts will only apply between the dates entered on the Sales Promotion Setup screen.
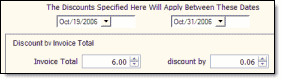
Set a progressive scale of invoice totals and how much discount to apply for invoices that total in the ranges specified. Example: Discount invoices totalling up to $6 by 6%.
If applicable, set discount amounts for chosen categories.
BCSS automatically computes these discounts from invoice total and categories and enters that total discount in the discount field on the invoice.
Sales Receipts
All editions of BCSS print sales receipts on letter-sized paper. This might be ok for an occasional receipt. Otherwise clients might think it's a bit strange to be printing receipts on 8x11 paper and this method also costs more in the long run (in ink and paper).
BCSS Deluxe, Diamond and Virtual print thermal receipts on 3" roll paper using (POS-X, Epson and Star) thermal receipt printers. This is the preferred method for printing a large number of receipts. The paper is 'cheaper' and there are no ink cartridges. Client expectations are met. A better impression is made.
BCSS Settings for Thermal Receipts
- Go to File > Program Setup > Printers.
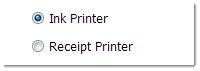
- In the Receipt-Printer section, select Receipt Printer:

- Just below that use the drop-down arrow to select the correct printer:
- Click Save/Exit.
- Close the program and reopen it to assure that settings have been reset. If not, turn UAC off (video).
BCSS Settings for Letter-Sized Paper
- Go to File > Program Setup > Printers.
- In the Receipt-Printer section, select Ink Printer:
- It is not necessary to designate the printer in the drop-down menu. With 'Ink Printer' checked, the program will use the printer chosen as 'Ink Printer' (in the first printer section on the setup page).
- Click Save/Exit.
- Close the program and reopen Program Setup > Printers to assure that settings have been saved. If not, turn UAC off (video).
Print Multiple Receipts
- A sales receipt can be reprinted by selecting the sale in the Sales Work Area and using Print Sale (lower-left menu).
- The number of multiple copies to print can be set in the printer's properties.
- An ink printer will present a print preview of the full-page receipt. Click the print icon to print the receipt and if desired, change the number of copies to print.
- A receipt will print a copy of the sales receipt, or it will print the number of copies set in properties.
Custom Messages on 3" Receipts
Note: Any string of 50 characters or less entered in the Email and Website fields in Program Setup (General tab) will appear on 3" sales receipts. Messages, like 'All Sales Final' or 'Thanks for shopping with us!'.
Custom Messages on Full-Page Receipts
Edit header.txt and footer.txt in C:\BCSS to customize messages appearing at the bottom of the full-page receipt.
Refunds
A credit cannot be processed for an item that has been deleted from inventory. It's advisable not to delete inventory items for a lengthy period of time, or limit the time after purchase for returns.
It might seem like good store policy to allow items to be returned, but consider:
- How many returns might there be in a year's time? Just a handful?
- Consignment-store patrons know they are purchasing used merchandise and they are aware that they have the opportunity to inspect those items prior to purchase. A store policy of 'no returns' is widely accepted if not expected and if prominently displayed, should satisfy any 'full-disclosure requirement'.
- If buyers are made aware of a no-return policy, is there any risk of business lost?
- The concepts and procedures of 'Credit memos' and 'store credit' are major sources of confusion which can be avoided by not allowing returns.
Full or Partial Refunds for House-Account Items
Retail and buy-outright merchandise is shop owned, so process a Credit Memo for returned shop-owned items to refund the money and return the items to inventory. BCSS only shows one pay method (Return) but an actual payment can be made as needed.
Full Refund (purchase price plus tax refunded) -
- Select Credit Memo from the Sales Menu.
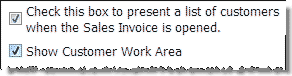
- In Diamond and Virtual program setup on the sale tab, if 'Check this box to present a list of Buyers when the Sales Invoice is opened.' and 'Show Buyers Work Area' are checked, a list of buyers appears when Credit Memo is selected.
- Select the buyer from the list. (There is no buyers list in BCSS Deluxe.)
- 'Return' will displayed at the right...
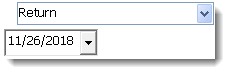
- ...and at the bottom under 'Terms':
- Enter the Item # and press the 'Retrieve-Item-Info button', or press the 'Select-an-Item' to select the item from the list, or click in the barcode field and scan the barcode. (If the item has been deleted from inventory, it will not appear in the list. If the item had been sent to Storage, it may be retrieved.)
- Return the amount shown in the 'Due' field to the Buyer. (See Refund for Store Credit if applicable.)
- Press 'Save, Preview, Print' to print the Memo or click 'Save' to save the Memo without printing it.
The total purchase price is refunded. The item is returned to Inventory and the shop and consignor balances are adjusted.
Partial Refund (Buyer will keep the item and receive a partial refund) -
- Select Credit Memo from the Sales Menu.
- If a list of buyers appears, select the buyer from the list.
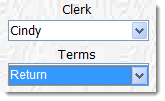
- The option named 'Return' will be selected and highlighted in blue:
- Complete as much Buyer information as desired on the Credit Memo screen and check Discount.
- Enter the item # or press the Item List button and select the item from the list. (If the item has been deleted from inventory, it will not appear in the list. If the item had been sent to Storage, it may be retrieved.)
- Change the unit price to reflect the amount of credit.
- If more than one item is involved change the quantity. (Taxes will be computed automatically.)
- Return the amount shown in the 'Due' field to the Buyer.
- Press 'Save, Preview, Print' to print the Memo or click 'Save' to save the Memo without printing it.
A discount transaction (partial refund) will reduce store revenue but will not change inventory.
The shop and consignor balances are adjusted.
Refund for Store Credit
A record must exist in the program for the person receiving a refund of store credit. The Diamond and Virtual editions of the program can record buyer information. Intro and Deluxe editions cannot. (See instructions below for Intro and Deluxe editions.)
Refund for Store Credit - Diamond and Virtual Editions
- If a record does not exist, in the Buyers Work Area, select New Buyer (lower-left menu) and create a record.
- Click 'View All' to refresh the list of buyers and select the person from the list.
- Choose Credit Memo (lower-left menu). The 'Credit-Memo' screen will open populated with the client's information.
- Enter the Item # and press 'Retrieve-Item-Info', or press the 'Select-an-Item' and select the item from the list, or click in the barcode field and scan the barcode. (If the item has been deleted from inventory, it will not appear in the list. If the item had been sent to Storage, it may be retrieved.)
- Return the amount shown in the 'Due' field to the Buyer.
- Press 'Save, Preview, Print' to print the Memo or click 'Save' to save the Memo without printing it.
The buyer's record will contain the amount of the store credit. To use the credit for purchases, select the buyer's record in the Buyer Work Area and choose 'Credit Sale' (lower-left menu). (details)
Refund for Store Credit - Intro and Deluxe Editions
Intro and Deluxe do not have a 'Buyer Work Area' for recording information about those who make purchases but a record can be created for a buyer by creating a consignor record (for the purpose of tracking a store credit).
- Press F2 to open the new-client screen, or choose 'New Client' (lower-left menu) in the Clients Work Area.
- Only an ID and name are required. Other info may be entered. The consignor % may be ignored.
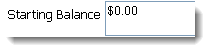
- Enter the amount of the credit in the Starting-Balance field (on the right):
- Save/Exit.
- With new record selected (blue background) choose 'New Settlement' (lower-left menu).
- For Payment Method use the menu and select 'Store Credit'.
- Save and Exit.
- Close the program and reopen it to refresh the data.
- Select the person in Clients.
- Store Credit should show the amount refunded.
BCSS Sales Reports
On the Sales Recap Report 'Total Sale' is the total of prices of items sold. 'Payments Recap' is a total of payments collected. When there is a difference, the amount collected was not the same as the amount due. Go through the invoices listed to find where this was the case.
There are many sales reports in BCSS and a variety of ways to produce them.
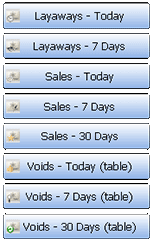
1. Quick Links - 'One-Click Reports' in the Sales Work Area for immediate access to pre-defined information: Layaways, Sales and Voids for the Day, Past 7 Days or Past 30 Days (displayed in the Main Table):
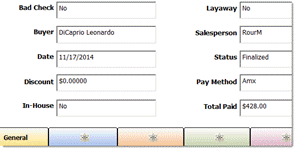
2. Details Area: In the Sales Work Area, select a sale in the Main Table and view information about the sale at the bottom - Bad Check, Buyer, Date, Discount, In-House Sale (yes or no), Layaway (yes or no), Salesperson, Status (On Hold, Voided, Finalized), Pay Method, Total Paid:
3. List of Sales
The list of sales in the Sales Work Area is a 'report' of sorts. The columns can be sorted by clicking on the column headers and records can be found by clicking in the search box.
...and typing an invoice number or name. (Go to File > User Interface to set a search preference for search by invoice or search by name.)
3a. Time Filters
Use these buttons:

to see records added or edited for the time period chose. View All will list all records again.
4. Function Keys
Press F9 for a sales-recap for 'today'.
Press F10 for items sold for 'today'.
5. Items Sold This Month for 1 Client
In the Clients Work Area, select the client from the table and press 'Items Sold Month' on the right.

6. Create a Detailed Sales Report using these 'filters':
Bad Checks, Buyer, Category, Client, Credit Memos, Inventory Location, Invoice Date, Invoice List, Invoice Total, Item Number, Items Sold, Layaways Excluded, Layaways Open (Current), Payment Method, Sales on Hold, Sales Recap, Sales Today, Salesperson, User-Defined Groups (4), Voids
Begin by selecting Reports on the Main Menu:
then select Sales:

Make Report Settings
Check options and enter ranges to include/exclude sales from the report.
For example to include only sales which are not layaways, sold by salesperson Mandell for October 3rd and 4th:
1. Check 'Not Current Layaways' (to exclude layaways from the report).
2. Select 'MandH' from the Seller drop-down menu (to only include sales made by that salesperson).
3. Check 'Invoice Date' and enter the date range (to include only sales made in period).
Note that check boxes must be checked for ranges to apply. If the From and To fields are completed but the check box is not checked (like Invoice Date in this example), the From and To range (the 'filter') will not apply.
![]() There are new options for layaways:
There are new options for layaways:
- Only Layaways in Payment Recap
- No Current Layaways in Payment Recap
- Choosing neither will include layaways in a separate section of the report.
- The first option will show only current layaways.
- The second option will show no current layaways.
Sort Report Output
- Client Reports can be sorted by ID, Name, New-Item Date or Settlement Date.
- Buyers Reports (Diamond and Virtual) can be sorted by Name, Dollar Volume, Last Purchase Date or Zip Code.
- Disbursement Reports can be sorted by Date or Payee.
- Inventory Reports can be sorted by Category, Client, Date In, Discount Date, Item ID, Price, Quantity or % Share.
- Sales Reports can be sorted by Buyer, Category, Client, Invoice Date or Salesperson.
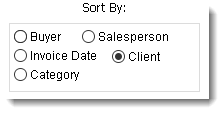
Important: For Sales Reports select 'Sort by Client' only when using the Item-Sold List. Other Sales Reports are based upon invoices (which often have more than one client). If other Sales Reports are sorted by client, invoices may be counted more than once in computing totals.
Print the Report
Selecting Print Invoice List -
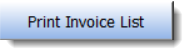
will display the report in a Print-Preview Screen.
Print the Report by clicking on the print button (yellow arrow).

View the Report in the Main Table
Selecting View Invoice List

will display the report in the list.

Click on any Sale to view details about it in the Details Area at the bottom:

Shop Sold List

Pressing Shop Sold List (at the bottom of the Sales Report Screen) will present a report showing Item ID, Description, Category, Price, Quantity, Date Sold, Invoice # (and 'Sold By' in BCSS Diamond and Virtual) for each item sold for the current day (if no date filter is set). Click the printer icon at the top of the report window to print the report.
Consignments-Sold List

This report includes Item ID, Description, Category, Price, Quantity, Date Sold, Invoice # and Payment Method for consignments sold.
Buy-Sold List

This report includes Item ID, Description, Category, Original Price, Quantity, Sale Price, Buy Price and Profit for shop-owned items.
Sales Recap

Pressing the Sales Recap Button will present a list of sections (not shown) for Invoice List, Salesperson Recap (in BCSS Diamond and Virtual), Payment Recap and Shop Totals. Uncheck sections to be excluded from the Sales Recap Report. Press the Preview/Print Button to preview the report. Click the printer icon at the top of the report window to print the report.
This is the information displayed in each Recap. (Buyer and employee information appear in Diamond and Virtual only.)
- Invoice List: Date, Invoice #, Buyer, Sale Amount, Tax, Sale Total, Pay Method
- Salesperson Recap: Salesperson, # of Sales, Amount
- Payment Recap: Type of Payment, # of Payments, Total
- Shop Totals:
Sales (before tax): Gross sales receipts including consignor/vendor and shop-owned inventory plus finalized layaway sales.
Client %: Client's share of sales proceeds
Buy-Outright Cost: Total paid for inventory purchased by the shop
Employee's %: Commissions payable to employees
Other Payments: Any payments entered as disbursements in the program
Promo Discounts: The total of discounts absorbed by the shop
Profit/Loss: Sales minus above costs
Buyer Fees: Total reductions before settlement
Tax(es) (split if 2): State and local sales tax amounts. If sales tax changed during the report period, all taxes charged are listed.
Non-Taxable Sales: Total of sales not subject to sales tax
Sales Recap 'Errors'
Account History is an explanation of a client's account balance. The person in charge of 'the books' at the store must have a thorough understanding of the concepts of accounting as they apply to the consignment/resale business.
Payment Recap is a total of recorded amounts received. The other sections of the Sales Recap are based on prices of items sold. Go through invoices for the period in question and look for differences between payments and prices.
Profit/Loss Breakdown
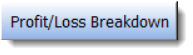
Profit/Loss Breakdown generates a list of sold items showing costs related to each item including client share, employee share, promotional discount, buy-outright share and retail cost with totals by client and grant totals. A net profit/loss appears last and takes bills paid (Disbursements WA) into account.
On the sales report screen:
- Designate how the report should be sorted (lower left) :
- Check the Invoice-Date Box. This must be done for the date range to apply.
- Enter a date range.
- Press Profit/Loss Breakdown.
The report will be presented in a print preview. To print the report, click on the printer icon (upper left):

Common Mistakes
- Changing an employee ID
- Assigning buy outrights to the House Account
Mall Activity Report

This report prepares a print preview of the first page of the first client. Subsequent client reports can be viewed by using the scroll button on the print-preview screen at the top left.
For a client to appear in the report, he or she must have:
- an assigned space
- at least 1 rent payment made
- at least 1 settlement
- price of item sold greater that 0
Printing will print all pages in the report, one at a time.
If a client qualifies then terminates their rental agreement and the space is reassigned, the client that terminated the agreement will no longer qualify for this report. To avoid problems, print out the terminated client's report when the agreement is terminated and give it to him or her. Keep a copy.
Print a single report by choosing the client from the drop-down list on the sales-report screen before running the report. If desired, set an invoice-date range to reduce the number of items in the report.
Consignment Rewards Program
Three Sales-Tax Settings:
- Local Tax (in Program Setup; City/County in the U.S., PST in Canada)
- Sales Tax (in Program Setup; State in U.S., GST in Canada)
- Tax by Category (Inventory > Categories)
Tax rates are set in Program Setup, Sales.
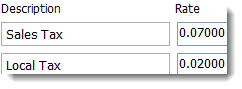
Two tax fields are provided. Enter applicable descriptions and rates (in decimal form). Example: Enter .07 for 7%. The display will be to 5 decimals places.
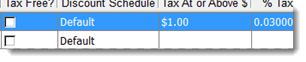
In this example, all Antiques priced at $1 or more are to be taxed at 3%. Tax rates can be set by category. Click on Inventory then Categories. Options are 'Tax Free', or enter a dollar amount for tax to be applied (at the amount or above) and under '% Tax' enter a decimal value for the tax rate for the category.
Tax Options
- If only one tax is entered in Program Setup, each line item on an Invoice will be tax or no tax.
- If both taxes in Program Setup are present, each item on an Invoice will have four tax options: none, tax 1, tax 2, or both (as a total of the two). (Click the down arrow to view them.) They will be combined as a total on the Invoice and in sales reports but will print separately on the Sales Receipt.
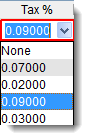
- Taxes can be assigned to specific categories (Inventory > Categories). If category taxes are defined, they will appear after the taxes in Program Setup in the dropdown menu. In the image above, .03 is the only category tax assigned, and it appears after the list of sales-tax options defined in Program Setup.
New invoices have a non-tax check box which applies to the entire invoice.

On the New-Sale Screen (F6):
Sales Taxes are automatically calculated and displayed as one total.
Put a check in the Non-Taxable Field if all items on the invoice are nontaxable.
For each line item, click on the box below Tax % and select the applicable tax.
Sales Receipts
If 2 taxes apply, they will be printed separately on Sales Receipts.
Tax Reports
To generate a Tax Report:
- Click on Reports then Sales.
- Make settings on the Sales Report Screen to control which taxes are to appear in the report:
- To see all taxes for a specific period, check Invoice Date and enter the date range.
- Select a Buyer, Category, Client or Salesperson to see applicable tax.
- Press Sales Recap (lower right).
- Uncheck the first 3 options.
- Press Preview/Print. (If there is more than one page displayed, use the right arrow in the top menu to go to the last page.)
The Shop Totals part of the Sales Recap Report will show separate totals for taxes even if they were applied together on Invoices. The last line in the sales tax break out will be total non-taxable sales.
Tax Rounding
The final tax on every invoice must be rounded (up to the nearest cent) but BCSS reports will show tax amounts to 5 decimal places, which is the amount to be paid to the taxing agencies. That amount may vary slightly from the actual amount of tax collected, but BCSS doesn't show the difference.
![]() The State of Maryland, for one, requires that sales tax be rounded up to the next cent for any fraction of a cent. To activate this option, check Always round taxes up. in Program Setup on the Sales tab.
The State of Maryland, for one, requires that sales tax be rounded up to the next cent for any fraction of a cent. To activate this option, check Always round taxes up. in Program Setup on the Sales tab.
New N.Y. State Tax Rates (2010)
These are the new tax rates for 2010:
- (A) Non-taxable items
- (B) Fully-taxable items
- (C) Fully-Taxable (clothing) > $110
- (D) Partially Taxable (clothing) <= $110
This is how one user configures BCSS for the new tax rates:
- In Program Setup, Sales tab, set categories to be taxable or not.
- Set Clothing as non-taxable 'yes' - then set the 'over taxable amount' to 109.99.
- For purses set up a category of accessories - non-taxable.
- For belts, hats, etc. set up a category of accessories - taxable.
Split Payments
![]() On the Consignment-Credit-Sale Screen, Consignment Credit Sale is now auto entered as Payment 2 and is unchangeable (for payment method). If a settlement has been made for Store Credit, the amount of Available Credit will be displayed. Enter the remaining payment in Payment 1. If the total payment exceeds the amount of purchase, Change Due will be displayed.
On the Consignment-Credit-Sale Screen, Consignment Credit Sale is now auto entered as Payment 2 and is unchangeable (for payment method). If a settlement has been made for Store Credit, the amount of Available Credit will be displayed. Enter the remaining payment in Payment 1. If the total payment exceeds the amount of purchase, Change Due will be displayed.
Split Payments
Payment for purchases can be split into 6 different methods of payment: Cash, Check, Credit Card, Debit Card, Gift Certificate and Deferred Payment.
For example, if a Buyer pays $50 in cash, $50 by credit card and $50 by gift certificate, separate 'Payment Method' fields must be completed for cash, credit card and gift certificate.
On the New-Sale Screen (F6), click the blue arrow (to the right of Choose Payment Method 1) and select the Payment Method, and replace 'Enter amount 1 here' (or the amount that was auto-entered) with the amount of the first type of payment:
For the second and subsequent payments, place a check mark in the box
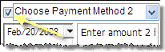
and repeat the steps above, selecting the Payment Method and entering the amount.
The check box must be checked for each type of payment or split payments will be ignored, even if amounts are entered.
All splits will have the same Payment Date.
What is Store Credit?
Tax-Free Items
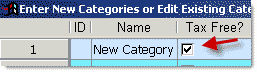
Set up specific categories as designate them and check 'Tax Free':
Tax will not be calculated when such items are added to the Sales Invoice.
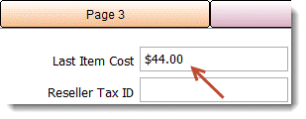
Tax-Exempt Resellers
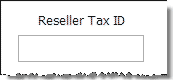
Entering a Tax ID in 'Reseller Tax ID' on a New-Sale Screen automatically changes the invoice to tax-exempt status.
If 'Show Buyer Work Area' has been checked in Program Setup (Sales), future sales to the same Buyer will be tax exempt.
Tax-Exempt Items
Some states only tax an item (like clothing) if its selling price is above a given amount. To process such items as tax exempt, set up one or more categories (Main Menu, Inventory, Categories) like 'clothing' and enter the applicable amount in the 'Tax Above $' field:

Alternatively the Sales-Tax Rate for single items may be changed on the Sales Invoice to be any value, including zero.
Tax-Free Invoices
On the New-Sale Screen, to make all items tax-free check 'Non-Taxable'.
Process a Trade
Exchange items for equal or unequal value and record the transactions as buys and sells:
- Process a buy-outright transaction for the item taken in trade. Enter a buy price equal to the amount agreed upon.
- Sell the store item being traded at the agreed price.
- For an equal trade no cash changes hands.
- If the customer's item is worth less, collect the difference from the customer.
- If the customer's item is worth more, pay the difference to the customer using the New Disbursement feature.
Check with your tax consultant. Barter transactions may be taxable. This information is not intended to provide tax advice.
Viewing a Sales Invoice
Once a Sale has been saved, the existing Sales Invoice may be viewed.
Only these changes may be made when viewing an existing Sale:
- Bad-Check Status
- Invoice Date
- New Payments for Layaways
- Remove Layaway Status when payments are complete.
To change anything else, the Invoice must be voided and a new one created.
View the Original Sale
Select Sales in the Work-Areas Menu:
Select the sale from the Table.
Select View Sale (not shown) from the Sales Menu:
Void a Sale
Note: A voided sale can't be reversed because prices and quantities are lost upon voiding.
Reversals for discounts and partial returns can be made using the Credit Memo Function.
Once an invoice has been saved, only these changes may be made when viewing an existing sale:
- Bad-Check Status
- Invoice Date
- New Payments for Layaways
- Remove Layaway Status when payments are complete
To change anything else, the Invoice must be voided and a new one created.
To Void a Sale
Go to the Sales Work Area:
Select a Sale from the List of Sales.
Select Void (not shown) from the Sales Menu:
When a sale is voided, the record of the sale remains listed in the Settlement Work Area Table.
Voiding a sale returns all items on the invoice to inventory and all transaction amounts are set to zero. The data is not saved, so a voided sale cannot be undone. The sale must be reentered to redo it.
Voiding after commission payment does not reverse the commission. The Employee Work Area provides ways to adjust employee account balances if necessary.
Sold Item in Wrong Consignor Account
If an item is in inventory under the correct consignor account, the latter will be credited with the appropriate share of proceeds from the sale of the item.
If an item is in inventory under the incorrect consignor account, the latter will be credited inappropriately with the share of proceeds from the sale of the item.
Occasionally when entering an unlisted item, the clerk may choose the wrong consignor from the drop-down menu on the line item. This may be more frequent where numbers are used instead of names or partial names for client IDs.
Credit the Correct Consignor Account
- Select the applicable sale in the sales work area.
- If there is more than one item on the invoice, make note of all other items on the invoice.
- Void the invoice.
- Create a new invoice with the same date as the original sale.
- Reenter the item(s) (that were correct) and save the sale under a new invoice #.
- In the client work area select the client in question.
- Press F7 or click on new settlement.
- Verify that the item in question appears in the settlement list.