Search the BCSS Manual
Buyers, Consignors, Employees, Sellers, Vendors
Clients
Individuals consign with you (consignors), sell to you (sellers), rent space (vendors) and make purchases (buyers).
For our purposes:
- Consignors, vendors and sellers are 'clients' (adding inventory).
- 'Buyers' are customers making purchases (removing inventory).
- Buying merchandise from individuals is 'resale' or 'buy outright'.
- Buying merchandise from companies (suppliers, wholesalers, manufacturers - not individuals) is 'retail'.
Buyers = Customers Making Purchases
(The Buyers module is not available in Intro or Deluxe.)
![]() Discount % Enter a discount (in decimal form) on the Buyer-Edit Screen to have the percentage deducted from the buyer's invoice.
Discount % Enter a discount (in decimal form) on the Buyer-Edit Screen to have the percentage deducted from the buyer's invoice.
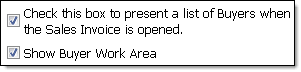
Important! In Program Setup (Sales), 'Show Buyers Work Area' must be checked to display the Buyers Work Area. Also, 'Check this box...' must be checked to present a list of Buyers when the Sales Invoice is opened.
Watch this video on how to hide the buyer's list at POS.
Buyer Records are comprehensive yet easy to use. Each record can include a number of identifiers and notes, making buyer management easy, precise and thorough.
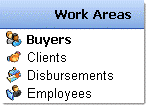
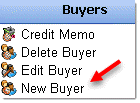
Access the Buyers Work Area by selecting 'Buyers' under the Work-Areas Menu:
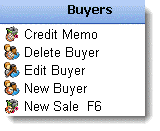
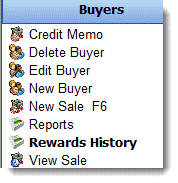
Selecting Buyers displays the Buyers Menu at the bottom left:
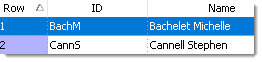
Buyers are listed by ID and Name. Click on the headers named ID and Name to sort the list. Click again to reverse the sort. Use the scroll bar on the right (not shown) to locate a Buyer:
(Note: If buyer names are entered as 'last-name-first' (no punctuation), names will be in logical order when lists and reports are sorted by name.)
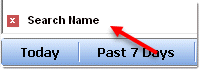
Click these options on the Time-Sort Bar to view Buyers Records which have been added or edited today, in the last 7 days, last month or last year:

Click 'View All' to see all Buyer Records.
Click in the box...
...and press the first few letters of the name.
Select a Buyer Record by clicking on the record once. (The background color will turn dark blue.)
The Details Area at the bottom shows information related to the Buyer selected:
The General Tab shows contact information.
The Demographics tab shows possible descriptors for the Buyer. (Demographics are 'labels' (like Income, Employer, etc.) that can be assigned to any Buyer, then reports may be generated based upon Demographics.)
The History tab lists purchase history.
Notes are additional information for shop eyes only.
(Note: Information cannot be edited on the Details screen. Scroll down to 'Edit a Buyer Record.)
Add or Edit a Buyer Record
(Diamond and Virtual only.)
![]() Import Buyer Data - Records for Buyers may be created or edited in BCSS in batch by importing data from a spreadsheet.
Import Buyer Data - Records for Buyers may be created or edited in BCSS in batch by importing data from a spreadsheet.
Add a New Buyer
Select New Buyer in the Buyers Menu:
The next available Buyer ID # is auto-entered.
Enter as much information as desired. Enter a birth date and check Send Mailings if applicable.
Check 'No Credit-Card Fee' if the buyer is to be exempt from paying extra for purchasing with a credit card.
Click the Demographics tab to enter that information or click OK to save the Record.
The last field on the Demographics screen is 'User Text'. ('User' simply means that the person using BCSS determines or 'defines' what the text will be, hence, 'User Text'.)
Any 'string of characters' may be entered as 'User Text' to uniquely identify a Buyer or Buyers, then in reports Buyers may be grouped or singled out by the User Text.
For example, enter 'best' in this field for your 'best Buyers'. Later on create a Report and use the User-Text as the search parameter (or report filter), entering 'best' (without quotes).
Delete a Record
Select a Buyer Record from the List and click Delete Buyer in the Buyer Menu. Some records cannot be deleted if they are tied to active transactions.
Edit an Existing Record
Double click on a Buyer to open its Edit Screen.
Change any information or add Notes then click OK to save changes. Note that a Buyer may be marked as Inactive at any time. This is useful for excluding 'Inactive Buyers' from buyer lists.
Buyer Notes
Two notes may be added to any Buyer Record - Shop Notes and Invoice Notes.
Notes can only be added to an existing Buyer Record. They cannot be added when first creating a Buyer Record.
Shop Notes are for 'shop eyes only'. They are convenient reminders and a great way to share information with all Employees, from 'Don't accept credit card payment' to 'Had a baby girl in January'. Several notes may be recorded.
Personal Invoice Notes appear on the Buyer's Invoice and can be anything, like 'Thanks for shopping with us Mary!' - up to 60 characters.
Add a Shop Note
In the Buyers Work Area, click on a Buyer Record the click on Edit Buyer (lower-left menu) to open the Edit-Buyer screen:
Enter a note of any length in the large box (not shown). Click OK to save.
Add a Special Message to Any Buyer's Invoice
Enter any message of up to 60 characters in the small box (not shown). This message will appear when an invoice is prepared for this Buyer and will be printed on the invoice when the invoice is printed.
Open a New Sale (F6)
Choose a Buyer. Press F6 to open the sales screen or use 'New Sale' at the bottom left, or use 'New Sale' on the right. The Invoice will appear with the Buyer's info entered.
IF the Buyer was not selected prior to choosing one of the three options, the Sales Invoice will be preceded by list of Buyers. Select one to proceed.)
Sales Tax #
Edit a Buyer's record to add a Sales Tax # in the Tax Exempt ID Field.
Address Labels
Instructions for printing address labels from sheets are the same for BCSS Intro, Deluxe, Diamond and Virtual. Labels for buyers can only be printed with BCSS Diamond and BCSS Virtual.
Address Labels are printed on 2 5/8" x 1" adhesive labels, 3 across, 10 down, 30 labels per sheet. The Avery Label #s are 5160 (LaserJet), 8460 (bubblejet) and 4144 (dot matrix).
Before attempting to print labels, in BCSS go to File, Program Setup, Printers and designate a printer for 'Ink Printer'. An ink printer is any ink or dot matrix printer that commonly prints on standard 8.5" x 11" letter-size paper.
First confirm that the printer is working. Open Notepad, type a few characters and press Control + P.
If test print didn't print, turn off the computer and printer. Check cable connections. Turn the PC and printer on. Make sure the printer software is installed by verifying that the printer is listed in the Control Panel > Printers. Verify that the printer has ink and paper and that there are no paper jams.
Open the Address-Labels Screen
To access the Address-Labels Screen, select Labels:

- With BCSS Intro, after clicking on Labels, select Address Labels.
For all BCSS editions, the Labels Screen will be presented. (Applicable sections of the Screen are shown below.)
Group Clients for Labels
Tell BCSS exactly for whom labels are to be printed by making settings on the Address-Labels Screen.
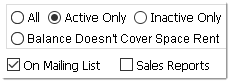
Example 1: To print labels only for Active Clients who are on the Mailing List, check Active Only and check Mailing List:
Example 2: Print labels for All Clients within the zip-code range From 22222 To 33333
Note that the box must be checked for the range (filter) to apply.
Before printing, decide in which order the labels should be printed. Group the labels for orderly tagging.
Select Mailing Labels on Avery Stock:

Labels will be displayed on a 'Print-Preview Screen'. If undesirable names appear or if some are missing, close this screen and change the settings to add or delete names, then preview again. If the labels are correct, use the Printer Icon:

Buyer Credit Limit
An amount may be entered as a 'Credit Limit' for any buyer by editing the record:
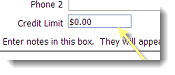
This amount is for reference only and does not enter into BCSS calculations or reports. It serves as a 'note' for all employees so they may know what a buyer's credit limit is without having to ask the store owner (in the buyer's presence). This is rarely used in most stores.
(Diamond and Virtual. With Virtual customers can view their Rewards-Points balance online.)
Consignment Rewards Program
Promote customer loyalty by awarding and accumulating dollar discounts (as a percentage of purchase) for future purchases. (Cents won't be displayed in the program.)
Adjust Credit Amount
- Select a record in the Buyers or Clients Work Area.
- Click on Reward History.
- When the display is complete, click on Close.
That should correct the rewards total in the database.
Activate the Feature
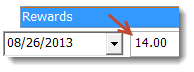
In Program Setup on the Sales tab, check 'Enable Rewards' and use the up/down arrows to set the percentage of sales to be awarded:

(.02 = 2%.)
With Rewards activated -
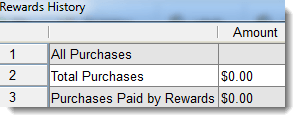
- 'Rewards History' will appear in the lower-left menu in the Clients and Buyers Work Areas. If it is not showing, close the program and reopen it.
- Clicking that link will present this information for the selected buyer or consignor:
Apply Rewards Dollars to a Sale
- Process a new sale.
- For the first payment method, select how the remaining balance will be paid (Cash, check, credit card, etc.).
The purchase amount will be auto-entered (except for cash) as the amount of payment and can be edited.
- Check 'Choose Payment Method 2'. (The box must be checked.)
- Select Rewards as the payment method.
The reward amount will be shown as a negative in 'Due'. Don't change it.
- Save the sale.
The program will correctly apply the amount of Rewards against the sale and reduce the first payment amount accordingly.
The amount of rewards available are entered automatically. They can put rewards in pay method 1. Any negative amount due showing will be deducted from pay method 1. The program will reduce the rewards available by the amount used and increase rewards available by the percentage of the amount paid by other pay methods.
Rewards Reporting
Rewards aren't a cash in/out matter, so they are listed in the Sales Recap > Payments list.
Rewards are not part of the Account Balance, so they don't belong in the Account-History report. View Rewards for individuals by clicking on Rewards History (lower-left menu) in the Buyer and Client Work Areas.
Online Access
The Rewards Program is available in BCSS Diamond and BCSS Virtual.
Customers (of stores using BCSS Virtual) can view their rewards points online. It would be necessary to upgrade from BCSS Diamond to BCSS Virtual for customers to view their rewards points online. Please email support for details. Upgrading would be $200 plus $89 for the first-year online access, then $189 annual renewal.
Rewards Accounting
Each client will receive his or her full share of the sales split when Rewards are used. The store absorbs the cost of the Rewards Program.
Notes:
- Whole dollars are used.
- If the dollar amount of Rewards exceeds the purchase total, the program will display the amount of cents to be collected.
- If the sale is saved with a negative balance in the Due field, the first payment will be adjusted by the amount of the negative. Use the second payment method for Rewards to avoid having Rewards adjusted downward in this situation.
- Bonuses from transactions recorded in pre-Rewards versions of BCSS won't show in rewards available. To correct this open the Rewards History for the person and close it.
Buyer Reports
A 'Buyer Report' is essentially a list of buyer-related information, similar to a Google search result but without 'close matches'.
Select Reports then Buyers:
Determine Report Content
Settings on the Report Screen determine the information to be included in the report.
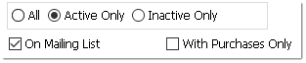
For example, to create a list of Buyers who are Active, who are on the Mailing List and who purchased during 3/18/2018 through 3/18/2019:
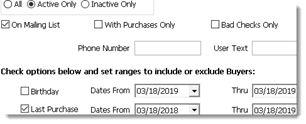
1. Check "Active Only'.
2. Check 'On Mailing List'.
3. Check 'Last Purchase' and enter 9/1/2009 in the From field and 9/11/09 in the To field.
Boxes must be checked for settings to apply.
Buyers may be included in the Report based upon Active/Inactive status, User Text, Bad Checks Only, Birthday, On Mailing List and/or With Purchases Only.
Sort Output
The content of the report may be sorted:

Print the Report
Selecting Print the Report -
will present the Report is a Print-Preview Screen:
The report may be printed by pressing the printer icon (yellow arrow).
Selecting View the Report

will present the information in the Main Table.
Time Filters
Click on these buttons:
to only display records that have been edited or added during the time period chosen.
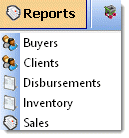
Quick Links
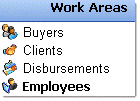
BCSS is divided into Work Areas. They are:
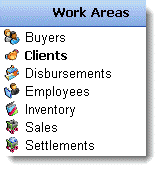
Each Work Area has its own set of Quick Links. These are the Quick Links for Buyers:
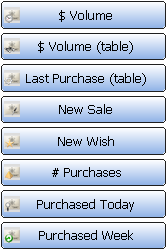
$ Volume - View $ Volume of Purchases in print preview.
$ Volume (table) - View Buyers in the Main Table sorted by $ Volume
Last Purchase (table) - View Buyers in the Main Table sorted by date of last purchase.
New Sale - Select a Buyer and open a New-Sale Invoice with the Buyer's information entered
New Wish - Select a Buyer and open the Buyer's Wish List
# Purchases - View a list of buyers sorted by their # of purchases
Purchased Today/Week - View Sales for Today and the Last 7 Days
Individual Buyer Information
Select a Buyer in the Main Table then view information about the Buyer in the Details Area at the bottom:
Click on the colored tabs at the bottom to view different screens of information (Demographics, General, History, Notes).
Wish Lists
The BCSS Wish List function matches in-stock items to items buyers wish to buy. BCSS compares the details of a 'wish' to descriptions of items in stock and returns a list of matching items.
Enter a New Wish
- Create a New-Buyer Record for the buyer.
- Go to the Buyers Work Area and click on 'New Wish' in Quick Links:

- Enter as much buyer information as desired.
- Enter an item description and/or item details and/or select a category and click OK.
Match a Wish to an Inventory Item
On the next screen (named View Wish List) all Wishes will be listed in the upper portion of the screen under

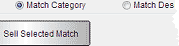
At the bottom select Match Category or Match Description and Details:
Under Requests on File, select the item entered. All items matching either the category of the item or the Description and Details of the item will be presented under.

BCSS searches for items based upon the Description and Details entered so place the most descriptive words first to describe each item in the Wish List.
Matches returned might contain more than the search text, but they will at least contain all of it.
Any Wish may be edited by selecting Edit Selected Request:

Items may be deleted from the list using Delete Selected Request:

Sell a Matching Item
To sell a selected match, select the item and press Sell Selected Match:

Follow the procedures for completing the New-Sale Screen. the item and buyer contact information will be pre-entered. More items can be added to this New Sale by entering in Item # or selecting from the Item List.
View the Wish List
Click on Sales and select View Wish List.
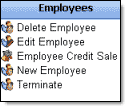
Employees
(Diamond and Virtual.)
Employees can be entered into the system and assigned usernames and passwords. Each can:
- have a different commission schedule
- be granted or denied access to any information or function
- make purchases by layaway, account receivables or a debits against future commissions.
- manage his or her own till
- have detailed reports of sales and commissions
- be terminated and reinstated
Each person should have his or her own till and only make sales when logged in. By doing so each person's transactions are kept separate and can be audited during and at the end of each shift. At any time, the amount in the till should match the 'Deposit' total shown on the Shift Report.
BCSS tracks each employee so if an employee makes sales from different computers in the store network, the correct totals will be provided for the employee, even if the audit or close out is done from yet another computer.
Employee Credit Purchases
Employees may make purchases. The purchases can be layaways or a debits against earned and future commissions (Employee Credit Purchase.
Employee Permissions
Grant or deny each Employee access to Point of Sale, Back Office and Management Areas (or specific sections within those Areas).
Things to Know about Employees
BCSS Employee Data Includes:
Employee Account Setup
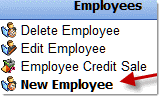
- Select Employees in the Work Areas Menu:
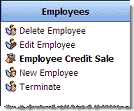
- Select New Employee in the Employees Menu:
- Enter information on the Add-New-Employee Screen/
- A Username and Password may be assigned to allow access to specific areas in BCSS and to perform a number of functions. See Employee Permissions for defining those areas and functions.
- If a Flat Commission is entered, enter the amount without the dollar sign.
- Enter the Commission Rate in decimal form (.1 = 10% for example).
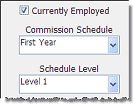
- Use the drop-down menus to change Hire Date and to select Commission Schedule and Schedule Level. (A different Commission Schedule may be assigned to each Employee. Commission Schedules will not appear until at least one Schedule is defined. Create at least one Commission Schedule before attempting to assign a Schedule to an employee.)
Edit an Employee Record
In the Employee Table, double click on an Employee Record to open the edit screen. Make changes and click OK to save the changes.
(BCSS Diamond and Virtual. In Deluxe there is only one clerk which is assumed to be the store owner.)
Using Cash Drawers
Each owner and employee can be granted or denied access to the cash drawer (in the Diamond and Virtual editions using the Employee-Access feature).
Each person with access can have his or her own drawer tray (aka 'till') and log in and out of the software to process sales.
If this feature is not used, there will be one cash drawer for the shop for all to use. 'Store Owner' will be displayed as the sales person.
Cash Drawer Balance
The Cash-Drawer-Balance feature records a starting balance and all payments received 'in real time' during the day (or shift). The amount of money in the drawer (cash and checks) and credit-card payments should be the day's starting balance plus cash, check and credit-card payments received.
The Cash-Drawer-Balance feature can also track each salesperson's cash-drawer balance in real time and determine how much money should be in the person's tray at any time.
BCSS tracks each employee, so if an employee makes sales from different computers in the store, BCSS will provide the correct totals for the employee, even if the audit or close out is done from yet another computer (connected to the host computer on the network).
It is possible to do a close out at a POS for one employee if only one employee transacted sales at that POS station.
Things To Know
To simplify accounting, reserve the till for sales only and make settlement payments by check or with money not from the till. There is no way to know from whose till a payment was made other than to deny employee access to settlements and not pay settlements from tills.
Do not use sales reports to balance the cash drawer. Sales reports include finalized transactions only. Layaways aren't finalized until the last payment is made or until they are abandoned and closed out, so they will not be included in sales reports until they are finalized. Layaway payments will be included in the cash-drawer balance.
Employee Cash-Drawer Management
Each employee to be tracked must:
- Sign in at the start of his/her shift.
- Port his/her tray from station to station.
- Sign out when leaving a station (to avoid entries being made by others using the employee's account).
- Secure the contents of the drawer.
Employee Log In and Auditing
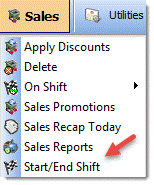
- Click on Start/End Shift on the Sales Menu.
- Enter the starting amount.
- Process sales.
- Any time during the day, count the drawer amount and return to this screen.
- 'Ending Till' is all sales receipts including cash, checks, credit cards, PayPal and gift certificates.
- 'Deposit' should be the 'Ending Till' minus 'Starting Till' minus credit cards, PayPal and gift certificates.
- 'Deposit' should equal cash + checks.
- The drawer contents should match 'Deposit'.
At the end of the day -
- Each clerk must log in and close out his/her till. (There is no 'group close out'.)
- Each clerk will get a till report showing only his/her finalized sales.
- Separate totals are available for each employee when logged in.
- Totals for an employee will not show when that employee is not logged in.
![]() A summary of the Till may be printed at day's end.
A summary of the Till may be printed at day's end.
Multiple Employees
Multiple employees can process sales, either from the same computer or from multiple POS stations. Either way the Cash-Drawer-Balance feature will compute real-time totals for each employee.
Transacting on Different Computers
If each employee has a separate work station, he or she can log in (and out) on that computer (or remain logged in - with the risk that another clerk can make transactions in his/her name).
Transacting on the Same Computer
If multiple employees work from the same computer, they can log in separately and start separate tills.
When an employee (not logged in) needs to process a transaction, he/she clicks on Utilities and selects Change User and makes the appropriate entries of username and password.
The 'On Shift' drop-down box shows which Employees are being tracked.
At the end of the day, each clerk must log in and close out his/her till. (There is no 'group close out'.) Each clerk will get a till report showing only the sales he/she processed.
Employee Commission Adjustments
At any time an employee's commission balance may be adjusted up or down.
Select the Employee Work Area.
Click on
in the Quick Links Menu.
Select the employee from the list.
If the employee is not listed, adjustments must wait until there is activity in the account.
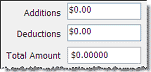
Select the employee. Enter an amount in Additions or Deductions and Save.
Paying Commissions to Employees
Select Employees:
Click on an Employee in the List.
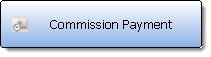
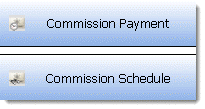
Select Commission Payment from the Quick Links Menu:
The ensuing New-Employee-Commission screen lists eligible sales.

Uncheck a sale to exclude it from commission payment.
Use the Check None and Check All Buttons to select no or all entries:


Enter amounts for Additional Payment and/or for Deduction if applicable.
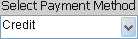
Enter an amount to pay and choose a Payment Method.

Choose Credit to collect payment for In-House Purchases, if any
Finalizing Commission Payments
When all settings are correct, click OK. BCSS makes these adjustments:
- Commissions are processed.
- A check is prepared for each Employee (eligible for payment) and is viewable is the Disbursements Work Area.
Print Checks
Select Disbursements:
Click on the check to be printed.
A pop-up window will appear for check position. Select the position and close the window.
A Print-Preview Screen will open showing how the check will be printed. If correct, click the printer icon to print.
When printing for the first time, print on a sheet of paper then hold the printed sheet and a sheet of checks together, one over the other, up to light to verify that the print aligns with the check spaces.
Employee Commission Schedules
Any number of Commission Schedules may be created in BCSS.
Each Schedule can have up to 4 Sales Levels.
Each Sale Level can have Percent or Flat Commissions or both.
Select Employees in the Work-Areas Menu
then Commission Schedule in Quick Links:
Enter the maximum Sales Amount (numbers only, no dollar sign or punctuation) for each Sales Level.
Enter a Commission Percentage and/or a Flat Commission for each Sales Level.
Enter a Name for the Commission Schedule in the 'Edit Name Here' box and click Create New Schedule to save the Schedule by the chosen name.
Select Create New Schedule. The Schedule Name will appear in the Choose a Schedule to View field.
Click Close to end the session.
In the future -
- Edit an existing Schedule by selecting it from the 'Choose a Schedule to View' drop-down menu. Make changes and click 'Save Changes to Old Schedule'.
- Delete an existing Schedule by selecting it in Choose a Schedule to View then select Delete.
Assign a Commission Schedule to an Employee
When adding or editing an Employee Record, use the drop-down menus under Commission Schedule and Schedule Level to assign the selected Schedule and Level to the Employee. Click OK to save the entries.
Employee Credit Purchase
Employees may make purchases by layaway, account receivables or debits against future commissions. (The Employee Account Balance will be negative if purchases exceed commissions earned.)
Employees may also be entered as Buyers for layaway purchases.
Processing an Employee Credit Purchase
Select Employees:
Select an Employee from the List of Employees:
Select Employee Credit Sale from the Employees Menu:
The New-Sale Screen opens with the Employee as Purchaser.
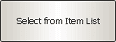
Enter items to be purchased using the Select from Item List option
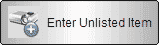
or add an item or items manually using the Enter Unlisted Item option:
Note that Employee Sale appears in the first Payment Field:
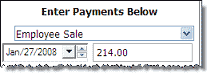
The amount entered here is the amount that will be charged against the Employee's Commission Balance. This amount may be all or part of the total purchase price.
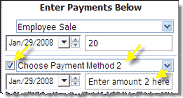
If the total purchase price is not paid at the point of sale, enter future payment types and amounts in the subsequent fields. Be sure to check each Payment Box:
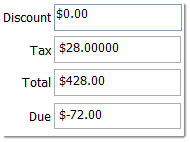
Discounts
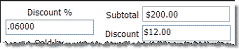
Any discounts to be awarded can be entered as a percentage or dollar amount: If % is entered, $ amount will be calculated and auto-entered in the Discount field.
Quick Links
BCSS is divided into Work Areas. They are:
Each Work Area has its own set of Quick Links. These are the Quick Links for Employees:
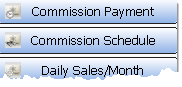
Commission Payment - Make payments to employees.
Commission Schedule - Add/edit commission schedules.
Daily Sales/Month and Year and Daily Sales/Month and Year/Category - View employee performance
Employee Access - Allow/deny access to areas and information in BCSS.
Sales Today - See what sales were made for the current day and by whom.
Individual Employee Information
Select an Employee from the Main Table and view information about him/her in the Details Area at the bottom of the screen.
Click on the colored tabs at the bottom for more information about the Employee.

Time Filters
Click on these buttons...
...to view records based upon the time period suggested by the button name: today, last 7 days, etc. View All will display all records again.
Sales Recap
A 'Sales Recap' can be produced for any period of time showing names, number of sales and sales amount.
To produce the report:
- Click on Reports.
- Click on Sales.
- Check the box to the left of 'Invoice Date' and enter 'Date From' and 'Date To' (to define the time period of the report).
- Click on the 'Sales Recap' button at the bottom.
- If other reports (Invoice List, Payment Recap and Shop Totals) aren't wanted, uncheck their boxes.
- Click on 'Preview/Print' to view a print preview of the report.
- Click the printer icon to print.
Salesperson Recap should always agree with the Invoice Total.
The Sales Recap is not intended to give shift totals. Use employee login and start/end shift for that.
When the payments recap doesn't agree with the invoices total, incorrect payment was collected. View individual invoices to see what actually happened.
Shift Close Out
Please refer to Audit Till for details on how to track each employee's daily sales.
The Sales List cannot be reconciled to the Shift Close Out because the Sales List includes all sales for a time period (usually daily) and the Shift Close Out covers only the time each employee had his/her till turned on during a day (Start/End Shift) and only includes sales for that employee.
Terminate an Employee
Go to Employee Permissions and remove all permissions prior to notifying an employee of termination.
Select Employees:
Select the Employee from the List of Employees
then select Terminate from the Employees Menu:
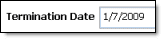
The termination date will appear on the Account Status screen of the Employee Record.
Reinstate an Employee
Double click on the Employee Listing to open the Edit-Employee screen. Check Currently Employed.
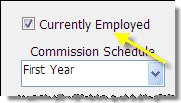
The Termination Date will be removed from the Account Status screen.
Sellers - Buy Outright or Resale
Here's a video on 'buy outright'
.Sellers are individuals (as opposed to companies) from whom purchases are made.
As thieves shy away from pawn shops (photos and fingerprints) for fencing their stolen goods, jurisdictions in some areas are requiring 'second-hand-dealer licenses' and the recording/reporting of information about sellers and the items purchased from them. (Check with your local authorities.)
For shops not required to report information to the police, the program can be used as is.
For shops required to report, in the program go to File then Program Setup then on the Clients Tab, check 'Enable Resale & Police Reports' which will add additional fields on the new-client screen for identification of sellers.
Doing so will activate the feature for taking pictures of sellers.
Buy Outright Settlement vs. Consignment Settlement
In BCSS 'settlement' is the process of paying consignors for sold consignments or paying sellers for purchased merchandise.
Consignors are paid after items sell.
Sellers are paid when items are purchased.
Program Setup for Resale (Buy Outright)
If BCSS is to be used exclusively for resale, make these settings:
- Navigate to File > Setup > Inventory.
- Check these options (and remember to uncheck the first option if consignments are added in the future):

- Click on the Clients tab and enter your clients' most common city and state (so it doesn't have to be typed in each time on a new-client record). City and state can be changed for any new or existing client.
- If purchases are to be funded with the shop's Store-Credit Balance, check:

- Use the drop-down menu to select the applicable house account.
- The New-Client Screen has typical fields for basic seller information (name, address, etc). If you are required to record sellers' details (height, weight, eye/hair color, ID numbers), in Program Setup on the check this box to add ID fields (not shown here) to the New-Client Screen:

This is a feature of BCSS Diamond and Virtual.
- Click on the Printers tab and set the Ink Printer and make sure the printer can self test or print from another program. If a printer is not listed, it needs to be installed.
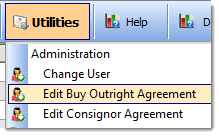
- Click on Utilities then Edit Buy Outright Agreement:
- Type text that is to be printed on agreements. Note that any line longer than (approximately) 120 characters will exceed the right margin of the printed page. Use the Enter Key to start a new line at or near the 120th character on any line.
Text entered here must be limited to 3 lines. Typically the text is a statement by the seller that he/she owns the item(s) and has the legal right to sell them. (Local law enforcement usually dictates the wording.)
- To change how the shop name and information appears on the agreement, edit in Program Setup on the General page.
- Click Save and Exit and restart the program.
Buy Outright Provisions
Items bought outright are not intended to be treated as Transfer-Account items.
The buy price is included in consignor's percentage on the Shop Totals.
BCSS is a 'Consignment Software Program'. As such it processes buy-outright transactions as consignments by adjusting the Consignor % in the background. When the Buy and Sell Prices are entered for a buy-outright item, BCSS computes what the Consignor % would have been if the transaction had been a consignment. This is necessary to make computations correct within the program.
For information purposes, this 'Computed Consignor %' is displayed in Item Details. (Go to Inventory, select the Item and view the % at the bottom of the screen.) This entry cannot be edited.
Ignore it. It is for internal purposes only.
Add a New Client
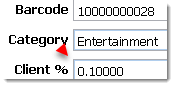
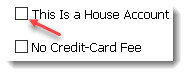
Don't use House Accounts for buy outright. Create one or more new-client accounts for the shop or shop owners. Set the consignor % to zero to have sales proceeds go to the shop account. Set the consignor % to 1 (for 100%) to credit all sales proceeds to the client account. Make sure to NOT mark these records as house accounts. Do NOT check this box:
To add a new client, select 'New Client' from the Client's Menu (or press F2).
(The Virtual edition of BCSS can scan drivers licenses to populate the new-client record.)
Enter as much information as desired. The program only requires a Client ID and one character in the name field.
Disregard the Client %. It will not apply to buy-outright transactions.
Check whether to send mailings and/or sales reports. These settings and many others may be used later to generate specific lists of clients for address labels, reports, etc.
User Text
Any 'string of characters' may be entered as 'User Text' to uniquely identify (and later find and group) clients. Spaces are ok but commas and apostrophes will be removed by the program.
For example, enter 'best' in the User-Text field for your 'best clients'. Later on create a report and use 'best' as the 'search word' or 'report filter'.
Only one 'string of characters' may be used per record.
User Date
Enter a date in the Client Record and use the date in the same way to tag (flag, mark) buyers' records. For example, if you want to contact 6 people on 8/7/2021, enter that date in the User-Date field in each consignors' record then create a report on or before that date using 8/7/2021 in the user-date search.
Requested Space - ignore if present
When all information has been entered, click Save/Exit to save the input and close the window.
Take, Record and View Seller Pictures
One picture of each person can be taken and stored on the computer, an external driver or online and recalled for identification.
Pictures should be saved on an external storage device to avoid losing them to a hard-drive failure. The device can be a USB flash drive, an external hard drive or an online destination.
- Plug an external storage device into a USB port. Windows will assign a 'drive letter' to the drive, something like 'E:'. (If the drive is ever removed and plugged back in, be sure to use the same USB port.)
- If the drive is not showing, go to the Desktop and double click on 'This PC' (or Computer or My Computer).
- Open the external drive by double clicking on it.
- In the window, right click in the white area and select New then Folder.
- Give the folder a name like 'Images'.
- Press Enter.
- Close the drive window.
- In the program, in the upper-left corner go to File then Program Setup then Inventory and use 'Find Location' for Default Picture File Location to navigate to the folder for images then Save/Exit.
Take Pictures with BCSS and a Webcam
- Press F2 to open the New-Client Screen.
- Enter as much information as desired.
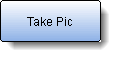
- Click Take Pic.
- If a camera is connected and operational, its name should appear in the 'Camera' field. If more than one device is connected, select the right one.
- It shouldn't be necessary to make selections for Input and Format.
- The directory set in program setup should appear as the location to where the image will be saved. Otherwise click on Save Pic.
- Navigate to the image folder and click Open.
- Enter a filename. Suggestion: last-first-ID
- For LEADS online reporting, the suggested filename must be used.
- Click Preview.
- Click:

- Close the Web Cam interface.
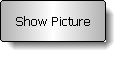
- Click Show Picture to verify:
Add a Picture for an Existing Client
- Click on Clients in the Work-Areas Menu.
- Double click on a client listing to open the edit screen.
- Follow the procedures above to add the picture.
- Use Show Picture to view a picture that has been assigned.
Alternate Method for Recording Pictures
- Take pictures with any camera.
- Save the pictures to an external storage device or online location.
- Add or edit the client record.
- Click on Picture File:

- Navigate to the image and select it.
- Click Show Picture to confirm it:

- Save / Exit.
Once all information has been entered, there are several options:
- If items won't be entered now and no agreement is needed:
- If purchased items are not be to entered now, an agreement may be printed. Entries will be saved when this button is pressed:
- If purchased items are to be entered now, opt for 'Save / Enter Buys' which will provide a 2nd opportunity to print the agreement:
Edit a Client Record
Double-clicking a record opens the edit window. Click OK after making changes or use 'Save and Continue' to save and continue editing.
Enter Items Purchased
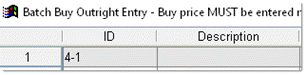
Choosing option 3 above opens the batch-enter screen for buy outright - populated with sequential IDs for the seller:
- Adjust the screen size if necessary.
The table will be populated with the Seller ID and sequential item numbers, the Default Category (if set in Program Setup), quantity (of 1), barcodes and the current date (Date In).
- Enter a description. The field is limited to 20 characters (to fit on the smallest labels).
- Select a category if appropriate. (Press the first letter of the name of the category. Use the down arrow to select the category. Press Enter to record the category and move to the next field.)
- Details are not required. Details only appear in Detailed Reports and on larger price labels.
- Enter Sell Prices if labels will be printed from this screen. Otherwise they can be entered later. (Sell Prices will be on price labels but not on buy-outright agreements.)
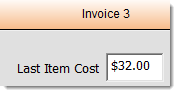
- Enter Buy Prices. (They will be printed on the buy-outright agreements but not on price labels. They will be displayed on sales invoices as 'Last Item Cost' when the item is added to the invoice):
- Change the quantity if necessary.
- 'Location' refers to the physical location where the item can be found (bin #, shelf ID, department, etc.).
- The program will have assigned a barcode and must not be changed. (There is an option in Setup on the Printers page for not printing barcodes on price labels.)
- If necessary, use the scroll bar to scroll right:
- The date the item was purchased (Date In) can be changed. (If several items are being entered for a date other than the current date, close the program, change the date setting in Windows and reopen the batch-enter screen and enter the items.)
- Ignore the rental reference.
- Notes about items can be entered (for shop eyes only). On smaller monitors it may be necessary to scroll to the right to see all fields.
- After all items have been entered and no further edits are needed. click on a row of an item for which a picture is to be taken then click on Take Pic.
- When finished entering items, several options are available.
- 'Save' records the entries and closes the batch screen.
- 'Cancel' closes the screen without saving entries.
- 'Print and Settle' presents a preview of the agreement. When the agreement is printed or closed, a second preview of items purchased appears. To have the agreement and items on one page, in Program Setup on the Inventory page, check 'Print B Agreement and Item List on a single page.'
- 'Settle Only' opens the 'New Settlement' screen for processing payments. It is possible to 'settle' for some items and not for others by checking and unchecking items under 'Include?'. Primarily, for Payment 1 select the Payment Method, add notes if needed then use the options at the bottom on the page to either 'Save, Print, Exit', 'Save and Exit' or 'Cancel'. In a strict buy-resell operation, this option will be rarely used.
- 'Receipt Only, No Settle, No Agree(ment)' saves entries and allows a printout of items being purchased without closing out (settling) at present.
- If sheet labels or tags are to be printed, select one of these options:

Those options do not apply to thermal labels.
- Or select this option to print thermal labels:
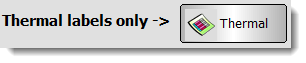
The settings on the Labels screen will dictate which labels will be printed.
- To print multiple labels for the same item check this:

If that box is not checked, one label will be printed for the item even if the quantity is greater than 1.
- To limit labels to a number of rows to be printed, enter the number of the last line to be printed:
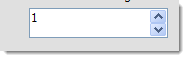
(If 10 rows are used and a row greater than 10 had been clicked on, inventory records will be created and blank labels will be printed for the 'blank rows'. Avoid clicking on unused rows. If uncertain, enter the number of the last row to be printed.)
Optional Actions
- Click Save/Exit to save the entries and print labels later.
- Click 'Print Agreement and Item List' to save entries and print the agreement and list of items purchased. The agreement and item list will print on one page, if that option is checked in Program Setup on the Inventory page:
- Click 'Settle Only' to open and process the sale, then pay the seller. (This needs to be done for every purchase.)
- The total sale will appear in the Notes section.
- Uncheck any item that is not to be purchased.
- Enter Additions or Deductions, if any.
- To the right of Payment 1, ignore the check number and select payment method. (If payment is by check, the check number offered will be used. Otherwise it will be ignored.)
- Choose 'Save, Print, Exit' to save the transaction and print a buy outright agreement.
- Choose 'Save and Exit' to save the transaction and not print an agreement.
- Select one of the options for sheet labels, or
- Click Thermal (lower right) to print thermal labels.
Note: On some computers using the tab key will not record the entry. Press Enter.
Reversing Entries
To delete a buy-outright transaction, do a settlement for the items for zero payment and delete the items from inventory.
If consignments have been incorrectly entered as resale items, do a settlement for the items for zero payment, delete the items from inventory and reenter them as consignments.
Things to Know:
- If a record already exists for the seller, select the record in the Clients Work Area. If only one item is being purchased, press F3 to open the new-inventory screen, check 'Buy Outright', enter the buy and sell prices. (Buy price will not be printed on the price label.)
- For purchasing multiple items, select the Client Record and in the lower-left menu, select Batch Buy Outright.
- A one-time message will appear when adding the first resale item.
Edit the Buy Outright Agreement
- Click on Utilities then Edit Buy Outright Agreement:
- Type text that is to be printed on agreements. Note that any line longer than (approximately) 120 characters will exceed the right margin of the printed page. Use the Enter Key to start a new line at or near the 120th character on any line.
Text entered here must be limited to 3 lines. Typically the text is a statement by the seller that he/she owns the item(s) and has the legal right to sell them. (Local law enforcement usually dictates the wording.)
- Click Save and Exit and restart the program.
Buy Outright Reports
A Report on Sellers
A 'report' is a display of information (print preview or in the main table defined by the parameters set on the report-designer page.
Create a Client Report
Select Reports from the Main Menu:
Select Clients:
Settings on this screen tell BCSS which Clients are to be included in the Report.

For example, to create a list of Clients who are Active and on the Mailing List, make these settings:
1. Check 'Active Only'.
2. Check 'On Mailing List'.
Parameters
Clients may be included in the Report based upon Birthday, Birth Month, Date of Last New Item, Date of Sale or Date of Settlement, User Date or User Text, Active/Inactive status, Unsold Items Disposition, Transfer Accounts Only, On Mailing List, To Receive Sales Reports and/or With Inventory Only.
Sort Output
The content of the report may be sorted by ID, Name, New-Item Date, Settlement Date. Check one:
Print Reports
Selecting Print the Report -
will present the Report is a Print-Preview Screen:
The Report may be printed by pressing the printer icon (yellow arrow).
View the Report in the Main Table
Selecting View the Report

will present the information in the BCSS Main Table.
Time Filters
Click on these buttons:
to view records added or edited today, last 7 days, etc. Press View All to view all records.
Quick Links
BCSS is divided into Work Areas. They are:
Each Work Area has its own set of Quick Links. These are the Quick Links for Clients:
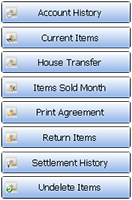
With Quick Links, select a Consignor and easily:
- View account history
- View current items
- Transfer items to the shop's Transfer Account
- Print one or more copies of the pre-filled Consignor Agreement
- Return items
- View the current settlement due
- Undelete items (return them to inventory)
Individual Consignor Information
Select a Consignor in the Main Table then view information about the Consignor in the Details Area at the bottom.
Click on the colored tabs at the bottom to view different screens of information (Details, General, Items, Notes, Settlements).
Search and Sort Records
Note: Columns containing both letters and numbers are sorted (in databases) as text so numbers will appear in order of 1,10,2, not 1,2,10.
When looking for records currently added or edited, click on the time-period buttons to display records for the time period selected:

Click on View All to restore all records.
If a record doesn't appear after it's been added, click on View All.
Sort Columns in the Main Table (version 6.0.516 and later)
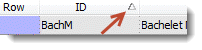
In any Work Area, click on the table header to sort the column alphabetically or numerically:

Click on the header again to reverse the sort order.
The triangle on the right of the column header indicates the sort order:
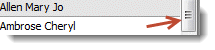
It may be necessary to move the vertical scroll bar (on the right of the main table) up or down to find a record.
Please note:
- If every record (ID, Name, etc.) has letters only or numbers only, the sort will be A-Z or 1-10.
- If records have a mix of letters and numbers (like Consignor IDs SmithJ and 125), the sort will be alphabetical so the sort of numbers in such a list will be 1,10,2, not 1,2,10.
Finding a Record
In November, 2013 (version 6.0.850) the search box was moved under the center table:
Search Options
Click on File then User Interface to select search options.
In Buyers, Clients, Employees and Settlements, searches can be by either ID or Name but not both.
In Disbursement searches can be by 'Paid By' or 'Paid To'.
In Inventory searches can be by ID1, ID2 or Description.
Sales searches can be by Invoice # or Name.
On the same screen, check 'Search by first letter/number only' to exclude any records that might include the search anywhere in the record. If this option is NOT checked, entering a search like 'ike' will find Ike Eisenhower and Mike Martin. To search type the first number or letter of the ID, name, description or invoice #. If that doesn't find the correct listing or reduce the number of listings to a few, type the next number or letter of the name or ID.
Records can also be found by using Reports.
Watch a video.Buy-Outright Inventory Reports
A 'Report' is basically the results of a 'search' of the BCSS database for information - just like a search in Google. A big difference is that a BCSS Report will only include the information asked for and not 'close matches'.
Select Reports (not shown) then Inventory:
Select Report Content
Settings here determine the information to be included in the report.
For example, to include only items 2 through 4 for a client.
1. Check 'Quantity greater than 0'.
2. Select the client from the drop-down list.
3. Check 'Items # Range' and enter 2 and 4 in the From and To fields.
Any Box (Date In, Date Discounted, Last Sale, Items # Range) must be checked for settings to apply.
Sort Output
Choose how to sort the content of the report:
Print the Report
Select 'Print Detailed List' or 'Print Brief List'.
The report may be printed by pressing the printer icon (yellow arrow).:
Show the Report in the Main Table
Select View the Report to show matches in the Main Table.
Period Filters
Choose one of these buttons:
to view records added or edited according to the time period chosen.
Quick Links
BCSS is divided into Work Areas. They are:
Each Work Area has its own set of Quick Links.These are the Quick Links for Inventory:
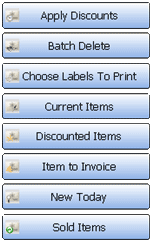
Apply Discounts - Click this option to manually force due discounts.
Batch Delete - Opens the Batch-Delete Screen.
Choose Labels to Print - Opens the Label Print Screen.
Current Items - Shows current items in inventory - unsold items and unsettled sales (with zero quantity).
Discounted Items - Show all discounted items.
Item to Invoice - Select an item from the Table and click this button to add the item to a New-Sale Invoice.
New Today - Display in the Main Table all items added to inventory today.
Sold Items - Display only items sold today.
Function Key
Press F8 for a quick report on inventory items entered for the current day.
Inventory Item Reports
Select an item in the Main Table and view information about the item in the Details Area at the bottom of the screen.
Click the colored tabs at the bottom to view screens with various information (Details, General, Notes).

Buy-Outright Sales Reports
There are a variety of sales reports and a several ways to produce them.
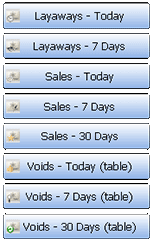
1.Quick Links - 'One-Click Reports' in the Sales Work Area for immediate access to pre-defined information: Layaways, Sales and Voids for the Day, Past 7 Days or Past 30 Days (displayed in the Main Table):
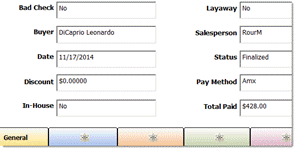
2. Details Area: In the Sales Work Area, select a sale in the Main Table and view information about the sale at the bottom - Bad Check, Buyer, Date, Discount, In-House Sale (yes or no), Layaway (yes or no), Salesperson, Status (On Hold, Voided, Finalized), Pay Method, Total Paid:
3. List of Sales
The list of sales in the Sales Work Area is a 'report' of sorts. The columns can be sorted by clicking on the column headers and records can be found by clicking in the search box and typing an invoice number or name. (Go to File > User Interface to set a search preference for search by invoice or search by name.)
3a. Time Filters
Click on these buttons:
to view only Records (in the list of sales) that have been added or edited today, Past 7 Days, Past 30 Days, etc. Click View All to see all records again.
4. Function Key F10 - Items Sold Today
Press F10 for a quick report on items sold for the current day.
5. Items Sold This Month for 1 Consignor
In the Clients Work Area, select the consignor from the table and press 'Items Sold Month' on the right.

6. Create a Detailed Sales Report using these 'filters':
|
Bad Checks Buyer Category Client Credit Memos |
Inventory Location Invoice Date Invoice List Invoice Total Item Number |
Items Sold Layaways Excluded Layaways Open (Current) Payment Method Sales on Hold |
Sales Recap Sales Today Salesperson User-Defined Groups (4) Voids |
Begin by selecting Reports on the Main Menu:
![]()
then select Sales:

Make Report Settings
Check options and enter ranges to include/exclude sales from the report.
For example to include only sales which are not layaways, sold by salesperson Mandell for October 3rd and 4th:
1. Check 'Not Current Layaways' (to exclude layaways from the report).
2. Select 'MandH' from the Seller drop-down menu (to only include sales made by that salesperson).
3. Check 'Invoice Date' and enter the date range (to include only sales made during the specified time period).
The box must be checked for entries to apply. If the From and To fields are completed but the check box is not checked (like Invoice Date in this example), the From and To range (the 'filter') will not apply.
Sort Report Output
- Consignor Reports can be sorted.
- Buyers Reports (Diamond and Virtual) can be sorted by Name, Dollar Volume, Last Purchase Date or Zip Code.
- Disbursement Reports can be sorted by Payee or Date.
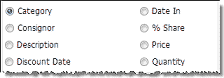
- Inventory Reports can be sorted by Category, Consignor, Date In, Discount Date, Item ID, Price, Quantity or % Share.
- Sales Reports can be sorted by Buyer, Category, Consignor, Invoice Date or Salesperson.
Important: For Sales Reports select 'Sort by Consignor' only when using the Item-Sold List. Other Sales Reports are based upon invoices (which often have more than one consignor). If other Sales Reports are sorted by consignor, invoices may be counted more than once in computing totals.
Print the Report
Selecting Print Invoice List -
will display the report in a Print-Preview Screen.
Print the Report by clicking on the print button (yellow arrow).
View the Report in the Main Table
Selecting View the Report

will display the report in the BCSS Main Table.

Click on any Sale to view details about it in the Details Area at the bottom:

Shop Sold List

Pressing Shop Sold List (at the bottom of the Sales Report Screen) will present a report showing Item ID, Description, Category, Price, Quantity, Date Sold, Invoice # (and 'Sold By' in BCSS Diamond and Virtual) for each item sold for the current day (if no date filter is set). Click the printer icon at the top of the report window to print the report.
Consignments-Sold List

This report includes Item ID, Description, Category, Price, Quantity, Date Sold, Invoice # and Payment Method for consignments sold.
Buy-Sold List

This report includes Item ID, Description, Category, Original Price, Quantity, Sale Price, Buy Price and Profit for shop-owned items.
Sales Recap

Pressing the Sales Recap Button will present a list of sections (not shown) for Invoice List, Salesperson Recap (in BCSS Diamond and Virtual), Payment Recap and Shop Totals. Uncheck sections to be excluded from the Sales Recap Report. Press the Preview/Print Button to preview the report. Click the printer icon at the top of the report window to print the report.
This is the information displayed in each Recap. (Buyer and employee information appear in Diamond and Virtual only.)
- Invoice List: Date, Invoice #, Buyer, Sale Amount, Tax, Sale Total, Pay Method
- Salesperson Recap: Salesperson, # of Sales, Amount
- Payment Recap: Type of Payment, # of Payments, Total
- Shop Totals:
Sales (before tax): Gross sales receipts including consignor/vendor and shop-owned inventory plus finalized layaway sales.
Clients' %: Clients' share of sales proceeds
Buy-Outright Cost: Total paid for inventory purchased by the shop
Employee's %: Commissions payable to employees
Other Payments: Any payments entered as disbursements in the program
Promo Discounts: The total of discounts absorbed by the shop
Profit/Loss: Sales minus above costs
Buyer Fees: Total reductions before settlement
Tax(es) (split if 2): State and local sales tax amounts. If sales tax changed during the report period, all taxes charged are listed.
Non-Taxable Sales: Total of sales not subject to sales tax
Sales Recap 'Errors'
Account History is an explanation of a consignor's account balance. The person in charge of 'the books' at the store must have a thorough understanding of the concepts of accounting as they apply to the consignment/resale business.
Payment Recap is a total of recorded amounts received. The other sections of the Sales Recap are based on prices of items sold. Go through invoices for the period in question and look for differences between payments and prices.
Common Mistakes
- Changing an employee ID
- Assigning buy outrights to the House Account