Search the BCSS Manual
Inventory
Barcodes
(This feature is available in BCSS Deluxe, Diamond and Virtual.)
Free POS-X Barcode Scanner Support: 800-790-8657, or live chat at http://pos-x.com/support/.
Barcodes on Price Labels and Hang Tags
Barcodes can be printed on price labels and hang tags using ink printers and sheet labels but they may be or become unreadable. (Ink fades and smears where thermal print does not.) Barcodes printed on thermal labels are more clear and durable.
Changing Barcodes
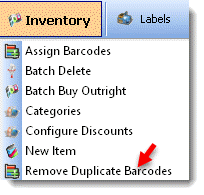
It is possible to change a barcode # manually but doing so can result in duplicate barcodes. Let the program remove duplicate barcodes by using 'Remove Duplicate Barcodes' under Inventory.
Use any of the options to print (reprint) price labels or click Save. Either way the items will be saved to inventory with new barcode numbers and codes.
To change a barcode, open the new-item screen and observe the next barcode # offered by the program. Edit the item record and use that number for the item.
Barcodes Are Optional
In Setup on the Printers tab, remove the check from 'Check this box to include barcodes on price labels' to NOT print barcodes on price labels and hang tags. If barcodes are not printed, more information about items can be printed by checking options in Program Setup > Inventory Tab.
Actions by Barcode
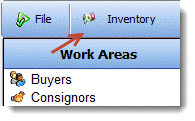
![]() In the Inventory Work Area, select Actions by Barcode to scan barcodes and select which items to donate, return, transfer to the Transfer Account or undelete. Click in the barcode Field, scan barcodes, review the list and select which items to process, then click Record/Print/Exit.
In the Inventory Work Area, select Actions by Barcode to scan barcodes and select which items to donate, return, transfer to the Transfer Account or undelete. Click in the barcode Field, scan barcodes, review the list and select which items to process, then click Record/Print/Exit.
Barcode Numbers
The program will know about items that have been entered into inventory. It will not know about barcodes that were printed elsewhere.
Non-BCSS barcodes can be read but don't use them. If a non-BCSS barcode is scanned, the New-Inventory Screen will open and the item could be entered with the existing barcode. This is not advisable as the program will assign the next barcode number based upon the last barcode # assigned.
BCSS reads UPC-A barcodes which have 12 digits but it only uses the first 11 numbers so it may be necessary to scan a code to 'cut' the 12th 'check digit'.
The 'Check Digit' and 'Cut Check Digit' barcodes on that page are for POS-X and Unitech scanners. It may be necessary to print the page then scan the code. Please refer to your scanner's manual if you're using a different make.
Find an Item by Scanning a Barcode
Go to the Inventory Work Area.
To the right of View All, click in the barcode field (where it says 'Enter Barcode') and scan a barcode to locate an item.

If the item is in the database with a correct barcode number, the item will be selected (highlighted) in the Inventory Table.
Add Items at POS by Scanning Barcodes
Each time the New-Sale Screen is opened (and after each completed sale) the cursor will appear in the barcode field, ready for a scan. Before scanning any item make sure the cursor is in the barcode field.
If a bar code is read that does not exist in inventory, the new-inventory-item window opens. Choose the provider of the item. After the new item is entered, read the bar code again to enter the item on the New-Sale Screen.
If it is necessary to press the Enter Key after a barcode has been read, please refer to the scanner manual for instructions on how to add a line feed. (POS-X free support: 800-790-8657)
Manually Enter Barcodes at POS
If a barcode fails to scan properly, enter it manually from the keyboard. Use the numbers on the keyboard that are below the function keys.
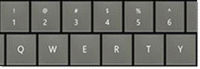
Do not use the numeric keypad.
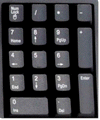
Press enter when you have finished entering the bar code.
Assign Barcodes
A barcode is auto-assigned to every item entered into inventory. It's not possible to know all of the reasons why an item doesn't have a barcode but it is handy to be able to assign barcodes to items that don't have barcodes.
If one item doesn't have a barcode:
- Open the New-Item Screen and write down or remember the next barcode number offered by the program. It must be 11 digits.
- Edit the record of the item in question and type in the barcode number.
- Click Save.
The program will assign the next-available number to the next item added to inventory.
If several items don't have barcodes:
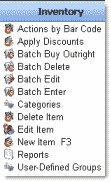
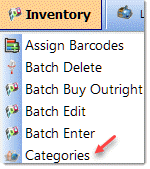
- Click on Inventory.
- Select Assign Barcodes.
- A message will appear stating how many new barcodes have been assigned.
Print 'unused barcodes' on price labels and attach them to inventory items and add the items to inventory.
('Unused barcodes' are barcode numbers next in sequence that haven't been applied to inventory items.)
- Click on Labels at the top.
- Select the Inventory tab.
- For Label Style, choose Barcodes on Avery Stock.
- On the next screen, click on Print Open Barcodes.
- Make any necessary settings.
- The box named 'Barcode Quantity = Inventory Quantity' can be checked or unchecked.
- Click on Test Print.
- If the labels are correct, click the printer icon.
- Attach labels to items.
- Enter the items in BCSS and record the barcode for each item.
Assign Barcodes to an Individual or Entity
If you consign several small items belonging to the same person or entity, create an inventory record for the items as a group and scan the barcode at POS. Enter the sale amount without itemizing items.
Also create a Client Record for the person or entity for settlement purposes.
Avoid Duplicate Barcodes
If inventory is being entered on multiple computers on a network, please read Computer Locations for correct configuration of BCSS for use on networks.
An alternative: If more than one person is entering inventory, have one person use the Batch-Enter function in BCSS and have others enter inventory on spreadsheets (to be imported into BCSS later).
Prior to printing barcode labels, use the 'Assign Barcodes' feature in the Inventory Work Area to assure that a barcode has been assigned to each item.
Remove Duplicate Barcodes
Duplicate barcodes can be replaced using the 'Remove-Duplicate-Bar-Codes' function:
- Click on Inventory:
- Click on 'Assign Barcodes' to assure that a barcode has been assigned to each inventory item. (The program will report the number of codes assigned or state that no codes have been assigned.)
- Click on Inventory again and select 'Remove Duplicate Barcodes'.
- A list of items with duplicate barcodes will be presented.
- Use any of the options to print (reprint) price labels or click Save. Either way the items will be saved to inventory with new barcode numbers and codes.
Printing Labels and Tags with Barcodes
Existing Barcodes
BCSS recognizes barcodes not in the BCSS database but it is not connected to any database that would provide information about other items. The same barcode can be used but information about scanned items would need to be keyed in.
Note that BCSS recognizes 7-digit and 11-digit barcodes. It may be necessary to configure the scanner to 'cut' the 12th digit from a 12-digit barcode.
There are two ways to enter a barcode at POS:
1. Scan a Barcode
When the New-Sale Screen opens and after each sale is saved, the barcode field ready for a scan.
![]()
Scan the barcode. If a barcode is read that does not exist in inventory, the New-Inventory-Item will open displaying the next barcode #. Write it down and enter information about the item.
After the new item is entered, enter the barcode on the New-Sale Screen.
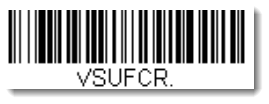
Issue: The Enter key must be pressed after scanning a code. Solution: Scan a barcode from the manual that adds a 'carriage return' (line feed). For the POS-X 2D scanner, the code is named 'VSUFCR' on page 4-3 in the users guide, http://px-download.s3.amazonaws.com/EVO2D_UserManual.pdf.
Try to scan the code (below) on your monitor. (It may be necessary scan from the manual's page.)
2. Manually Enter a Barcode
If the barcode reader is unable to read a barcode -
- Click in the Bar-Code-Entry Box on the New-Sale Screen and start to enter the barcode (using number keys at the top of the keyboard).
- Enter the barcode and press Enter.
- The pop-up window disappears and processing proceeds as if a barcode had been read with the reader.
Existing Barcodes
BCSS recognizes barcodes not in the BCSS database but the program is not connected to any database that would provide information about items with barcodes printed elsewhere. The same barcode can be used but information about scanned items would need to be keyed in.
Note that BCSS recognizes 7-digit and 11-digit barcodes. It may be necessary to configure the scanner to 'cut' the 12th digit from a 12-digit barcode. See the barcode configuration instructions.
Barcode Numbers in Reports
Bar-code numbers may be displayed on screen and/or printed for a specific item or a range of items.
Please note: In order for a barcode to be viewable or printable, a barcode must have been assigned to the inventory item. See Assign Barcodes.
View the Barcode for One Inventory Item
After a barcode has been assigned, go to the Inventory Work Area:
Select the item from the list of inventory items in the table:
![]()
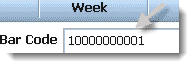
View the barcode in the Bar-Code Field at the bottom of the screen:
View and Print Barcode Reports (See Barcode Labels for printing price labels and hang tags with barcodes.)
Click on Reports and select Inventory:
![]()
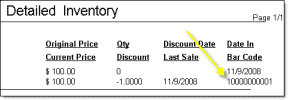
Once the inventory items have been selected (by making settings on the Report Screen), click the button named Print Detailed List:
![]()
View barcodes on the Print-Preview Screen:
Use the print button to print the report:
![]()
Find An Item By Barcode
In the Inventory Area click in the barcode field:

Scan the code. The matching item will be highlighted in the list.
Free POS-X Barcode Scanner Support: 800-790-8657, or chat or complete a service request at http://pos-x.com/support/.
BCSS is compatible with most scanners and has been configured for the POS-X Scanners and the Unitech MS210 Barcode Reader.
Generally scanners can be used 'out of the box' like keyboards - plug them into a USB (Uniform Serial Bus) port and Windows will recognize the new hardware.
Test Any Scanner Prior to Use with BCSS:
- Open NotePad.
- Scan any barcode.
- The barcode should appear in NotePad.
If the barcode does not appear in Notepad, try another cable, another USB port and/or try another barcode. See the scanner manual for scanner setup and configuration. If there's still a problem, contact the provider of the scanner. It's possible that the scanner is defective. (POS-X Support: 800-790-8657)
Test the Scanner with BCSS:
- In BCSS, press F6 for New Sale.
- The cursor should be in the barcode field (upper right) ready for a scan. If it is not, click in that field.
- Scan a barcode.
The barcode should appear in the barcode box and the item scanned should appear as a line entry.
If the scan did not work, open Notepad and scan the item again. If the barcode appears in Notepad, the scanner is working.
Issue: After scanning a barcode, it's necessary to press Enter to complete the scan. Solution: Scan a barcode from the manual that adds a 'carriage return' (line feed). For the POS-X scanner, the code is named 'VSUFCR' on page 4-3 in the users guide, http://px-download.s3.amazonaws.com/EVO2D_UserManual.pdf.
Try to scan the code (below) on your monitor but usually it's necessary to print the code and scan from the printed page.
Scanner Settings
BCSS can read 12-digit (UPC-A) barcodes. When setting up the scanner, scan these barcodes for UPC-E or UPC-A:
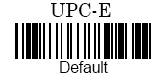
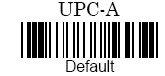
It may be necessary to print this page and scan the code from the printed page.
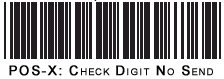
Some barcodes may have 12 digits with the 12th digit being a 'check digit'. BCSS treats 12-digit codes as 'invalid' so when setting up the POS-X scanner, put the scanner in Program Mode and scan this code to 'turn the check digit off' or 'cut check digit':
 |
 |
BCSS can read 7-digit (UPC-E codes but they are not used.
POS-X Bar-Code Scanners
Each scanner is shipped with a users guide and (cable and power supply where applicable).


Troubleshooting
The primary reasons for scanner inoperability are:
- Incorrect Interface Connection: POS-X scanners connect via the USB port and are shipped with USB cables. No other connection should be attempted.
- Incorrect Configuration Setup: BCSS reads 11-digit barcodes. Count the number of digits in the barcode. If it is 12, configure the scanner to cut (drop, not read) the 12th digit by scanning the Scanner Settings (or refer to page 46 of the POS-X manual).
- Poor Bar-Code Quality: Older printers and some inkjet or bubblejet printers may not produce enough clarity in the actual barcode to make them readable. LaserJet printers are better, as are Hewlett-Packard models. All-In-One printers might produce inferior label quality.
Scanner enters lead character @c
Please see Scanner Settings on how to configure scanners by scanning factory-provided barcodes.
Bar codes are duplicated | Scanning brings up wrong item | Codes not read by scanner
Procedure:
- Press Inventory.
- Click 'Remove Duplicate Barcodes'. A window will open with a list of items with new barcodes.
- Select Save to save the new barcodes or select a print option to print labels with the new barcodes.
- The Bar-Code Layout Window will open. Make settings for margins and/or row spacing if necessary.
- Labels for the newly-assigned codes will be auto-printed when the window is closed.
- If there are only a few barcodes, remove all of them, reassign codes and try scanning again.
Bar codes print in mirror image.
This is usually caused by having too many printer drivers installed. Go to Control Panel, Printers and remove any drivers for printers that are not being used. It is best to have only one ink printer and one receipt printer.
Intuit's driver for QuickBooks has been known to cause problems.
Print another document to assure that the printer is working properly.
I don't have an installation CD. Where can I find the drivers?
Scanners do not require drivers. The POS-X Scanner Configuration Manager can be download from https://pos-x.com/downloads/. In the search box type 'configuration' plus the scanner model to more quickly locate relevant listings.
The Configuration Manager includes:
- Scanner settings
- User interface
- Bar-code definition
- Data edit
- Update scanner program
- Test scanner read state
These settings can also be accessed in Control Panel > Devices and Printers (XP: Control Panel > Devices and Printers). Right click on the scanner and select Properties. Click on tabs to access various screens.
Why won't my scanner read some barcodes?
The barcode symbologies might need to be enabled. By default Codabar, MSI, and Code11 are not enabled. Bar codes must also be clearly printed. They can't be faded, torn or crumpled.
What are “M”, “A”, or “K” in front of all my scans?
Those are Code IDs. For POS-X: In the manual see page 30, Group 14, Codabar. For the MS210: Scan the NO barcode of Code ID on page A.2.
Troubleshooting Barcode Printing
Labels Not Positioned Correctly on Sheet Labels -
1. Turn the printer off to stop printing and clear the printer queue.
2. Turn the printer back on and clear the paper.
3. Change Print Settings (on the Label Screen) to correct print position by changing the values for Top and Left Margin, row Space on the Labels Screen:
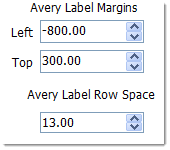
If labels are not printing on the last row, decrease the value for Row Space.
No Barcodes on Labels
1. Make sure the item with a missing barcode has a barcode assigned.
2. Turn barcodes on in Program Setup, Printers tab. Select 'Check this box to include barcodes on price labels'.
If Setup opens with that box checked, remove the check. Save and Exit. Reopen Setup. Replace the check and Save/Exit again for a reset.
Types of Inventory
There a 5 types of inventory in BCSS:
- Consignment:
Consignments are items belonging to others being sold by the shop for a percentage of the sales proceeds. The percentage can be different for each client, each item and each inventory category. Clients are paid after items sell.
- Buy Outright:
'BOR' items are purchases from individuals for resale. Payment is made up front and the purchased items become property of the shop upon payment.
- Retail:
Retail is merchandise purchased for resale from non-individuals like suppliers, wholesalers, manufacturers.
- Shop-Owned:
For one shop owner, shop-owned items can be sold using the 'House Account'. All sales proceeds will go the 'shop' or 'house' account. For multiple shop owners selling individually-owned merchandise, use separate accounts (not House Accounts) with 100% payout to the owner of each item.
- Rentals:
Items for rent are mostly shop-owned items that are rented for a period of time for a fee. Payment is made to the shop upon taking possession of the rented items.
Inventory Notes
Create a Client Record before entering inventory. Do not use punctuation at all.
With BCSS Virtual clients (or anyone) can add inventory online and view their account information. Stores can download the data, edit it and print price labels.
Entering inventory prior to POS creates a record for each item (optionally with a picture), and makes the following functions available (not available in Intro):
- Batch enter/edit/delete, categorize, track, find, sort, label/barcode and discount inventory.
- Discount (manually or automatically), delete, edit, tax, report and print labels by category.
- Track ownership, location, disposal, Client %, current status, and price history including % Discount, Current, Original and Lowest Prices
- Create detailed reports showing Quantity, Client, Category, Sales Location, Date In, Date Discounted, Date Of Last Sale, Item ID, % Share, Description and Details
- Scan barcodes at POS for fast check out.
- Recall a picture of the item to avoid tag switching.
- Delete inventory or move it to storage (and back). Return unsold inventory to the client, transfer it to shop ownership, donate it or destroy it. Print 'secret codes' on price labels to know what to do with each unsold item.
Add One New Inventory Item for an Existing Client (F3)
Select the client and press F3. The New-Item Screen will open with the Client's ID, Item #, Client %, Barcode and Date auto-entered. Quantity will be entered as 1 (for convenience) and may be changed.
The Item ID will be the Client ID + Item Number (example: If 'Lin' was entered as the Client ID for 'Lincoln', the Item ID of 'Lin-5' would indicate that the item belonged to Client Lincoln and is the 5th consigned item by Lincoln).
Item IDs can be edited only on the batch-edit screen (to help avoid duplicates).
Label Descriptions - Descriptions are limited to 20 character so as to fit on the smallest of price labels so use the words and numbers that best describe the item.
The description can be left blank. Inventory records could be batch edited later to add descriptions.
To make descriptions more useful in reports and sorted lists, use consistent wording and numbering. (Example: Always use 'Klein', not Calvin and Cline and Kline.) Also in the description, name the item first (shirt, drill, ring, etc.) so all like items will be grouped in the inventory list.
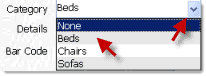
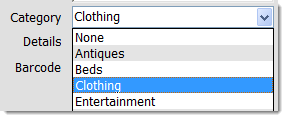
Select a Category - Accept the default category (if one is set in Program Setup > Inventory) or press the first letter of the desired category then use the mouse or down arrow to select the category the press Enter:
(To set up categories, go to File then Inventory then Categories.)
If the selected category is associated with User-Defined Groups, selecting the category will change the names of the fields 'User-Defined Inventory Group*' to the Group-Defined Names. In the following example, the category 'Beds' has been associated with the User-Group named 'Style' so when the category 'Beds' is selected (above), 'User-Defined Inventory Group 1' becomes 'Style'.
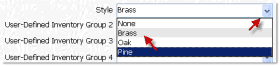
Clicking the blue down arrow to the right of 'Style' presents a list of different types of materials (Brass, Oak, Pine), one of which (Brass) may be selected to further describe the item. In this example, the category 'Beds' has only been associated with one User Group (Style) so there are no other User-Defined Groups available for the category 'Beds'.
Details Field - This description will appear on Detailed Price Labels and Detailed Inventory Reports. Enter up to 100 characters.
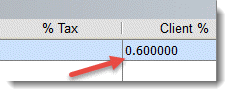
Change the Client % (in decimal form) if necessary. (This is the share of the sale the Client is to receive. The default of 40% is set in Program Setup and may be changed.)
Enter a Selling Price.
Location
In the program 'location' can be computers on a network or inventory-item locations in the store (like bin #, shelf #, etc).
Manage Inventory Locations
Locations can be used to know where inventory items are located (in the store, at another location, etc.)
- Go to File - Program Setup - Networks.
- Click on Manage Locations.
- In the table in the first cell, enter a name for a location (bin-1, shelf-42, store-2-bin-3, etc.)
- Enter names for other locations.
- Save/Exit.
- Close/reopen the program to reset Windows.
- When entering inventory, use the drop-down menu for Location to make a selection.
- Edit an existing record to add or change a location.
The date set on the computer will be the In Date auto entered. It can be changed. If several items are being entered from a date different from the date set on the computer, change the date on the computer then add items for the date set (to avoid having to change the date each time).
Click on New Picture and navigate to the location (on the computer) of the picture. Click on the picture file to add the picture to the item record.
![]() Add a Picture from the Internet - When adding a new inventory item or when editing an existing inventory record, enter the URL of the image in the field named 'Picture URL' and click OK.
Add a Picture from the Internet - When adding a new inventory item or when editing an existing inventory record, enter the URL of the image in the field named 'Picture URL' and click OK.
![]()
The path to the image will be added to the BCSS database. The actual image will reside on the server.
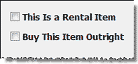
Check either of these options if applicable. Buy Outright is an item that is purchased and resold. Rentals are items that are rented out for a fee.
Press Cancel
![]()
to clear the entries and close the screen or
Press OK
to save the Record.
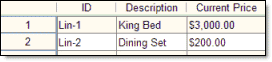
To view the newly-added item, go to the Inventory Work Area and use the Scroll Button (not shown) to scroll down to the last Entry in the Inventory List:
![]()
or select the Client from the List of Clients and use the Items Tab in the Details Area to view that Client's Items:
Please note: The Inventory ID can only be edited on the Batch-Edit Screen. This makes it easy to see other IDs and avoid duplicating IDs.
Add Inventory at POS
- Press F6 to open the new-sale screen.
- Select this option:
The program will assign an Item ID when the owner is selected. (step 5 below)
- Click in the 'Description' box and enter 20 characters or less.
- Make entries for Price and Quantity.
- In the Client ID box use the down arrow and select the client. (A client record must exist for the person to appear in the list. If missing, close the sales screen, create a record for the person and return to the sales screen.)
- Follow the procedures for completing a sale.
Add Inventory Remotely
- Inventory can be entered into spreadsheets then imported into the program. Special spreadsheets are available from tech support. Completed sheets can be emailed to the shop for import into the program. (See data import.)
- With the Virtual edition of BCSS inventory can be added online at resell4.me and downloaded at the shop. Virtual also allows consignors and vendors to view their account information online. (fee based)
- Any free remote-pc program (Team Viewer, GoToMyPC, etc.) can be used to access the shop computer from any other computer. (See how.)
Batch Inventory Entry - Enter multiple Inventory Items for one Client.
Once the batch-enter screen has been opened, please do not minimize it or switch to another screen (to process a sale, for example). Instead, finish making entries (and printing price labels if desired), and close the batch-enter screen.
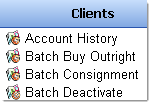
Select Clients:
Select a client from the Table.
Select 'Batch Buy Outright' or 'Batch Consignment' from the Clients Menu:
The next available item numbers for the selected Client are listed.
To add an item, click on the blank Description cell for the first item number in the first row.
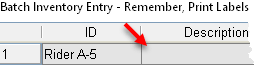
Add the Description for the New Item (up to 20 characters) then press Enter.
Accept the default category or press the first letter of the desired category then use the mouse or down arr ow to select the category and press Enter. Sorry for the limitation but using the tab key will record the category as 'none'. It's a module that we cannot control.
If the Details field is present, enter up to 100 characters about the item.
For buy outright enter the Selling Price or leave blank. For consignment enter the selling price. (must be entered for price to appear on labels)
Change quantity if necessary.
Location usually refers to a location in the store. Ignore if not used.
Do NOT change the barcode number (to avoid duplicates).
Change the Date In if applicable.
Check if the item is a rental.
If applicable enter the path to an image for the item like C:\Images\sofa211.jpg (for an image stored on the computer) or http://www.myserver.com/images/sofa211.jpg (for an image stored online). If a path has been entered in Program Setup (Inventory) in the field named 'Default Picture File Location', that path will be pre entered in the image field on the Batch Enter Screen.
Enter notes if needed.
Change the Client % if appropriate.
User-Defined Groups
The are 4 columns for User-Defined Groups. If they are not being used they won't appear on the batch-enter screen. Click on 'None' to select from drop-down menus but note that selections may not be made if the category chosen has not been associated with Groups.
Repeat for each new item.
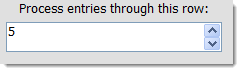
![]() A box has been added for entering the number of the last row to be printed. Type in the number of the row or chose a number from the drop-down menu. This should avoid printing labels beyond the last item entered.
A box has been added for entering the number of the last row to be printed. Type in the number of the row or chose a number from the drop-down menu. This should avoid printing labels beyond the last item entered.

Check 'Label Qty = Item Qty'. The number of labels printed will match the quantity for the item.
Click 'Print Agreement And Item List' to print the Consignment Agreement and a list of the items entered.
When all is finished click on the type of label to be printed.
If labels are NOT to be printed at this time, click OK to save items to inventory. Print labels later using the settings on the Labels Screen (found by clicking Labels).
Printing Labels
Important! If sheet labels are to be printed for newly-added items, print them BEFORE selecting OK. A pop-up message will appear asking if this is to be done. This does not apply to Zebra Thermal Labels. For Thermal Labels, batch enter items then follow the procedures for printing price labels.
If the Batch-Enter Screen has been closed before labels are printed, or if labels need to be printed again for items added (for any date or date range):
- Click on Labels on the Main Menu.
- Double click Inventory.
- Check 'Date In' and enter today's date in the From and To fields (or enter any date or date range to print labels based upon the date(s) they were entered).
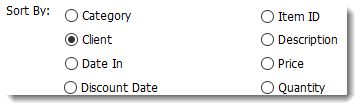
- Select Sort By and Label Style.
- Press Print Price Labels and follow instructions for printing price labels.
Batch Inventory Edit
Use Batch Edit to change values for more than one Inventory Item.
Select Inventory:
Select Batch Edit from the Inventory Menu:
On the subsequent screen, click on any cell and enter new information. (Some cells provide drop-down menus for quick selection.)
When finished, click OK to save changes.
Add Inventory Away from the Store
Use Spreadsheets
Data for buyers, consignors and inventory can be added to spreadsheets which can be taken to the store (on a flash drive) or compressed (zipped) and emailed as attachments to an email address that can be accessed at the store. This is a convenient and free way of utilizing Microsoft Excel or OpenOffice.org's spreadsheets (but don't uses MSWorks). See Data Import for instructions.
Use BCSS Virtual
The Virtual edition of BCSS allows anyone to access resell4.me and add inventory on that website. The store owner or employee can download the data into the batch-enter screen, edit if needed then print price labels (with or without barcodes). This method may be preferable to consignors pricing items and printing price labels as it seems that consignors routinely over-price, requiring price labels to be reprinted or edited.
Batch Inventory Delete
1. Batch delete will not delete a consignment item unless it has been sold, has a quantity of zero and has been settled.
2. For buy-outright items with zero quantity, batch delete will delete those records without checking for a settlement.
3. Make a backup of your data before using this function.
To delete all inventory prior to a given Last-Sold Date or by Client or by Inventory Category, select Batch Delete from the Inventory Menu to view this screen:
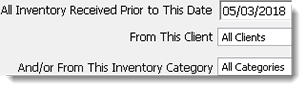
Items may be deleted for individual consignors, individual categories, or all items with quantity = 0 if 'All Clients' or 'All Inventory' are selected.
Set a date. No item will be deleted if its 'In Date' is after the date set for this function.
Select the Delete Category from 'And/or From This Inventory Category' or accept 'All Categories'.
Press OK. All items in the deleted category with In Dates prior to the date set on the Batch Delete screen will be deleted.
Inventory Categories - Organizing Merchandise
Categories group inventory items. For example, categories in a women's store might be Accessories, Apparel, Bloomers, Bridal, Clubwear, Corsets, Dresses, Exotic, Fitness, Furs, Halters, Handbags, Hosiery, Jackets, Jeans, Lingerie, Maternity, Outerwear, Petite, Plus.
Well-organized inventory avoids confusion, mistakes and frustration. Items are easier to locate in the store and useful reports can be generated about inventory on hand, sold, returned, donated, transferred to shop ownership etc.
Assigning a category to an item helps to describe and identify it.
BCSS Category Features
- A default category set in Program Setup (Inventory tab) will appear for every new item entered and avoid some repetitious data entry. (The category can be changed before entering items.)
- Inventory can be entered in spreadsheets which can be sent to the store for import. The Excel-Fill feature can be used to autofill fields for category.
- A unique discount schedule can be applied to any category.
- Set a specific sales tax for a category or make the category tax-free.
- Set a sales-tax rate for items in a category priced above a given amount.
- Every category can have designated client % (the amount paid to the client).
- Specific categories can be included in promotional sales.
- Items can be isolated for price-label printing or reprinting.
- User-Defined Groups can be used to micro define any inventory item.
Create Categories in BCSS
Select Categories from the Inventory Menu:
To add one category, enter the name of the category in the box at the bottom:

and press 'Create New Category'.
![]()
Repeat for other categories and click 'Save Changes':
![]()
To add multiple categories at once, type or copy/paste a list of categories separated by commas - no space after the commas - example: beds,chairs,sofas - (Enter up to 500 characters). Press Create New Category to enter all categories at once.
and press 'Create New Category'.
![]()
The Default Discount Schedule (set in Program Setup, Inventory) will apply to each category entered. If other discount schedules were defined in Program Setup, select the appropriate schedule for each category.
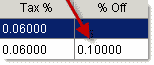
By default each category will be taxed at the rate(s) set in Program Setup > Sales. Enter a different tax rate for any category and be sure to make the entry in decimal form, like .1 for 10%.
Check 'Tax Free' if items items in the category are non-taxable.
A dollar amount may be entered in the 'Tax At or Above' column. Any item sold below that amount would not be subject to sales tax. The Tax-Free box must remain unchecked.
A client % (different from the default % set in Program Setup) can be set for any category here (in decimal form):
Edit a Category Name
Before changing a category name, run an inventory report using 'category' as the report filter to see which items have been assigned to the category. Change the name of the category then change the category assignment for each item.
To change the name of a category, select the category by clicking on it. Its name will appear in the Name Box.
Make desired changes to the name and select Save Edited Category.
![]()
When finished editing or adding Categories, select Saves Changes and Exit.
Deleted Categories
BCSS will continue to track items which were assigned to a category if the category name is deleted.
Using Categories on the New-Item Screen
On the New-Item Screen (F3), the default category set in setup will appear for the category.
Select a category from the drop-down menu if different from the default:
If User-Defined Groups have been assigned to the chosen category, the group names will appear...

...and a member from each group can be selected to describe the item in more detail:
Click 'Save and Exit' to save the record or 'Save, Print a Thermal Label' to save the record and print a thermal (not sheet) label.
Using Categories on the Batch-Enter Screens
![]() Columns not needed on batch-enter screens can be removed. Please contact support for this option ($39).
Columns not needed on batch-enter screens can be removed. Please contact support for this option ($39).
![]()
- In Clients select the owner of the items to be entered.
- From the lower-left menu choose Batch Consignment or Batch Buy Outright.
- Enter a description (20 characters max) and press Enter.
- The default category set in setup (Program Setup > Inventory) will appear for the category. Press Enter to accept the category and move to the next field.
- To select a category other than the default category, press the first letter of the desired category and use the mouse or down arrow to select the category:
- Press Enter to save the category and move to the next field.
- If User-Defined Groups have been assigned to the chosen category, the group names will appear further to the right on the screen:

It may be necessary to widen the screen and/or to scroll to the right. If no group names appear, Groups have not been assigned to the category chosen.)
- Click in the box under the Group Name (red arrow above) and choose a member of the group.
When done entering items:
- Click Save to save the record and close the input screen, or
- Click Cancel to close the screen and not save entries, or
- Click on any of the label options under 'Use thee buttons for sheet labels only' IF USING AN INK PRINTER AND SHEET LABELS. DO NOT CLICK ON THESE OPTIONS FOR THERMAL LABELS.
- To print thermal labels, click on 'Thermal'.
- Close the message window and click on Thermal again.
- Alternatively, click 'Print Agreement and Item List'.
- If a number of labels are to be printed matching the quantity of an item, check ''Label Qty = Item Qty'.
- If a row after the last item row had been clicked, enter the row # of the last item here to avoid printing blank labels:
Use Categories for Label Printing
Categories can be used as a 'filter' when selecting items for label printing.
- Click on Labels.
- Make sure you're on the Inventory page.
Various settings can be made on this page to isolate or define for which items labels should be printed. One of the 'filters' (to 'filter out' unwanted items) is Categories.
- Select the category of the item.
- If all of the items belong to the same person, select the person using the drop-down to the right of 'Client'.
- If you know that all of the items were entered into inventory during the same time period, check 'Date In' and set the From and To dates.
- The labels can be sorted by any of these parameters:
- All of the options under Style are for SHEET LABELS except 'Thermal Labels'.

- 'Thermal Labels' must be selected if printing thermal labels.
- Press 'Print Price Labels' to proceed.
- Press 'Select Labels to Print' to select specific items for labels.
Use Categories for Reports
- Click on Reports.
- Select Inventory.
- Use the drop-down menu to the right of 'Category' to choose the category.
- Make any other settings on the page to filter out unwanted information.
For example, check 'Price Range' and set the From and To values to only include in the report those items with prices falling within the range set.

- Choose a sort option and select one of the options represented by the buttons at the lower right.
'View the Report' will display the results of the report in the main table in the program.
Categories in Promotional Sales
Specific categories can be included in a promotional sale:
- Click on Sales:
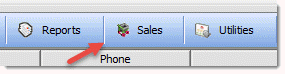
- Select Sales Promotions.
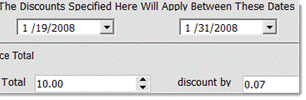
- Enter the date range of the sale.
- Enter appropriate discounts under 'Discount by Invoice Total' if appropriate.
- Under 'Discount by Item Category' use drop-down menus to select categories and set the amount price of items in the selected category are to be discounted by.
- Click OK to save changes or Cancel to close the screen and not save changes.
Note that sales-promotion discounts are absorbed by the store. There are 5 ways to discount in BCSS.
User-Defined Groups
When a new item is entered in Inventory, it can be described and classified (categorized) using one or more of these:
- Category - a grouping of similar items - Categories can be very broad (Furniture, Clothing, Cars) or they can be more specific (Beds, Chairs, Sofas).
- Description - What is the item? (Jacket, Pants, Sofa). The Description appears on the Price Tag so it is limited to 20 characters.
- Details (describing the item) - 'Details' appear on Detailed Price Labels and Inventory Reports (up to 100 characters)
- User-Defined Groups - The User of the software 'defines' the Groups by giving the Groups names and assigning Members (classifiers) to the Groups. Group: Color; Members: Blue, Green, Red, then using Groups and Members to describe items in detail.
Using UDGs in BCSS
In BCSS, an Inventory Category can have 26 sub-categories (called 'User-Defined Groups') for more specific categorization of items. For example, the Category of Clothing could have Groups like Color, Size, Type, Style, Maker, Designer, Season, Condition, Vintage, etc.
Each Group could have a number of 'Members'. The Group 'Color' could have Members like Black, Blue, Green, Red, Yellow, etc.
When an Inventory Record is added or edited, and a Category is selected, BCSS presents the Groups (if the Category was 'associated' with Groups, see below) and presents Members of each Group in drop-down menus for selection.
In the example above, the selected Category is 'Clothing'.
The Clothing Category has been associated with the User-Defined Groups (Color, Style, Fabric and Designer).
A Member may then be selected from each Group using the drop-down menus.
User-Defined Groups and their Members provide more detailed and accurate classification. Inventory reports can be generated to only include one category and filters for that category's groups.
Groups and Members also add uniformity to item description throughout the store by giving multiple software users suggestions for descriptors.
Because of the limited space on inventory-entry screens, only the first 4 UDGs will appear on entry screens. Suggestion: Make the first 4 UDGs the most commonly-used for your business.
Setting Up User-Defined Groups
Select Inventory (at the top) then User-Defined Groups:
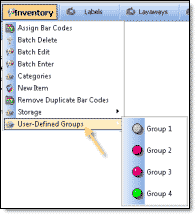
...then select Group 1 or any existing group.
In the field to the right of 'Enter one Group Name (like Color) here:', enter a name for Group 1. For example, type the word Color.
![]()
In the field below that, type in names of Members (separated by commas, no spaces - like: red,blue,green - or copy/paste a list). It is very important not to enter spaces or periods.
Note: For some Groups, you may wish to use abbreviations for Member Names to save time and space. For example, enter BF,PO,ZF for Button Front, Pullover, Zip Front.
Click on Create New Member(s)...
![]()
...then click on Save Changes Locally.
![]()
'Save Locally' save changes and the screen remains open for more editing. 'Save Globally' saves changes made on all UDG Screens without closing the UDG Screen.
It is not necessary to complete all 4 Groups, but if more Groups are desired -
Click on the button for Group 2:
![]()
Enter a name for the Group and enter Member Names (separated by commas, no spaces) and click Save Changes Locally.
Repeat these steps for Groups 3 and 4 if desired and when finished, select Save Changes Globally and click Exit.
At the top select Inventory then User-Defined Groups then Group 1. Confirm that the entries are correct for Group 1. Repeat these steps for each Group.
Editing Group Names
To change a Group Name, select the Group:
![]()
Replace the existing name with the desired name and click the Save Edited Group Name Button:
![]()
The new name will be saved. The new name will appear on Add, Edit and Report Screens. The program must be restarted for the change to show under Inventory > User-Defined Groups.
Application - How to Use User-Defined Groups
Once Groups and Members are defined, one or more of the Groups can be associated with any Category. Then, when adding or editing an Inventory Record and selecting a Category, the Group(s) will be presented and Members may be selected (for Categories that have been associated with one or more Groups).
Associating Groups with Categories
BCSS needs to know which Groups to present for any Category selected, so Groups must by 'associated' with Categories.
Select Categories from the Inventory Menu:
Select a Category by clicking on it. (The row's background color will change to blue to signify that it has been selected.)
Check one or more Groups to 'associate' Groups with the Category. For example, checking Color associates the Group (Color) with the Category (Clothing).

One or more Groups may be associated with any Category. It is not necessary to assign any Groups or more than one Group.
If User-Defined Groups haven't been 'defined', the Groups will appear as above, 'User Defined Group 2', etc.
Click Save Changes.
To verify that the settings are correct, select a different Category (on this same screen) then select the Category that was associated with Groups again to confirm that the settings are correct and have been saved.
Click Exit when finished.
Test Settings
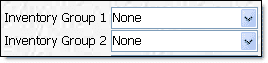
Press F3 to add a new inventory item and select a Consignor for the item. Note that the entry for Category is None. The User-Defined Fields are named 'Inventory Group 1', etc. because no Category has been selected. The names will remain the same if a Category is selected that has not been associated with Groups.
Select a Category that has been associated with Groups. In our example, Clothing is associated with Groups:
![]()
When the Category of Clothing is selected, the names of the User-Defined Fields change to the names of the Groups. For example, 'Inventory Group 1' changes to 'Color'.
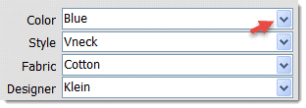
Click on the blue arrow to the right of Color to select a color:
![]()
If desired, make selections from Groups 2, 3 and/or 4 to further describe the item.
Click OK to save changes.
Practical Application
Items in inventory can be grouped or isolated using User-Defined Groups and their Members.
For example, using the Clothing example, a list can be made of all items in inventory that are blue in color.
- Click on Reports and select Inventory.
- Select the color Blue:

- Click 'View the Report' to view the list on screen or choose either of the print options (Print Detailed List, Print Brief List) to print preview and/or print the list. Only those items blue in color which have been associated with the color Blue will be in the list.
See Reports for details.
User-Defined Groups on Price Labels
![]() User-Defined Groups may be printed on these labels:
User-Defined Groups may be printed on these labels:
- Sheet Hang Tags
- Thermal adhesive labels 2" x 2", 4" x 2", 4" x 3" and 4" x 4"
To turn UDGs on for labels, click on File then Program Setup then Inventory and check this box...
![]()
...then click Save/Exit.
Close and reopen the program.
Delete One Inventory Item - Options:
- In the Clients Work Area select the client and select Items at the bottom of the screen. Select the item and use 'Delete Item' at the left.
- In the Inventory Work Area, select an item from the table. Right click on the item and choose Delete (or select the item and choose Delete Item in the lower-left menu).
Discount Aged Inventory
(This feature is available in BCSS Deluxe, Diamond and Virtual. BCSS Intro does not store information about unsold inventory.)![]() Discount items after they are transferred to Secondary Transfer Accounts. Items transferred to the Primary Transfer Account cannot be discounted automatically and must be discounted manually at POS.
Discount items after they are transferred to Secondary Transfer Accounts. Items transferred to the Primary Transfer Account cannot be discounted automatically and must be discounted manually at POS.
![]() Print Discount Dates and Prices on Price Tags.
Print Discount Dates and Prices on Price Tags.
![]() If more than one discount schedule is to be used, be sure to open each schedule and check 'Process discounts and transfers automatically' and Save/Exit. For versions after 6.0.1569 it will also be necessary to update the program. Send an email to update.
If more than one discount schedule is to be used, be sure to open each schedule and check 'Process discounts and transfers automatically' and Save/Exit. For versions after 6.0.1569 it will also be necessary to update the program. Send an email to update.
Things to Know about Discounting Aged Inventory:
- Any category that is to be discounted must have a correctly-formatted Discount Schedule assigned to it.
- If discounts are not acting as expected check to see if entries have been made in Special Promotions and remove them. (Click on Sales then Sales Promotions.)
- If a Discount Schedule is changed, discounts for items to which it applies will be recomputed, making existing price labels incorrect.
- Opening the New-Sale Screen for the first time each day applies discounts. Because this can take some time (on computers with lesser resources and/or with larger databases), open the New-Sale Screen on the main computer at the start of each day. Don't attempt to make sales on POS stations until the discounting process has finished.
- On networks, turn Automatic Discounts off on network POS stations. Do this on each POS station computer:
- In BCSS click on File then Program Setup.
- Click on the tab for Inventory.
- Remove the check from this box:

- Click Save/Exit.
- Restart BCSS.
Discount Aged Inventory
Automatic discounting of aged inventory does not apply to the Primary Transfer Account. Discount items in the Primary Transfer Account manually at POS.
Automatic discounting of aged inventory can apply to Secondary Transfer Accounts. Check this option is Program Setup > Inventory Tab:
![]()
Click on Discounted Items (in the Inventory Work Area) to view a list of discounted items (arranged by 'time since the In Date with discount time ranges in sequence').
The Discount Schedule
A typical Discount Schedule reduces sale price in increments of # of days from the 'In Date' and percentage of Original Selling Price.
Five Rules
- Time is measured in the # of days an item has been in inventory from 'Date In', not the # of days elapsed since the last discount date.
- Percent Discount is based upon the Original Selling Price.
- 'Transfer to Transfer Account' must be selected in the consignor's record for items to transfer and 'Process discounts and transfers automatically' must be checking in Program Setup > Inventory Tab:

- The discount periods (# of days) are entered in the first column (next to 'After'). All 4 discount-period fields must be completed. The values cannot be zero and there must be a 'progression'.
- The 'Transfer to shop ownership' field must be completed and cannot be zero. If no transfers are to take place, enter some large number that will never be reached (like 5000). In the next example, is this field were zero, every item would transfer to the Transfer Account on day 1.
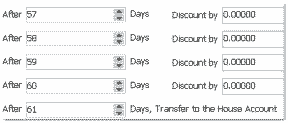
For example, if there is to be no discount for 60 days but items are to transfer to the Transfer Account on day 61, then the 'Discount by' fields can be zero but the 'After' fields (# of days) would be 57, 58, 59, 60 and 61.
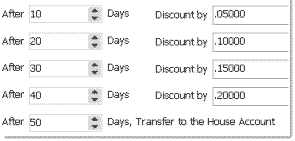
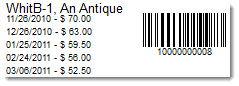
Below is an example of a correct Discount Schedule for an item entered into inventory on January 1st for $100 that is to be discounted by 5% every 10 days then transferred to the Transfer Account after 50 days. (The number of days and discount amounts, of course, can be different than those shown.)
- After 10 days, on January 11th, discount original price of $100 by 5% to $95
- After 20 days, on January 21st, discount original price of $100 by 10% to $90
- After 30 days, on January 31st, discount original price of $100 by 15% to $85
- After 40 days, on February 9th, discount original price of $100 by 20% to $80
- After 50 days, the item will auto transfer to the Transfer Account (if 'Process discounts and transfer automatically' is check in Program Setup, Inventory). The 'Date In' shown in the Transfer Account Record for transferred items will be the original 'Date In'.
In the following example, items are to be discount after 30 days (from the Date In, by 10% - of the original price) then again after 60 days (from the Date In, by 15% - of the original price) then no additional discount after 60 days, with unsold items transferring to the Transfer Account after 90 days. The schedule on the left is correct. Note that the schedule on the right is incorrect in that setting the discount to zero on the 61st day removes the discount entirely (because the discount is applied to the Original Price.)
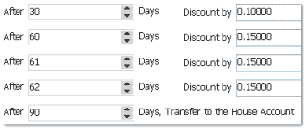
Note: If a discount % is the same as the previous discount % (15% in the example above) only the first of such duplicates will be printed on price labels. In the above example, for an item entered on 4/1 for $100, the label entries would be:
$100
05/01/16 $90
05/31/16 $85
Multiple Discount Schedules
Any number of Discount Schedules can be created. Each Discount Schedule can be associated with any one category for discounting items in the specified category according to the assigned Discount Schedule.
Create Multiple Schedules
- In Program Setup on the Inventory tab, click on Edit Schedule Names:
- Enter a name for the Schedule:
- Click on Create New Schedule:

The new schedule name will appear in the list but it is not recorded yet.
- Click on Save Changes:

- If no other schedules are to be created, click on Exit.
- Back on the Inventory tab, click on the drop-down arrow for Discount Schedule Name:
- Select the Schedule to be edited.
- Check the box 'Process discounts and transfers automatically':

If this box is not checked, items will not be discounted.
- Complete the Schedule as desired, being sure to follow the rules for proper completion.
- When finished, click on Save Schedule to record the Schedule in the database:

- To confirm the entry, choose a different Schedule from the drop-down box for 'Discount Schedule Name' then choose the Schedule just completed. The entries made should appear.
- Click Save/Exit to exit Program Setup.
Discounts Window
Because discounts are based upon the # of days since the 'Date In', discounts only need to be processed once per day. Discounts may be applied manually or automatically (when the New-Sale Screen is opened for the first time each day). Either way, BCSS will reduce the selling price by the designated amount for each item at the designated time. When the item is sold, the new discounted price is applied.
Process Discounts Automatically
To process Discounts automatically, check 'Process discounts automatically' in Program Setup, Inventory. Discounts will be processed each day when the BCSS New-Sale Screen is opened for the first time.
Each item's record can be edited to change the Discount.
Process Discounts Selectively
To prevent automatic discounting of select items, create a special category or categories for the select items and assign a discount schedule of 1 day 0%, 2 days 0%, 3 days 0%, 4 days 0%.
Process Discounts Manually
Discounting manually provides the opportunity to change the amount or date of the discount for each item.
To discount manually:
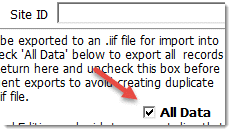
- In Program Setup > General Tab, check All Data:
- Click on Sales then Apply Discounts:

- Allow a few seconds for the Discounts Window to display items eligible for discounting.
- The list may be sorted by clicking on the column headers (like ID, Date In, Days, etc). If there are many items in the list, the sort will take a few seconds. Please only click once and wait. (Speed is determined by the 'clock speed' of the computer's processor and the size of the database.)
- The current discount rules (set in Program Setup, Inventory) appear on the Discount Screen. Any of these values may be changed and applied to items selected for discounting. (These values may be changed permanently by resetting them in Program Setup, Inventory.)
- Uncheck items not to be discounted. (Use 'Check All' and 'Check None' for convenience.) Unchecked items will reappear the next time discounts are processed.
- Click OK and allow sufficient time for processing.
Discount by Category
A Discount Schedule can be assigned to any category. Placing items in Categories and assigning discount schedules to the categories allows greater control and flexibility over which items to discount, when and by how much.
Associate Discount Schedules with Categories
Click on Inventory.
Select Categories from the Inventory Menu:
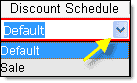
Use the drop-down menu under Discount Schedule and select the New Discount Schedule for the Category. (In this example, there are 2 Discount Schedules: 'Default' and 'Sale':)
Make other changes if desired then Click Save Changes and Exit.
In the future, when items are discounted, Discount Schedules assigned here will apply based upon the Category and its associated Discount Schedule.
View One Discounted Item
Go to the Inventory Work Area:
and select the item in the list. Click the Details tab at the bottom on the screen to view information about the item:

View All Discounted Items (sorted by Category)
In the Inventory Work Area, select Discounted Items from Quick Links:
Optional: Print Discount Schedules on Price Labels
BCSS includes an option to print the Discount Schedule on Price Tags, making reprinting of price tags unnecessary after Discount Dates have been reached. These are examples of sheet labels. ("Re" is the disposal code for 'return'. The date on the Detailed Label and the Hang Tag is the Date In.)
 Medium Label |
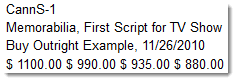 Detailed Label |
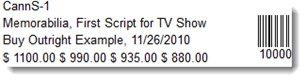 Hang Tag |
Discount Schedules on Thermal Labels can only be printed on labels 1.5" in height or greater. These labels can have discount prices but not dates: 4 x 1, 2 x 1, 3 x 1.25. These labels cannot accommodate a Discount Schedule: 2.25 x 1.25, 2.25 x 1.37.
For thermal labels it may be necessary to choose a smaller font size (in Program Setup, Printer tab) to fit dates and prices onto labels, especially for items priced $1,000 or more.
To turn this option on, click on File, Program Setup and select the Inventory Tab. Place a check in the box 'Show discount price schedule on pricing labels.' (upper left).
Some store owners prefer not to have upcoming Discount Dates known to potential buyers (so buyers won't delay purchasing until a known Discount Date). Other store owners use Discount Dates as a reason to encourage purchase: "Buy now or this item will be gone before the Discount rolls around."
Still other store owners use colored price tags for different Discount Periods so that everyone can readily see how much an item has been discounted (pink: discounted once, blue: discounted twice, etc.), or different colors are used for different months.
If the Discounted Price is to be shown on the Price Tag, either the Discount Schedule must be printed initially or price tags must be reprinted after Discounting.
Note: A discount period which is the same as the previous period will be skipped on the label. For example, if the Schedule is...
- 10 days -10%
- 20 days -20%
- 30 days -20%
- 40 days -20%
...only the first two periods will appear on price labels.
Why make discounts the same for different periods? All 9 fields on the Discount Schedule must be completed. If there is only 1, 2 or 3 discounts, the remaining fields on the schedule must have entries. Making the entries the same completes the requirement without causing undesired additional discounting.
Transfer to Transfer Account
In order to transfer unsold items to the Transfer Account automatically, complete a correct discount schedule (Program Setup, Inventory tab) and enter the number of days to elapse for items to transfer:
Make sure this box is checked (Process discounts and transfers automatically.):

Transfer to Transfer Account without Discounting
Make sure the box (just above) is checked and complete the schedule like this (changing the date values as needed):
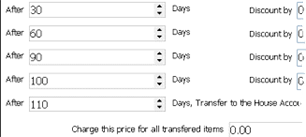
(after 30 days: 0; after 60 days:0; after 90 days: 0; after 100 days:0; after 110 days: transfer)
There is an option to set the same price for each transferred item.
Reprint Labels
Identifying only those items which have been discounted is easy. Select Reports then Inventory to open the Inventory Report Designer screen.
Check 'Dated Discounted' under 'Make Report Settings' and enter dates in the From and To fields.
Click the type of label to be printed under 'Print the Report'.
See Price Labels for more detailed printing instructions.
Discount by Category
Each Inventory Category can have it's own Discount Schedule. Placing items in their own Categories allows greater control and flexibility in determining which items to discount, when and by how much.
First, Create a Discount Schedule.
Go to File, Program Setup, Inventory. A Default Aged-Discount Schedule is displayed. To create another Discount Schedule, select Edit Schedule Names.
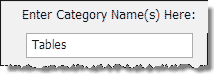
Enter the name of the New Schedule in the box below 'Enter Schedule Name(s) Here' (lower right) and press Create New Schedule:

Other Names for Schedules may be entered now, or press Save Changes then Exit to save New-Schedule Names.
Use the drop-down menu under Discount Schedule Name to select a New Schedule. Doing so will reset all fields in the Discount Schedule fields to 0.
Enter values for the New Schedule. All fields must be completed. Select Save Schedule and click OK. The New Schedule is now complete and ready to be associated with one or more Inventory Categories.
Associate Discount Schedules with Categories
Click on Inventory.
Select Categories from the Inventory Menu:
Use the drop-down menu under Discount Schedule and select the New Discount Schedule for the Category. (In this example, there are 2 Discount Schedules: 'Default' and 'Sale':)
Make other changes if desired then Click Save Changes and Exit.
In the future, when items are discounted, Discount Schedules assigned here will apply based upon the Category and its associated Discount Schedule.
Price Discount at the Point of Sale
There are 5 types of discounts at the point of sale:
Discounts Absorbed by the Store
- Dollar - Total Invoice is reduced by a dollar amount.
- Promotional - All items offered under a Special Promotion are discounted (except in BCSS Intro).
Discounts NOT Absorbed by the Store
- Percentage (%) - Items are discounted individually by a %.
- Percentage (%) - Total Invoice is reduced by a %.
- Price - The price of an item is reduced.
Explanation
Invoices can include more than one item. Each line item can be discounted by %:

...that percentage is applied to each item on the invoice and the discount is shared with consignors.
If the invoice total is discounted by a $ amount...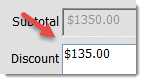
... or by a sales promotion...
...the discount cannot be applied proportionately to each invoice item and must be absorbed by the store.
If the item price is discounted...
...the discount will be shared with the consignor.
-----
Any of the 5 discounts can apply at the same time or in combination. If one discount is changed, the others are not affected. BCSS tracks the amount of each discount and computes the correct total.
Discounts by price, percent and dollar amount are entered on the New-Sale Screen.
Tip: To keep the consignors' shares the same and reduce the amount credited to the store, enter a dollar amount for a discount.
Note that for dollar and promotional discounts The Sales-Recap Report (store revenue) will present the discounted price while Items-Sold Reports (typically produced for consignors) will show the price before the discount - because the consignor's share is not discounted by dollar and promotional discounts.
![]() As of July 14, 2014 (v. 6.0.2272) the program computes the difference between Original Price and Sale Price for each item on the invoice and reports the total of those differences as Total Discount.
Accuracy depends upon having accurate Original Prices. Sometimes zero is enter for new items and a price is entered at checkout. And sometimes the sale price is higher than the original price. The program ignores situations where the sale price is higher than original price.
It is also possible for the user to edit the Original Price. The program can't know whether that is the case.
As of July 14, 2014 (v. 6.0.2272) the program computes the difference between Original Price and Sale Price for each item on the invoice and reports the total of those differences as Total Discount.
Accuracy depends upon having accurate Original Prices. Sometimes zero is enter for new items and a price is entered at checkout. And sometimes the sale price is higher than the original price. The program ignores situations where the sale price is higher than original price.
It is also possible for the user to edit the Original Price. The program can't know whether that is the case.
Discounting the Entire Invoice at the Point of Sale
Press F6 to open a new sales invoice.
Process a New Sale.
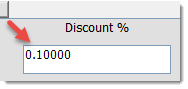
The discount may be entered as a dollar amount and/or as a percentage:
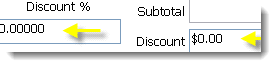
The percentage discount is not absorbed by the store. It applies to the consignor's share and the store's share.
The dollar discount IS absorbed by the store. It does not apply to the consignor's share; therefore, the full sales price will appear on the consignor's settlement.
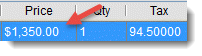
Line-Item Discounts
Reduce the cost of a single item by entering the amount of the discount (in decimal form) in the '% Off' field:
This discount is not absorbed by the store. It applies to the consignor's share and the store's share.
Promotional Discounts
Promotional Discounts are auto-entered by BCSS (during a Special Promotion only).
A Promotional Discount will only appear in the Discount field during a Special Promotion. It may be edited to increase or decrease it.
This discount is absorbed by the store. It is not deducted from the consignor's share.
Accounting for Discounts in BCSS
Discounts by %, Age or Price are shared by the consignor and the store. (If a $100 item is discounted by 10%, for example, and the split is 50-50, the consignor receives $45 and the store receives $45.)
Dollar ($) and Promotional (%) Discounts are absorbed by the store (not deducted from the consignor's share). (If a $100 item is discounted by $10, for example, and the split is 50-50, the consignor receives $50 and the store receives $40.) (On invoices with multiple items from multiple consignors, it is not possible to proportion a dollar or promotional discount to each item.)
A % Discount reduces the settlement amount. Dollar and Promotional Discounts do not reduce the settlement amount.
Promotional discounts can be by invoice or category or both. If both are specified, both apply. If only one is specified, that one applies.
|
Discount Type
|
Absorbed
|
Reduce Settlement
|
Reduce Invoice
|
|
%
Aged
Price
Dollar
Promotional
|
No
No
No
Yes
Yes
|
Yes
Yes
Yes
No
No
|
Yes
Yes
Yes
Yes
Yes
|
Finalizing the Invoice
After the last item is entered, remove any items by selecting the item and selecting the Remove-Item button.
If applicable, check Non-Taxable and select COD, Net 30 or Prepaid from the Terms field.
Select Payment Method under Enter Payment Below and enter Amount Paid. Change due to the Buyer, if any, will appear at the bottom if the field named 'Due'.
If applicable, check 'Send Mailings' and/or select an Employee in the 'Sold by' field.
Select 'Preview, Print, Save' to print preview and print a copy of the invoice.
Select 'Save' to save the sale.
Once the Invoice is saved, it may be located in the Sales Work Area List.
Employee Commission Adjustments
Edit One Inventory Record
Go to the Inventory Work Area Menu:
Click on the Item to be edited. The line will turn dark blue to indicate that the item has been selected.

Select Edit Item from the Inventory Menu:
(Optionally, double click on an Inventory Record.)
Click on the Notes Tab at the top to add notes if desired.
Inventory Pictures
Go here for taking pictures of sellers.
One picture of each inventory item can be stored on the computer, an external driver or online and recalled for identification. This is often done for valuable items to help avoid tag switching. Clerks at POS can click on 'View Item Picture' for visual confirmation.
Record the path to where pictures are stored in Program Setup > Inventory. When a picture is taken in the program, BCSS will suggest the same location. If the computer is connected to the Internet, the location of the images can be an online destination. (Copy/paste the URL.)
Add an Existing Picture
To add an existing picture of the item on the Inventory or edit-item screens click:
Navigate to the location of the picture and select the file.
Click on Show Picture to view the image.
Make any changes and click OK to saves changes.
Take a New Picture Using BCSS
On the new-item or edit-item screen, press Take Pic/
- Select the camera (if none is showing).
- It should not be necessary to change Input or Format.
- If a path to picture location is set in Program Setup > Inventory, that path will be displayed next to 'Save Pic Here'. Otherwise, click on 'Save Pic Here' and navigate to the folder for picture storage, select it and click Open.
- For LEADS pictures, leave the suggested File Name unedited. Otherwise, enter a descriptive File Name like description-itemID-date. Example: Ring-24k-SJ-4-10-01-19
- Click on the Preview button and center the image.
- Press 'Take The Picture'. A picture of the item will be taken and stored in the designated location.
- For confirmation, click on Show Picture, or navigate to the designated location and view the picture.
On batch-enter screens the path to the picture must be keyed in.
Make any changes and click OK to saves changes.
Finding a Record
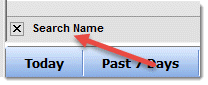
In November, 2013 (version 6.0.850) the search box was relocated under the center table:
Search Options
Click on File then User Interface to select search options.
In Buyers, Clients, Employees and Settlements, searches can be by either ID or Name but not both.
In Disbursement searches can be by 'Paid By' or 'Paid To'.
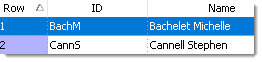
In Inventory searches can be by ID1, ID2 or Description. If ID1 is sorted, hold the shift key down and sort ID2. The sort of ID1 will remain and ID2 will be sorted in order.
Sales searches can be by Invoice # or Name.
On the same screen, check 'Search by first letter/number only' to exclude any records that might include the search anywhere in the record. If this option is NOT checked, entering a search like 'ike' will find Ike Eisenhower and Mike Martin. To search type the first number or letter of the ID, name, description or invoice #. If that doesn't find the correct listing or reduce the number of listings to a few, type the next number or letter of the name or ID.
Watch a video.Restore a Deleted Item to Inventory
Select Clients in the Work-Areas Menu
Choose the owner of the Inventory Item from the List of Clients. (The background color of the row selected will turn dark blue.)
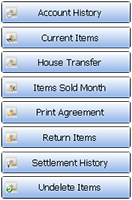
Select Undelete Items in Quick Links:
Under 'Undelete?' check the item or items to be restored to the Inventory Record.

If it's helpful, use the Check All and Check None options:


Click Record, Exit. Selected items will be returned to the Inventory Record.
Verify Restoration
Select the client from the Main Table and click on Items at the bottom:
Verify that the item has been reinstated.

![]() Undelete by Barcode
Undelete by Barcode
Undelete an item or multiple items by scanning barcodes.
- In the Inventory Work Area Menu, select Actions by Barcode.
- Check 'Undelete by Barcode' and click Continue.
- Check each item to be undeleted (restored to inventory).
- Press the Record, Print, Exit button.
- View individual items in the Inventory Work Area to confirm that they have been restored to inventory.
(Unsold Inventory Disposal is available in BCSS Deluxe, Diamond and Virtual.)
![]() In all editions of BCSS except intro, in the Inventory Work Area, select Actions By Barcode to scan the tags of expired items to process them more quickly.
In all editions of BCSS except intro, in the Inventory Work Area, select Actions By Barcode to scan the tags of expired items to process them more quickly.
Dispose of Unsold Inventory
Unsold inventory can be destroyed, donated to charity, returned to the consignor or given to the shop (transferred to the Transfer Account).
Important! The Disposition Option must be set in each Client Record:
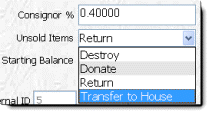
The default setting is 'Return' (because that is the most common option).
If an item doesn't appear in a list as expected, check the disposition code in the item record.
All labels (except butterfly) can be printed with Disposal Codes for Destroy, Donate or Return. Store Employees will know the codes but buyers may not. The codes may be changed periodically to maintain secrecy. Set the codes in Program Setup (Inventory).

Some stores print the current month's hang tags with a border color for the month, then a different color for each subsequent month. (Of course if items are returned after 90 days, only three colors are needed.) That is one way to know which items are to be returned.
Another way to know which items have been in stock beyond the holding period is to run an Inventory report. Click on Reports on the top menu then Inventory. Select the Disposition...
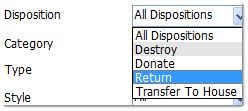

In this example, the date 'in the distant past is 11/25/1983 (to be sure to include all items in inventory) to 8/26/2014. If today were 11/25/2014, all items will be included in the report that have been in stock for 90 days or more.
Click on Print Brief List:
Assigning Disposal Codes
Locate Disposal Code Settings in Program Setup, Inventory.
Check the 'Show disposal code...' box and enter any characters in the boxes for Destroy, Donate and Return. These codes will be printed on price tags.
If no code is printed on a label then BCSS was not configured for unsold items, or Items are to be auto-transferred to the Transfer Account.
In order for any item to appear in lists for Destroy, Donate, Return or Transfer to Shop Ownership, the Client Record must be set as such.
Destroy (Discard, Delete) an Unsold Item
- Locate the owner of the item in the Client Work Area.
- At the bottom of the screen in the Details Area, Item Tab, select the item.
- Click Delete. The item is deleted from inventory.
-
Alternate Method:
- Select the item in the Inventory Work Area.
- Click Delete in the Inventory Work-Area Menu (lower left).
Donate an Unsold Item (to Charity)
'Donate' must be the selected option in the Client Record for Unsold Items to appear in this list.
- Locate the owner of the item in the Client Work Area.
- Right click and select Donate Items.
- Check the item(s) to be donated.
- Click Record, Print, Exit and view the print preview.
- Print the report if desired. (This is a one-time-only report which can not be recreated. Choose to print the report now if it may be needed for reference later.)
- Select the item in the Inventory Work Area table and confirm the deletion note under Notes in the Details Area.
Return an Unsold Item to the Consignor
If the store wants a receipt...
Make sure the consignors disposal code is set to RETURN (Edit Consignor - top right)
- Click once on the consignors name and then, either right click on the consignors name and way at the bottom of the options click RETURN ITEMS TO CONSIGNOR.
- In the window that comes up, a list of all the consignors items will be listed.
- Check (click) the box to the left of the items to be returned and then click RECORD, PRINT, EXIT.
- A printable document will come up that has a list of items that were selected for return.
- Print the doc, have the consignor sign it and file it.
- Exit out of the document after it prints. The program will go to each item selected, change the quantity on hand to 0 and add a note that the item was returned to the consignor and add the date of the transaction.
If the store DOES NOT wants a receipt...
To return all items to all consignors using barcodes:
Note: The disposal code for every consignor must be set to RETURN.
- From the Inventory Work Area - select Actions By Barcode. (Maximize the page.)
- Choose Return By Barcode then Continue and wait for the computer to process the request. The program will have to check every inventory record. The amount of time it takes will depend upon the number of items in inventory and the computer's resources. The program will return to the main page when finished processing.
- Click Check All.
- Click in the box at the very bottom of the page labeled Barcode.
- Start scanning tags from the items to be returned. Up to 100 items can be scanned. Use the scroll bar to the right of the page to scroll down to the last item. Blank rows are okay.
- Once all items to be returned have been checked, click Record, Print, Exit.
- A printable document will come up that has a list of items that were selected for return.
- Print if a printed copy is needed.
- Exit out of the document after it prints.
The program will go to each item selected, change the quantity on hand to 0 and add a note in each item record that the item was returned to the consignor and the date of the transaction.
Transferring an Unsold Item to Shop Ownership (the Transfer Account)
When an item transfers to the Transfer Account, a new Item ID is created under the Transfer Account (and new price tags need to be printed unless barcodes will be scanned at checkout). If there were no sales of the item before transfer, the old item record will not be retained and the item will no longer be available through the consignor's account.
If the item is transferred to the Transfer Account, the barcode number does not change. If the barcode is scanned at checkout, the program will know that the item is a house item.
If the item is transferred to the Transfer Account AND the store does NOT use a scanner, a new label will have to be printed. When the Item ID is entered into a sale, the program will not know that the item has been transferred and will say 'item not found'.
If the barcode number is manually entered on the New-Sale Invoice, the correct (new) item number will be pulled.
Additionally, items that are transferred to the Transfer Account will no longer be displayed in the Account History for the original consignor, however, each house item has a note which identifies the original consignor, date of the transfer and original item ID. This note is displayed under the SETTLEMENT-ID Field in Account History for the Transfer Account.
How to Transfer Item(s) to Shop Ownership Manually
- 'Transfer to House' must be the selected option in the Client Record for Unsold Items to appear in the list of inventory. Edit the client record and set 'Unsold Items' to 'Transfer to House':
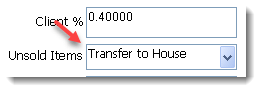
- Save and Exit.
- Important: Close the program and reopen it.
- Locate the owner of the item(s) in the Client Work Area.
- Select House Transfer from the Quick Links Menu:
- Check the item(s) to be transferred.
- Click Record, Print, Exit and view the print preview.
- Print the report if desired.
- Select Transfer Account in the list of clients.
- Select Items in the Details Area and click on the item transferred.

- Select Edit Item in the Clients Menu.
- Click on Notes to view information about the transfer.
![]()
Automate Transfers to the Transfer Account
- In the Clients Work Area, set up a new Consignor Account for the shop, just as for any Consignor and check 'This Is a Transfer Account'.
- In Program Setup, Clients tab, check ' Enable the Transfer Account'.
- In Program Setup, Inventory tab, complete a Discount Schedule.
- Enter the number of days (in the last box) an item is to be for sale before becoming 'unsold'.
- On that screen, check 'Process discounts automatically'.
- Set the disposal option to 'Transfer to Transfer Account' in each Consignor's record where applicable.
Batch Transfer
- Go to Program Setup > Clients and enable the Transfer Account. Save/Exit.
- Edit the client record and set Unsold Items to 'Transfer to House'.
- With the client record selected, click on the 'House Transfer button' on the right on the main screen.
- Use the House Transfer button in the Clients WA on the right.
- Use the options at the bottom of that screen to choose actions.
Reverse Transfers
In the Consignor Work Area in the lower-left menu, click on Reverse House Transfer.
Check the items to take out of the Transfer Account and return them to the clients' accounts.
Click 'Record, Exit' to finalize.
Confirming Auto-Transfers to Transfer Account
When auto transfer is activated, BCSS automatically removes an unsold item from Inventory (after the period of time designated In Program Setup, Inventory, Aged-Discount Schedule) and adds it to the shop's List of Inventory (in the Transfer Account) with a new Item ID (like 'Transfer-1').
If a partial quantity of the item has been sold, the item record remains in the list (to support existing sales records).
View the record of the transfer in the Details Area in the Inventory Work Area - select the item from the list of inventory items and click on Notes at the bottom:
various information (Details, General, Notes).
Default Action
If no settings are made in BCSS regarding unsold inventory, BCSS will do nothing. Of course an unsold item can be handled without involving BCSS. At any time, an item may be destroyed, donated, returned or given to the shop and the BCSS record of the item can be adjusted accordingly, or just deleted.
View Item Disposition
Select an Inventory Item from the Inventory List.
Its Disposal Option is shown in the Details Area (General Tab, at the bottom).
View Consignor's Disposal Setting
Select a Consignor from the table and view the Disposal setting on the Details Tab at the bottom:
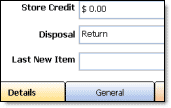
To change the disposition, double click on the record to open the edit screen. Change the disposition choice and click OK.
Inventory Reports
'Reports' are displays of information.
Selecting 'Inventory' in the Work-Area Menu...

...displays a list of searchable inventory items in sortable columns in the Main Table.
Clicking on any of the 'time-period buttons' (Today, Past 7 Days, etc.) displays items in the main table that have been added or edited in the selected time period.
Choosing an item record displays information about the item in the Details Area at the bottom of the page:
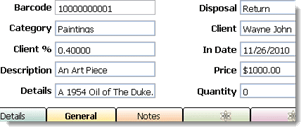
Clicking on the green Details button shows information about pricing, discounts, state, type, etc.
Clicking on Notes displays any information previously entered about the item.
On the right, 'Current Items' displays a list of items in inventory. 'New Today' (or F8) shows a list of items entered into inventory for the current day. 'Sold Items' (or F10) presents a list of items sold today.
In the Clients Work Area, select a client and click on Account History to view all information related to the account, including inventory. Also click on Items at the bottom of the page to see the client's Items Report.
Detailed Inventory Reports
- In the Inventory Work Area click on 'Reports' at the lower left, or click on Reports on the Main Menu:
- Select Inventory. (Resize the window by dragging its edges.)
- Settings on the page define the exact information to be included in the report.
- When setting ranges (dates, item #s, prices) be sure to check the applicable box(es).
- Select a sort option.
- Use the buttons at the bottom to produce the desired report.
Cost of Goods Report
- In the Inventory Work Area click on 'Reports' at the lower left, or click on Reports on the Main Menu:
- Select Inventory. (Resize the window by dragging its edges.)
- Choose the account from the drop-down list for Clients.
- Select a sort option.
- Click on 'Print On Hand List'.
Email an Inventory Report to a Client
On the Inventory Report Page...
- Select the Client.
- Check the box named 'Date In'.
- Set a date range to define which items are to be included in the report. If all items are to be included, leave the box unchecked.
- Alternatively check 'Items # Range' and enter values for 'From' and 'To'.
- Select 'Print Detailed List' or 'Print Brief List' to view the report in print preview.
- On the print-preview screen click the email icon:

Please note that the email function is a Windows function which requires configuration. If this doesn't work, print the report as a PDF and attach the PDF to an email to the client.